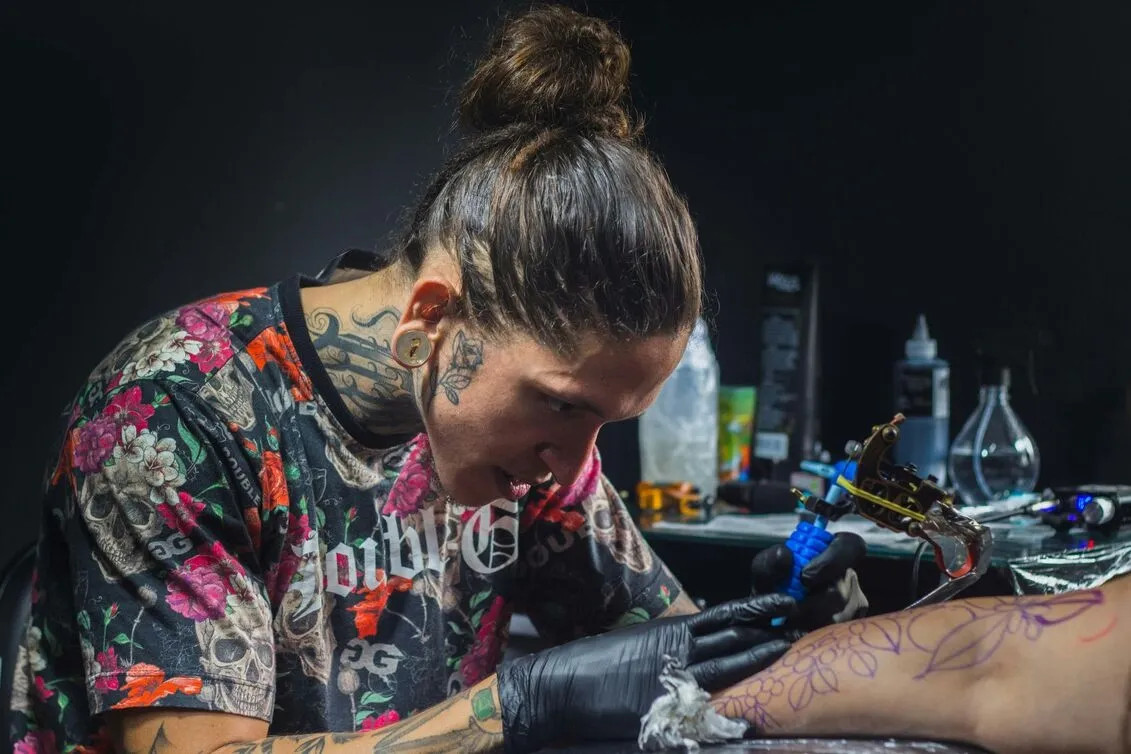
Setting up your tattoo machine is the first step towards creating stunning body art, and tattooat.com is here to guide you. This comprehensive guide will provide you with a step-by-step approach to setting up a tattoo machine and ensuring a safe and successful tattooing process. Let’s dive into the art of tattoo artistry with safety protocols, tattoo equipment, and the right tattoo tools.
1. What Equipment Do You Need To Set Up Your Tattoo Station?
Your tattoo station is your creative hub, and having the right equipment is paramount. Here’s a detailed tattoo setup checklist:
-
Sanitizing Agents: Essential for maintaining a germ-free environment.
- Disinfecting wipes
- Sprays
- Hospital-grade solutions like MadaCide
-
Tattoo Machine: The heart of your setup, whether coil or rotary.
-
Power Supply: Ensures your machine runs smoothly.
-
Tattoo Trays: To hold your supplies and keep them organized.
-
Tattoo Needles: Disposable needles of varying sizes for different effects.
-
Sharps Container: An OSHA-approved container for disposing of used needles safely.
-
Ink Caps: Small containers to hold tattoo ink during sessions.
-
Protective Supplies: Barrier film to cover machines and equipment.
-
Safety and Hygiene Tools: Disposable gloves and masks to protect you and your clients.
-
Razors: To remove hair from the tattoo area.
 Tattoo Equipment
2. How To Set Up A Tattoo Machine?
Setting up a tattoo machine for beginners can seem daunting, but with the right guidance, it becomes a straightforward process. Here’s a detailed, step-by-step guide to get you started:
2.1. Gather Your Supplies
Before you begin, make sure you have all the necessary equipment and supplies at hand. This includes:
- Tattoo machine (coil or rotary)
- Sterile tattoo needles
- Tattoo ink
- Ink caps
- Power supply
- Clip cord
- Foot pedal
- Grommets
- Rubber bands
- O-rings
- Sterile gloves
- Barrier film
- Disinfectant wipes
- Paper towels
2.2. Sanitize Your Work Area
Hygiene is paramount in tattooing. Start by thoroughly cleaning and disinfecting your entire work area. Wipe down all surfaces, including your tattoo machine, power supply, and any other equipment you’ll be using. Cover your work surface with a barrier film to prevent contamination.
2.3. Prepare Your Tattoo Machine
-
Wrap the Machine: Cover your tattoo machine with barrier film to protect it from contamination.
-
Insert the Needle:
- For Coil Machines: Insert the needle through the tube and loop it over the armature bar. Secure it with a rubber band to keep it stable.
- For Cartridge Machines: Simply insert the cartridge needle into the machine.
-
Add Grommets and O-rings: Place a grommet on the needle bar to prevent it from vibrating excessively. Add O-rings to the armature bar to reduce noise and vibration.
2.4. Connect the Power Supply
- Attach the Clip Cord: Plug one end of the clip cord into your tattoo machine and the other end into the power supply.
- Connect the Foot Pedal: Plug the foot pedal into the power supply.
- Turn on the Power Supply: Adjust the voltage according to your machine and needle configuration. Start with a lower voltage and increase it gradually until you achieve the desired speed and power.
2.5. Adjust the Machine
- Needle Depth: Adjust the needle depth so that only the tip of the needle extends beyond the tip of the tube. This ensures that the ink is deposited properly into the skin.
- Tension and Speed: Adjust the tension and speed of the machine to achieve the desired tattooing effect. Experiment with different settings to find what works best for you.
2.6. Test the Machine
Before you start tattooing, test the machine on a piece of practice skin or a synthetic surface. This allows you to get a feel for the machine and make any necessary adjustments.
2.7. Fill the Ink Caps
Pour the desired tattoo ink into the ink caps. Make sure the ink is sterile and of high quality to prevent infections and ensure vibrant, long-lasting tattoos.
2.8. Wear Protective Gear
Put on sterile gloves to protect yourself and your client from contamination. You may also want to wear a mask and eye protection to prevent exposure to blood and other bodily fluids.
2.9. Final Checks
Before you begin tattooing, double-check that everything is set up correctly and that you have all the necessary supplies within easy reach. Take a deep breath and prepare to create some amazing art.
3. Setting Up Your Tattoo Machine: A Deeper Dive
To ensure a smooth tattooing process, let’s delve into the specifics of setting up your tattoo machine, including adjusting needle depth, tuning for lining and shading, and more.
3.1. Adjusting Needle Depth
- Why It Matters: Needle depth is crucial for proper ink deposit. Too shallow, and the ink won’t stay; too deep, and you risk scarring.
- How To: Adjust the needle depth by loosening the set screw on the tube and sliding the tube up or down. The goal is to have only the very tip of the needle extending beyond the tip of the tube.
3.2. Tuning For Lining and Shading
- Lining: Requires a faster machine speed and tighter tension. This allows for clean, crisp lines.
- Shading: Requires a slower machine speed and looser tension. This creates softer, more blended shading effects.
3.3. Fine-Tuning Your Machine
- Coil Machines: Adjust the front and back springs to control the machine’s speed and power.
- Rotary Machines: Adjust the voltage to control the machine’s speed.
3.4. Testing and Calibration
- Practice Skin: Always test your machine on practice skin before tattooing a client.
- Observe: Watch how the ink flows and adjust the machine accordingly.
4. How To Set Up A Tattoo Station In 5 Steps?
Here’s a step-by-step guide to setting up your tattoo station:
- Clean Your Workspace: Sanitize all surfaces.
- Prepare Your Machine: Wrap it in protective film and test it.
- Organize Your Inks: Pour out colors into ink caps.
- Stock Your Tray: Lay out sterilized tools.
- Find the Right Spot: Choose a well-ventilated, well-lit area.
5. Tips for Optimizing Your Tattoo Setup
Here are four expert tips to optimize your tattoo setup for a seamless and professional experience:
- Invest in the Right Chair: Ensure client comfort with an ergonomic, adjustable chair.
- Wear Safety Gear: Use disposable gloves, aprons, and masks to prevent contamination.
- Don’t Overwhelm Your Space: Keep only essential tools on your tray.
- Put Away Equipment When You’re Done: Store tools properly to avoid damage and contamination.
6. Understanding Tattoo Machine Types
Choosing the right tattoo machine is crucial for achieving the best results. Let’s explore the primary types of tattoo machines available and their ideal applications.
6.1. Coil Tattoo Machines
- How They Work: Coil machines use electromagnetic coils to move the needle up and down.
- Pros:
- Powerful and reliable
- Ideal for lining, shading, and color packing
- Customizable for different tattooing styles
- Cons:
- Can be heavy and noisy
- Require more maintenance
- Ideal For: Artists who prefer a traditional machine with a strong hit and the ability to customize their setup.
6.2. Rotary Tattoo Machines
- How They Work: Rotary machines use a motor to create a smooth, consistent needle movement.
- Pros:
- Lightweight and quiet
- Versatile for lining, shading, and color packing
- Lower vibration and less trauma to the skin
- Cons:
- Can be less powerful than coil machines
- May require more frequent maintenance
- Ideal For: Artists who prefer a smooth, consistent machine with less vibration and versatility for various tattooing styles.
6.3. Pen-Style Tattoo Machines
- How They Work: Pen-style machines are a type of rotary machine designed to mimic the feel of drawing with a pen.
- Pros:
- Ergonomic and comfortable to hold
- Lightweight and easy to maneuver
- Quiet operation
- Cons:
- Can be less powerful than coil or traditional rotary machines
- May not be suitable for all tattooing styles
- Ideal For: Artists who prefer a lightweight, ergonomic machine with a pen-like feel, perfect for intricate designs and fine lines.
7. Mastering Tattoo Needle Configurations
Understanding tattoo needle configurations is essential for achieving the desired effects in your tattoos. Different needle groupings create a range of illustrative effects such as filling, shading, and pointillism.
7.1. Round Liners (RL)
- Configuration: Tightly grouped needles arranged in a circle.
- Use: Creating crisp, clean lines. Ideal for outlining tattoos and creating intricate details.
- Sizes: Typically range from 1RL (single needle) to 18RL (larger, bolder lines).
7.2. Round Shaders (RS)
- Configuration: Loosely grouped needles arranged in a circle.
- Use: Shading and soft color blending. Creates a softer, more diffused effect compared to mag needles.
- Sizes: Typically range from 3RS to 18RS.
7.3. Magnum Needles (MG)
- Configuration: Needles arranged in a straight line, either in a single row (single mag) or multiple rows (double mag, stacked mag).
- Use: Color packing and shading large areas. Provides excellent ink flow and coverage.
- Sizes: Vary widely, from 5MG to 49MG or larger.
7.4. Curved Magnum Needles (CM)
- Configuration: Needles arranged in a curved line.
- Use: Contouring and shading with a softer edge. The curved shape allows for smoother transitions and less trauma to the skin.
- Sizes: Similar to magnum needles, ranging from 5CM to 49CM or larger.
7.5. Flat Needles (F)
- Configuration: Needles arranged in a straight line, tightly packed.
- Use: Creating straight lines and geometric designs. Can also be used for shading in tight areas.
- Sizes: Typically range from 4F to 15F.
8. Ink Selection and Handling
Choosing the right tattoo ink and handling it properly is crucial for achieving vibrant, long-lasting tattoos and ensuring client safety.
8.1. Types of Tattoo Ink
- Pigment-Based Inks: These inks use solid pigment particles suspended in a carrier solution. They are known for their vibrancy and longevity.
- Pre-Dispersed Inks: These inks have pigment particles that are already broken down and dispersed in the carrier solution, making them easier to work with.
- Hybrid Inks: These inks combine pigment-based and pre-dispersed technologies to offer the benefits of both.
8.2. Selecting High-Quality Inks
- Reputable Brands: Choose inks from reputable brands known for their quality and safety standards.
- Sterility: Ensure that the inks are sterile and have not been opened or tampered with.
- Pigment Composition: Research the pigment composition of the inks to ensure they are safe and non-toxic.
8.3. Proper Ink Handling
- Ink Caps: Always use disposable ink caps to hold your ink during sessions.
- Avoid Contamination: Never dip your needles directly into the ink bottle. Pour a small amount of ink into the ink cap and use that for the session.
- Storage: Store your inks in a cool, dark place away from direct sunlight.
- Expiration Dates: Check the expiration dates on your inks and discard any that have expired.
8.4. Mixing and Blending Inks
- Consistency: Ensure that your inks have a consistent viscosity. If an ink is too thick, you can add a small amount of sterile water or a mixing solution to thin it out.
- Blending: When blending inks, use a sterile mixing container and a sterile mixing stick. Mix thoroughly to ensure an even color distribution.
- Test: Always test the mixed ink on a piece of practice skin before using it on a client.
9. Safety and Hygiene Best Practices
Maintaining strict safety and hygiene standards is essential in the tattoo industry to protect both the artist and the client from infections and other health risks.
9.1. Sterilization and Disinfection
- Autoclave: Use an autoclave to sterilize all reusable equipment, such as stainless steel tubes and grips.
- Disinfectants: Use hospital-grade disinfectants to clean and disinfect all surfaces in your work area, including chairs, tables, and machines.
- Single-Use Items: Use single-use, disposable items whenever possible, such as needles, ink caps, and barrier films.
9.2. Barrier Protection
- Gloves: Wear sterile gloves at all times during the tattooing process. Change gloves frequently and always after touching non-sterile surfaces.
- Masks: Wear a surgical mask to protect yourself from airborne particles and bodily fluids.
- Eye Protection: Wear safety glasses or a face shield to protect your eyes from splashes and splatters.
- Barrier Film: Cover all equipment and surfaces with barrier film to prevent contamination.
9.3. Skin Preparation
- Shaving: Shave the area to be tattooed with a new, disposable razor.
- Cleaning: Clean the area with an antiseptic solution, such as chlorhexidine or iodine.
- Stenciling: Apply the tattoo stencil using a stencil transfer solution.
9.4. Needle Disposal
- Sharps Container: Dispose of used needles in an OSHA-approved sharps container.
- Proper Sealing: Ensure that the sharps container is properly sealed and disposed of according to local regulations.
9.5. Cross-Contamination Prevention
- Hand Hygiene: Wash your hands thoroughly with soap and water before and after each tattoo session.
- Avoid Touching: Avoid touching your face, hair, or other surfaces during the tattooing process.
- Cleanliness: Maintain a clean and organized work area to minimize the risk of cross-contamination.
10. Troubleshooting Common Tattoo Machine Issues
Even with the best setup and maintenance, you may encounter issues with your tattoo machine from time to time. Here are some common problems and how to troubleshoot them.
10.1. Machine Not Running
- Check Power Supply: Ensure that the power supply is turned on and properly connected.
- Inspect Clip Cord: Check the clip cord for any damage or loose connections.
- Foot Pedal: Make sure the foot pedal is functioning correctly.
- Machine Switch: Verify that the machine switch is in the “on” position.
10.2. Machine Running Poorly
- Voltage Adjustment: Adjust the voltage on the power supply to optimize machine performance.
- Needle Adjustment: Ensure that the needle is properly aligned and secured in the machine.
- Machine Tuning: Fine-tune the machine by adjusting the springs (for coil machines) or the stroke length (for rotary machines).
10.3. Ink Not Flowing
- Needle Depth: Adjust the needle depth to ensure proper ink deposit.
- Ink Viscosity: Check the viscosity of the ink and thin it if necessary.
- Needle Clogging: Clean the needle tip to remove any clogs or dried ink.
10.4. Excessive Vibration
- Machine Lubrication: Lubricate the machine components to reduce friction and vibration.
- Rubber Bands and O-Rings: Replace worn rubber bands and O-rings to minimize vibration.
- Machine Balance: Ensure that the machine is properly balanced and that all components are securely tightened.
11. Perfecting Your Tattoo Workspace Layout
Creating an efficient and ergonomic workspace layout is crucial for maximizing productivity and minimizing fatigue during long tattoo sessions.
11.1. Ergonomic Considerations
- Chair Height: Adjust your chair height to ensure that your elbows are at a 90-degree angle and your wrists are straight.
- Reach: Position all equipment and supplies within easy reach to minimize unnecessary movements.
- Lighting: Use adjustable lighting to reduce eye strain and improve visibility.
11.2. Zoning Your Workspace
- Clean Zone: Designate a clean zone for sterile equipment and supplies.
- Work Zone: Set up a work zone for tattooing, with easy access to your machine, inks, and other tools.
- Disposal Zone: Create a disposal zone for used needles, ink caps, and other waste.
11.3. Organization and Storage
- Tool Organization: Use trays, organizers, and drawers to keep your tools neatly organized and easily accessible.
- Supply Storage: Store your supplies in a clean, dry place away from direct sunlight and extreme temperatures.
- Labeling: Label all containers and drawers to quickly identify the contents.
12. Staying Current With Tattoo Trends and Techniques
The tattoo industry is constantly evolving, with new trends and techniques emerging all the time. Staying current with these developments is essential for providing your clients with the best possible service and maintaining a competitive edge.
12.1. Research and Education
- Trade Shows: Attend tattoo trade shows and conventions to learn about new products, techniques, and trends.
- Workshops: Participate in workshops and seminars taught by experienced tattoo artists.
- Online Resources: Utilize online resources, such as tattoo forums, blogs, and social media groups, to stay informed about the latest developments.
12.2. Experimentation and Innovation
- New Styles: Experiment with new tattoo styles and techniques to expand your repertoire and attract new clients.
- Custom Designs: Create custom tattoo designs that reflect your clients’ individual preferences and personalities.
- Unique Effects: Explore unique tattooing effects, such as watercolor tattoos, geometric tattoos, and biomechanical tattoos.
12.3. Collaboration and Networking
- Guest Spots: Participate in guest spots at other tattoo studios to learn from different artists and expose yourself to new clients.
- Collaborations: Collaborate with other tattoo artists on joint projects to share ideas and expand your skills.
- Networking: Network with other professionals in the tattoo industry, such as suppliers, marketers, and educators, to build relationships and gain valuable insights.
13. The Importance of Continuing Education in Tattoo Art
The world of tattoo art is dynamic, with ever-evolving techniques, styles, and safety standards. Continuing education is crucial for any tattoo artist who wants to stay relevant, provide the best service to their clients, and advance their career.
13.1. Enhancing Skills and Knowledge
- Mastering New Techniques: Continuing education provides opportunities to learn and master new tattooing techniques, such as advanced shading, color blending, and dot work.
- Understanding Art Principles: Formal training can deepen your understanding of art principles like composition, color theory, and perspective, which are essential for creating visually stunning tattoos.
- Improving Client Communication: Courses in communication and client relations can help you better understand your clients’ needs and preferences, leading to more successful and satisfying tattoo experiences.
13.2. Staying Compliant with Regulations
- Health and Safety Standards: Continuing education ensures you are up-to-date with the latest health and safety regulations, including sterilization techniques, cross-contamination prevention, and first aid procedures.
- Legal Requirements: In some regions, tattoo artists are required to complete continuing education courses to maintain their licenses or certifications.
- Ethical Practices: Education on ethical practices helps you conduct your business with integrity, ensuring fair treatment of clients and respect for the art form.
13.3. Career Advancement
- Building a Reputation: Demonstrating a commitment to continuing education can enhance your reputation as a skilled and knowledgeable tattoo artist, attracting more clients and opportunities.
- Specialization: Focusing on a specific area of interest, such as portrait tattoos, realism, or traditional Japanese tattoos, can set you apart from other artists and establish you as an expert in your field.
- Mentorship: Continuing education can open doors to mentorship opportunities, where you can learn from experienced artists and gain valuable insights into the industry.
14. Elevate Your Tattoo Business with tattooat.com
Knowing how to set up a tattoo station is just the beginning. To truly excel, you need the right tools and resources. At tattooat.com, we provide a wealth of inspiration, a curated list of talented artists and studios, and detailed guides to help you master the art of tattooing.
Ready to take your tattoo artistry to the next level? Visit tattooat.com today to explore stunning designs, find the perfect artist, and unlock a world of tattoo knowledge. Let us help you turn your passion into a masterpiece. You can visit us at 1825 SW Broadway, Portland, OR 97201, United States, or call us at +1 (503) 725-3000.
15. Frequently Asked Questions (FAQs)
15.1. How often should I clean my tattoo station?
You should clean and sanitize your tattoo station between each client and at the end of each day.
15.2. What voltage should I set my power supply to?
The ideal voltage depends on your machine and needle configuration. Start low and adjust as needed.
15.3. How do I dispose of used needles?
Dispose of used needles in an OSHA-approved sharps container.
15.4. What safety gear should I wear?
Wear gloves, aprons, masks, and eye protection.
15.5. How do I choose the right tattoo needle?
Consider the design and desired effect when choosing a needle.
15.6. How do I maintain my tattoo machine?
Clean and lubricate your machine regularly.
15.7. How do I stay updated with tattoo trends?
Attend trade shows and follow industry publications and social media.
15.8. What are the best sanitizing agents for a tattoo studio?
Hospital-grade disinfectants like MadaCide are ideal.
15.9. How can I make my clients more comfortable during long sessions?
Invest in an ergonomic chair and provide breaks as needed.
15.10. Where can I find high-quality tattoo supplies?
Visit tattooat.com for a curated selection of top-notch tattoo supplies.