What Do Tattoo Artists Use To Make Stencils? Tattoo artists employ a variety of tools and techniques to create precise stencils, ensuring the artwork is flawlessly transferred to the skin, and at tattooat.com, we’re dedicated to providing comprehensive insights into the intricate world of tattooing. By understanding the tools and processes involved, both aspiring artists and tattoo enthusiasts can appreciate the skill and precision required to create stunning body art. Discover the essential materials, from thermal paper to stencil solutions, that bring tattoo designs to life and explore a realm of designs, artists, and knowledge at tattooat.com, your ultimate resource for everything tattoos.
1. Why Are Stencils Essential in Tattooing?
Stencils are indispensable in tattooing, providing a preliminary outline that ensures accuracy and client satisfaction. Stencils allow clients to approve the design and placement before the permanent ink is applied. Let’s explore the reasons why stencils are a cornerstone of professional tattooing.
- Client Approval: Stencils provide a tangible preview of the final tattoo, allowing clients to visualize the design on their skin and request adjustments before the tattooing process begins.
- Accuracy and Precision: Stencils guide the artist, ensuring that the tattoo design is rendered accurately and consistently.
- Mistake Prevention: By providing a clear outline, stencils help artists avoid errors and maintain the integrity of the design.
- Complex Designs: For intricate and detailed tattoos, stencils are crucial for managing the complexity and ensuring that all elements are correctly placed.
- Time Efficiency: Stencils streamline the tattooing process, reducing the time spent on freehand drawing and allowing the artist to focus on the application of ink.
2. What Types of Stencil Paper Do Tattoo Artists Use?
Tattoo artists rely on specialized stencil papers to transfer designs accurately onto the skin. The choice of paper depends on the artist’s preference for hand-drawn or digitally created designs. Let’s delve into the primary types of stencil paper used in the industry.
2.1 Hectograph Paper
Hectograph paper, also known as freehand paper, is ideal for artists who prefer to create stencils manually. This paper typically consists of three layers, making it suitable for traditional drawing methods.
- Top Layer: The uppermost layer is designed for drawing the tattoo design.
- Middle Layer: A protective layer is positioned between the top and bottom sheets to prevent them from sticking together.
- Bottom Layer: This layer receives the transferred image and becomes the stencil, ready for application to the skin.
2.2 Thermal Paper
Thermal paper is the go-to choice for artists who create designs digitally. Compatible with thermal printers, this paper allows for precise reproduction of intricate patterns.
- Top Layer: The design is printed or drawn on this layer.
- Middle (Onion) Layer: This brown layer is removed before printing to ensure a clean transfer.
- Carbon Ink Sheet: The carbon ink sheet transfers the design onto the bottom layer.
- Bottom Protective Layer: This layer protects the carbon ink sheet and ensures a clean transfer process.
2.3 Tracing Paper
Tracing paper is a single, translucent layer used for creating preliminary sketches of tattoo designs. Artists often use tracing paper to refine their artwork before transferring the final design onto stencil paper.
- Single Layer: A translucent sheet that allows artists to create and refine designs.
- Drafting: Used for initial sketches and drafts before the final design is transferred.
3. Can Tattoo Stencils Be Made Without Transfer Paper?
While it is technically possible to create a tattoo stencil without transfer paper, professional artists strongly advise against it. Alternative methods often involve using graphite from a pencil, which can lead to several issues.
- Inaccurate Transfer: Graphite does not transfer cleanly or easily, resulting in a less precise stencil.
- Poor Adhesion: Regular paper does not conform to the skin as effectively as transfer paper, leading to distorted stencils.
- Smudging: Graphite is prone to smudging, which can compromise the clarity of the stencil.
For professional results, it is always best to use dedicated tracing or transfer paper to ensure a crisp, accurate stencil.
4. How Do Tattoo Artists Create Stencils?
Tattoo artists employ various methods to create stencils, depending on their preferred techniques and the tools they use. Let’s explore the step-by-step processes for creating stencils using hectograph and thermal paper.
4.1 Creating Stencils with Hectograph Paper
Hectograph paper is ideal for artists who prefer hand-drawn stencils. Follow these steps to create a stencil using hectograph paper:
- Prepare the Paper: Remove the middle layer (onion sheet) from the hectograph paper.
- Draw the Design: Use a hectograph pencil or pen to draw the design on the top layer. Apply enough pressure to ensure the image transfers cleanly to the bottom layer.
- Trace the Design: Alternatively, draw the image on tracing paper first and then trace it onto the top layer of the hectograph paper.
- Check the Transfer: Ensure the design has transferred clearly to the bottom sheet, which will serve as the stencil.
4.2 Creating Stencils with Thermal Paper
Thermal paper is suitable for both hand-drawn and digitally created designs. Here are the steps to create a stencil using thermal paper:
- Digital Design: Create the tattoo design using a digital tablet and software.
- Printing Options: Print the design directly onto thermal paper using a thermal printer, or print it on regular paper and transfer it using a thermal copier.
- Thermal Copier Transfer: Place the printed design and thermal paper into the thermal copier, following the manufacturer’s instructions to transfer the image.
- Thermal Printer Transfer: Load the thermal paper into the thermal printer and print the design directly onto the paper.
5. What is the Process of Using a Thermal Copier to Print Tattoo Stencils?
Thermal copiers are essential tools for tattoo artists, allowing them to transfer designs from paper to stencil sheets quickly and accurately. Here’s a step-by-step guide on how to use a thermal copier effectively.
- Prepare the Thermal Paper: Take a thermal copier paper packet, which includes a yellow sheet, a brown “onion” sheet, and a carbon sheet.
- Open the Copier Lid: Lift the lid of the tattoo thermal copier.
- Remove the Onion Sheet: Extract the brown “onion” sheet from between the carbon and yellow sheets.
- Position the Yellow Sheet: Take the yellow sheet and feed it through the opening at the bottom of the copier’s lid, moving from the back of the machine forward until it lies over the copier’s core.
- Check Carbon Sheet Orientation: Ensure the purple carbon is facing down. If not, remove the yellow sheet, flip the packet, and reinsert it into the lid’s opening.
- Align the Paper: Pull the yellow sheet through until the crease aligns with the edge of the lid as you close it.
- Close and Fold: Lock the lid closed and fold back the yellow sheet over the thermal copier lid.
- Insert the Design: Take your tattoo design printout and feed it face-down into the slot in front of the copier’s lid.
- Copy the Design: Press the “Copy” button on the machine.
- Peel and Reveal: Peel back the carbon layer from the thermal copier paper packet to reveal a reverse copy of your tattoo design.
6. How Do Tattoo Artists Use a Thermal Printer for Stencils?
Thermal printers provide a direct and efficient method for creating tattoo stencils from digital designs. Let’s explore the steps for using a thermal printer.
- Connect the Printer: Connect the thermal printer to a power outlet and to your computer via USB.
- Prepare the Design: Open the graphic image file on your computer and reverse the image horizontally so it prints backward.
- Prepare the Thermal Paper: Fold the yellow sheet of the thermal paper backward along the perforated line, crease it, and carefully tear it off.
- Remove Protective Cover: Remove the protective cover from the purple sheet of carbon paper and discard it.
- Load the Paper: Feed the carbon paper sheet into the thermal tattoo printer face-down, so the white sheet is visible from the top.
- Print the Design: Send the reversed tattoo design to the printer from your computer.
- Separate the Sheets: Once printed, remove the carbon sheet from the white sheet containing your tattoo design.
7. What Supplies Are Needed for Thermal Printing?
To effectively use a thermal printer for tattoo stencils, you’ll need specific supplies. Here’s a list of essential items:
- Thermal Printer: A reliable thermal printer like the ReproFX Spirit Pocketjet Burner.
- Thermal Printer Paper: Specially designed paper for thermal printers.
- USB Cable: For connecting the printer to your computer.
- AC Adapter Cord: To power the printer.
- Software Driver: Spirit™/Brother®-Developed Driver for your PC.
- Computer or Tablet: To create and send designs to the printer.
- Tattoo Gloves: For maintaining hygiene during the process.
8. What is the Best Method for Creating Tattoo Stencils?
The best method for creating tattoo stencils depends on the artist’s personal preferences and the nature of the design.
- Digital Stencils: Many artists prefer digitally-drawn stencils printed onto thermal paper for their ease of adjustment and reprinting.
- Hand-Drawn Stencils: Some artists prefer the control and artistic feel of hand-drawing stencils, finding it more intuitive.
Ultimately, the most effective method is the one that produces the best results and satisfies both the artist and the client.
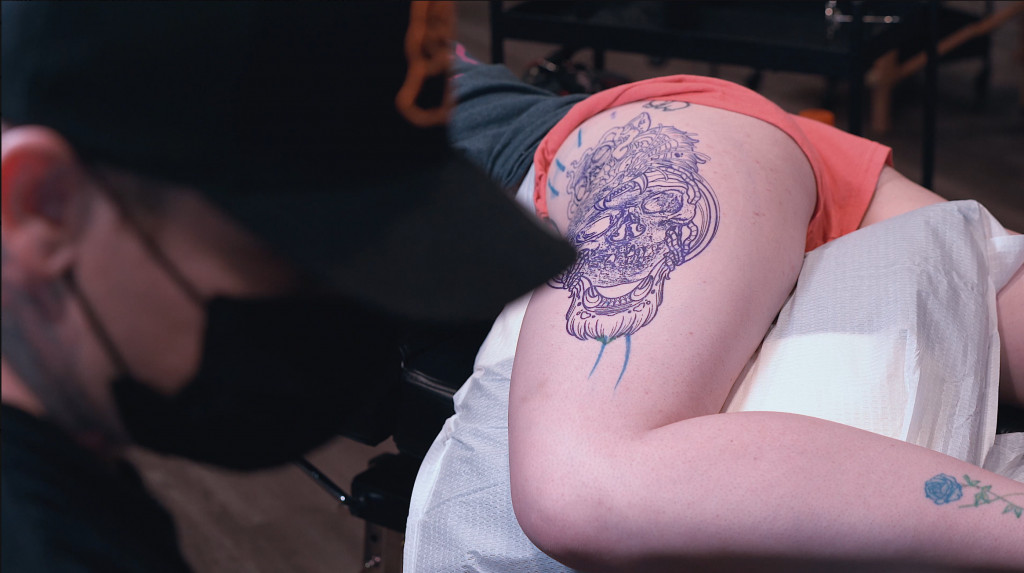
9. How Do Tattoo Artists Apply Stencils to the Skin?
Applying the stencil correctly is crucial for a successful tattoo. Here’s how tattoo artists ensure a clean and accurate transfer:
- Determine Placement: Confirm the exact location of the tattoo with the client. Ensure the client is standing for tattoos on areas that may stretch or compress when sitting.
- Prepare the Skin: Clean the area with green soap, shave if necessary, and disinfect the skin to ensure it is smooth and sanitary.
- Apply Transfer Solution: Use a thin layer of stencil transfer solution to help the stencil adhere to the skin and prevent smudging. Solutions like Recovery Stencil Lock, Stencil Stuff, or Spirit Stencil Transfer Cream are ideal.
- Place the Stencil: Apply the stencil to the prepared area, ensuring it is smooth and properly aligned.
- Allow to Dry: Leave the stencil in place until it is completely dry. Some artists use a towel to gently press the stencil and speed up the drying process.
- Peel and Wait: Carefully peel off the stencil and wait an additional 15-20 minutes for the ink to fully dry before beginning the tattoo.
10. What Are the Best Practices for Tattoo Stencil Application?
Achieving a perfect stencil application requires attention to detail and adherence to best practices. Consider the following tips to ensure a flawless transfer:
- Skin Preparation: Thoroughly clean, shave, and disinfect the skin to create a smooth surface for stencil application.
- Transfer Solution: Use a high-quality transfer solution to enhance stencil adhesion and prevent smudging.
- Stencil Placement: Ensure the stencil is properly aligned and positioned according to the client’s preferences.
- Drying Time: Allow the stencil to dry completely before removing it to prevent smearing.
- Client Confirmation: Before starting the tattoo, have the client confirm the stencil placement and design.
11. What Are the Best Tattoo Stencil Transfer Solutions?
Using the right transfer solution can significantly improve the quality and longevity of your tattoo stencil. Here are some of the best solutions recommended by tattoo artists:
- Stencil Stuff: A popular choice among tattoo artists, Stencil Stuff ensures a crisp, clear transfer that lasts throughout the tattooing process.
- Recovery Stencil Lock: Known for its reliable performance, Recovery Stencil Lock helps the stencil adhere firmly to the skin, minimizing the risk of smudging.
- Spirit Stencil Transfer Cream: This cream provides a smooth and even application, resulting in a detailed and long-lasting stencil.
12. How to Prevent Smudging When Applying Tattoo Stencils?
Smudging can ruin a stencil, leading to inaccuracies in the final tattoo. Here’s how to prevent smudging during the stencil application process:
- Use a Quality Transfer Solution: A good transfer solution helps the stencil adhere firmly to the skin, reducing the likelihood of smudging.
- Apply Thin Layers: Applying the transfer solution in thin, even layers prevents the stencil from becoming too wet and prone to smudging.
- Allow Proper Drying Time: Ensure the stencil is completely dry before removing it. Use a clean towel to gently press the stencil and speed up the drying process.
- Avoid Excessive Movement: Once the stencil is applied, avoid excessive movement or pressure on the area to prevent smudging.
13. Why is Skin Preparation Important for Stencil Application?
Proper skin preparation is crucial for stencil application for several reasons:
- Sanitation: Cleaning and disinfecting the skin reduces the risk of infection during the tattooing process.
- Adhesion: Clean, smooth skin allows the stencil to adhere better, resulting in a clearer and more accurate transfer.
- Visibility: Shaving the area ensures that the stencil lines are clearly visible, allowing the artist to follow the design accurately.
14. What Are Common Mistakes to Avoid When Making Tattoo Stencils?
Making tattoo stencils requires precision and attention to detail. Here are some common mistakes to avoid:
- Using Regular Paper: Avoid using regular paper as it does not conform to the skin well and can lead to distorted stencils.
- Skipping Skin Preparation: Neglecting to properly clean and prepare the skin can result in poor stencil adhesion and increased risk of infection.
- Applying Too Much Transfer Solution: Over saturating the skin with transfer solution can cause the stencil to smudge.
- Not Allowing Enough Drying Time: Removing the stencil before it is fully dry can result in smearing and a less accurate transfer.
15. How Do Tattoo Artists Handle Stencil Placement for Large Tattoos?
Placing stencils for large tattoos requires careful planning and execution. Here are some strategies tattoo artists use:
- Sectioning: Divide the tattoo design into smaller, manageable sections. Apply stencils for each section individually, ensuring they align correctly.
- Reference Points: Use anatomical landmarks or reference points on the body to ensure accurate placement and alignment.
- Client Positioning: Have the client stand or sit in a natural position to avoid distortion of the design.
- Mirrors: Use mirrors to provide the client with a comprehensive view of the stencil placement and allow for adjustments.
16. What Are the Benefits of Using Digital Tattoo Stencils?
Digital tattoo stencils offer numerous advantages over traditional methods:
- Precision: Digital designs can be created with high precision, ensuring accurate reproduction on the skin.
- Adjustability: Digital stencils can be easily adjusted and modified, allowing for quick changes to the design.
- Reprinting: If a stencil is damaged or needs adjustment, it can be easily reprinted without having to redraw the entire design.
- Storage: Digital designs can be stored electronically, saving space and making it easy to access and reuse designs.
17. How to Choose the Right Tattoo Stencil Paper?
Choosing the right tattoo stencil paper depends on your preferred method of design creation and the tools you use. Here’s a guide to help you select the appropriate paper:
- Hectograph Paper: Ideal for artists who prefer hand-drawn stencils.
- Thermal Paper: Best for artists who create designs digitally and use thermal printers or copiers.
- Tracing Paper: Suitable for creating preliminary sketches and drafts before transferring the final design to stencil paper.
18. How Do Thermal Copiers Differ from Thermal Printers for Tattoo Stencils?
Thermal copiers and thermal printers serve different purposes in the tattoo stencil creation process:
- Thermal Copiers: These devices transfer designs from a printed image onto thermal paper. They are useful for artists who create hand-drawn designs or have pre-printed images.
- Thermal Printers: These printers directly print digital designs onto thermal paper, eliminating the need for a separate transfer process. They are ideal for artists who create designs digitally.
19. How Can Tattoo Artists Ensure Stencil Longevity During Long Sessions?
During long tattoo sessions, it’s important to ensure that the stencil remains intact and visible. Here are some tips for stencil longevity:
- Use a High-Quality Transfer Solution: A reliable transfer solution helps the stencil adhere firmly to the skin, minimizing the risk of smudging or fading.
- Apply a Protective Balm: Apply a thin layer of tattoo balm or ointment over the stencil to protect it from friction and moisture.
- Avoid Excessive Wiping: When wiping the tattoo area, use gentle, controlled motions to avoid rubbing off the stencil.
- Reapply Stencil if Necessary: If the stencil starts to fade, reapply it using the original stencil or a fresh one.
20. FAQ: Tattoo Stencils
20.1 What is a tattoo stencil?
A tattoo stencil is a template used to transfer a design onto the skin before tattooing, ensuring accuracy and client satisfaction.
20.2 Why are stencils important in tattooing?
Stencils provide a clear outline for the artist, help prevent mistakes, and allow clients to approve the design and placement before the tattoo is applied.
20.3 What materials are used to make tattoo stencils?
Common materials include hectograph paper, thermal paper, tracing paper, thermal copiers, and thermal printers.
20.4 How do tattoo artists apply stencils to the skin?
Artists clean and prepare the skin, apply a transfer solution, place the stencil, allow it to dry, and then carefully peel it off.
20.5 What is the best stencil transfer solution?
Popular options include Stencil Stuff, Recovery Stencil Lock, and Spirit Stencil Transfer Cream.
20.6 How can smudging be prevented when applying stencils?
Use a quality transfer solution, apply thin layers, allow proper drying time, and avoid excessive movement.
20.7 Can tattoo stencils be reused?
Generally, tattoo stencils are not reused for sanitary reasons and to ensure the highest quality transfer.
20.8 What is the difference between thermal paper and hectograph paper?
Thermal paper is used with thermal printers or copiers for digital designs, while hectograph paper is used for hand-drawn stencils.
20.9 How do digital tattoo stencils improve the tattooing process?
Digital stencils offer precision, adjustability, easy reprinting, and efficient storage.
20.10 How do tattoo artists handle stencil placement for large tattoos?
Artists use sectioning, reference points, careful client positioning, and mirrors to ensure accurate placement.
In conclusion, mastering the art of stencil creation and application is essential for any tattoo artist. By understanding the different types of stencil paper, transfer methods, and best practices, artists can ensure accurate and visually stunning tattoos. Whether you prefer the traditional approach of hand-drawn stencils or the precision of digital designs, the key is to prioritize accuracy, client satisfaction, and sanitary practices.
Ready to elevate your tattoo artistry? Visit tattooat.com today to explore a wide range of tattoo designs, connect with talented artists, and discover valuable resources to enhance your skills. Unlock your creative potential and bring your tattoo visions to life with tattooat.com. Address: 1825 SW Broadway, Portland, OR 97201, United States. Phone: +1 (503) 725-3000.