What A Healing Tattoo Should Look Like is a common concern for anyone getting inked, and at tattooat.com, we understand the importance of proper aftercare. Knowing what to expect during each stage of the tattoo healing process, from the initial redness to the final shedding, ensures your body art remains vibrant and infection-free. This guide will provide detailed insights into tattoo healing stages, proper aftercare techniques, and potential complications. Discover everything you need to know about tattoo maintenance, skin hydration, and sun protection to keep your artwork looking its best for years to come.
1. Understanding the Tattooing Process and Initial Appearance
When you get a tattoo, what should it look like? Immediately after getting a new tattoo, it’s normal for the area to appear vibrant, red, swollen, and possibly a bit raised. The skin has been traumatized by the tattooing needles, which deposit ink beneath the surface, creating a wound that needs to heal. Expect some blood and fluid leakage initially; this is all part of the body’s natural response to the trauma. The colors will appear bright and bold, but this will change as the healing process begins.
1.1. The Tattoo as a Wound
Tattooing essentially involves creating a wound by scraping off the top living layer of your skin, according to dermatologists at the American Academy of Dermatology. Therefore, a new tattoo should be treated with the same care as any other wound. The body initiates its healing mechanisms to repair the damaged tissue, which involves several stages that affect the tattoo’s appearance. The initial vibrancy is temporary and will give way to different phases of healing, each with its own characteristics.
1.2. Immediate Aftercare: The First Few Hours
In the first few hours, the tattooed area will ooze blood, plasma, and excess ink. Your tattoo artist will apply a bandage or protective film to keep the area clean and prevent infection. According to the Tattoo Aftercare Association, this initial covering helps to create a barrier against bacteria and other contaminants. It’s crucial to follow your tattoo artist’s instructions on when to remove this initial dressing, usually within 2 to 24 hours.
1.3. What’s Normal vs. What’s Not
It’s normal to experience redness, swelling, and mild discomfort in the first few days. However, excessive bleeding, intense pain, or signs of infection are not normal. Signs of infection include:
- High fever
- Swelling or redness that spreads beyond the tattoo area
- Pus or foul-smelling discharge
- Excessive pain
If you notice any of these signs, consult a healthcare professional immediately. Early intervention can prevent serious complications and ensure your tattoo heals properly.
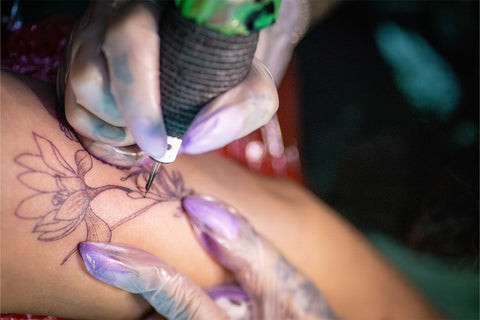 Fresh tattoo with vibrant colors and slight redness, typical immediately after the procedure.
2. First Stage of Healing (Days 1-6): What to Expect
What does a tattoo look like when it’s healing in the first stage? The first stage of tattoo healing involves significant fluid leakage as the body works to flush the wound. Nutrient-rich blood plasma is sent to the surface of the skin to promote healing. Your tattoo artist will apply a clear wrap to trap this fluid, keeping the skin moist and supporting the healing process.
2.1. The Leaking Phase
For the first few days, expect your tattoo to be weepy and leaky. Fluid may accumulate under the clear wrap, which is normal and beneficial. According to a study in the Journal of Wound Care, keeping the wound moist encourages faster healing and reduces the risk of scarring. This fluid contains vital healing factors that aid in skin repair.
2.2. Keeping It Clean and Protected
During this phase, it’s essential to keep the tattoo clean and protected. Gently wash the area with mild, fragrance-free soap and lukewarm water. Pat it dry with a clean paper towel and apply a thin layer of tattoo-specific aftercare balm or moisturizer. Reapply a fresh bandage or wrap as instructed by your tattoo artist.
2.3. Recognizing Signs of Trouble
While some fluid leakage is normal, excessive bleeding or the presence of pus is not. Increased redness, swelling, and pain could also indicate an infection. Monitor your tattoo closely and consult your tattoo artist or a healthcare professional if you have any concerns.
3. Second Stage of Healing (Days 7-14): Vibrant Colors and Scabbing
In the second stage, what should a healing tattoo look like? As the leaking subsides, your tattoo will appear very vibrant. Most of the initial redness and swelling will diminish, but the area will remain tender. A thick, clear layer similar to a callus may form—this is a scab.
3.1. The Scabbing Process
Scabbing is a natural part of the healing process, but it shouldn’t be excessive. The scabs should be thin and clear, not thick, brownish, or blackish. According to the National Institutes of Health, excessive scabbing can delay healing and increase the risk of scarring. Proper moisturizing is key to preventing thick scabs.
3.2. Moisturizing and Aftercare
Continue to wash the tattoo gently and apply a thin layer of moisturizer several times a day. Choose a tattoo balm or moisturizer recommended by your tattoo artist. Avoid products with fragrances, alcohol, or other harsh chemicals, as these can irritate the skin and interfere with healing. Keeping the tattoo moisturized prevents the skin from drying out and forming thick, crusty scabs.
3.3. Addressing Concerns
If you notice dark scabs or crusty texture, consult your tattoo artist. This might indicate that you aren’t moisturizing enough or that the tattoo isn’t healing properly. Mild scabbing is usually normal, but it’s essential to address any concerns promptly to ensure proper healing.
4. Third Stage of Healing (Weeks 3-4): Peeling and Itching
What should a healing tattoo look like in the third stage? As your tattoo enters the final stage of healing, it may appear less vibrant than before. The skin begins to heal over the tattoo, and the colors may look slightly duller. This is a normal part of the process. The dead skin will start to shed, revealing a new layer of healthy skin underneath. This stage is characterized by peeling and itching.
4.1. The Peeling Phase
Peeling is a sign that your tattoo is healing. The top layer of dead skin cells is sloughing off to reveal the fresh, new skin beneath. According to a study in the Journal of Clinical and Aesthetic Dermatology, this process can cause significant itching and irritation.
4.2. Managing the Itch
It’s crucial to avoid scratching your healing tattoo, as this can damage the vulnerable new skin and the tattoo itself. Apply a gentle, fragrance-free moisturizer to help soothe the itch. Cold compresses can also provide relief. Consider using a numbing spray specifically designed for tattoo aftercare to reduce the urge to scratch.
4.3. Restoring Vibrancy
Once the peeling is complete, your tattoo will regain its vibrancy. The new layer of skin will be smooth and healthy, and the colors will appear brighter. Continue to moisturize regularly to keep the skin hydrated and the tattoo looking its best.
5. Recognizing and Preventing Tattoo Infections
What should a healing tattoo not look like? It’s vital to recognize the signs of a tattoo infection and take steps to prevent them. A healthy tattoo should not worsen with time, blister, bubble, or become bumpy. Avoid whitish or yellowish discharge seeping from the tattoo, as this is a sign of infection.
5.1. Identifying Infection Signs
Key signs of a tattoo infection include:
- Increased redness and swelling
- Pus or foul-smelling discharge
- Blisters or bumps
- Excessive pain
- Fever
If you experience any of these symptoms, seek medical attention immediately. Infections can spread quickly and cause serious health problems if left untreated.
5.2. Preventing Infections
Preventing tattoo infections involves following proper aftercare instructions and maintaining good hygiene. Here are some essential tips:
- Wash your hands thoroughly before touching your tattoo.
- Use mild, fragrance-free soap to clean the tattooed area.
- Pat the area dry with a clean paper towel.
- Apply a thin layer of tattoo-specific aftercare balm or moisturizer.
- Avoid swimming pools, hot tubs, and direct sunlight until the tattoo is fully healed.
- Wear loose-fitting clothing to prevent irritation.
5.3. Treating Infections
If you suspect your tattoo is infected, consult your tattoo artist and a healthcare professional. Infections are typically treated with topical or oral antibiotics, along with diligent hygiene practices. Early treatment is crucial for preventing complications and ensuring your tattoo heals properly.
6. Long-Term Tattoo Care: Keeping Your Ink Looking Fresh
What will your tattoo look like when it’s fully healed? Once your tattoo is completely healed, it should look like it’s always been there, similar to a freckle or birthmark. All swelling and irritation should be gone, and the tattoo should be level with your skin. There should be no redness, and it shouldn’t hurt to touch it.
6.1. Sun Protection
The sun is your skin’s biggest enemy, according to the Skin Cancer Foundation. Unprotected UV exposure can cause dark spots, premature aging, and tattoo fading. Always apply sunscreen with an SPF of 30 or higher to your tattoo before going outside, even on cloudy days.
6.2. Moisturizing Regularly
Dry skin can make your tattoo look dull and ashy. Use a deeply nourishing lotion or tattoo balm once a day to keep your tattoo hydrated. Increasing your water intake can also improve skin hydration from the inside out.
6.3. Gentle Exfoliation
Dead skin cells can accumulate on the surface of your skin, causing dry patches. A gentle exfoliator can help buff off these dead cells, making it easier for moisturizer to reach your skin. Use a gentle exfoliating product like a sugar scrub to keep your skin soft and smooth.
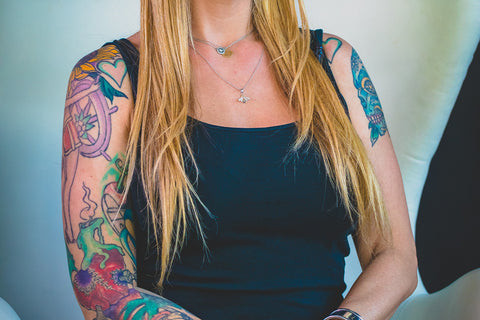 Fully healed patchwork tattoos, showing vibrant colors and smooth skin, indicating proper care.
7. Touch-Ups and Maintaining Detail
If you notice any fading or loss of detail after your tattoo has healed, you can return to your tattoo artist for a touch-up. Small details can sometimes fade during the healing process, and a touch-up can restore the tattoo to its original glory.
7.1. When to Consider a Touch-Up
Consider a touch-up if you notice:
- Fading colors
- Loss of fine lines or details
- Uneven ink distribution
7.2. Finding the Right Artist
Choose a tattoo artist who specializes in touch-ups and has experience with your tattoo style. A skilled artist can make subtle adjustments that enhance the overall appearance of your tattoo.
7.3. After the Touch-Up
Follow the same aftercare instructions as you did for your original tattoo. This will ensure that the touch-up heals properly and the colors remain vibrant.
8. Common Mistakes to Avoid During Tattoo Healing
Avoiding common mistakes during tattoo healing is crucial for ensuring the best possible outcome. Here are some pitfalls to steer clear of:
8.1. Over-Moisturizing
While moisturizing is essential, applying too much moisturizer can suffocate the skin and hinder healing. Use a thin layer of product and allow the skin to breathe.
8.2. Picking at Scabs
Picking at scabs can remove ink and damage the skin, leading to scarring and uneven healing. Let the scabs fall off naturally.
8.3. Using Harsh Products
Avoid using products with fragrances, alcohol, or other harsh chemicals on your healing tattoo. These can irritate the skin and delay healing.
8.4. Neglecting Sun Protection
Sun exposure can fade your tattoo and damage the skin. Always apply sunscreen before going outside.
8.5. Ignoring Signs of Infection
Ignoring signs of infection can lead to serious health problems. Seek medical attention immediately if you suspect your tattoo is infected.
9. Addressing Specific Concerns: Blowouts, Fading, and Allergies
Certain complications can arise during or after the tattoo healing process. Here’s how to address some specific concerns:
9.1. Tattoo Blowouts
A tattoo blowout occurs when the ink spreads beyond the intended lines, creating a blurry or smudged appearance. This can happen if the tattoo artist injects the ink too deep into the skin. While blowouts can’t be completely fixed, they can be minimized with laser treatments or cover-up tattoos.
9.2. Tattoo Fading
Tattoo fading is a natural process that occurs over time due to sun exposure, aging, and other factors. Regular sun protection and moisturizing can help slow down fading. Touch-ups can also restore faded tattoos to their original vibrancy.
9.3. Allergic Reactions
Allergic reactions to tattoo ink are rare but can occur. Symptoms include itching, redness, swelling, and rash. If you suspect you’re having an allergic reaction, consult a healthcare professional immediately. They may recommend antihistamines or other treatments to alleviate the symptoms.
10. Expert Tips for a Smooth Tattoo Healing Process
To ensure a smooth and successful tattoo healing process, follow these expert tips:
10.1. Choose a Reputable Artist
Selecting a skilled and experienced tattoo artist is crucial for preventing complications. Research artists in your area and choose someone with a solid reputation and a portfolio of high-quality work.
10.2. Follow Aftercare Instructions Diligently
Adhering to your tattoo artist’s aftercare instructions is essential for proper healing. Follow their recommendations for cleaning, moisturizing, and protecting your tattoo.
10.3. Stay Hydrated and Eat Well
Drinking plenty of water and eating a healthy diet can support your body’s natural healing processes.
10.4. Be Patient
Tattoo healing takes time, so be patient and allow your body to do its job. Avoid rushing the process or interfering with the natural healing mechanisms.
10.5. Monitor Your Tattoo Closely
Keep a close eye on your tattoo throughout the healing process and address any concerns promptly. Early intervention can prevent minor issues from becoming major problems.
FAQ: What A Healing Tattoo Should Look Like
Q1: What is the first sign of a tattoo healing?
The first sign of a tattoo healing is typically a decrease in initial redness and swelling within the first few days after getting inked.
Q2: How long does it take for a tattoo to fully heal?
A tattoo typically takes about 2 to 4 weeks to heal on the surface, but complete healing beneath the skin can take up to 6 months.
Q3: What does an infected tattoo look like compared to a normal one?
An infected tattoo will exhibit increased redness, swelling, pus or foul-smelling discharge, and may cause fever, whereas a normal healing tattoo shows only mild redness and clear fluid.
Q4: Should I moisturize my tattoo while it’s peeling?
Yes, continue moisturizing your tattoo while it’s peeling to keep the skin hydrated, relieve itching, and promote healthy healing.
Q5: Can I swim with a healing tattoo?
No, avoid swimming in pools, oceans, or hot tubs with a healing tattoo to prevent infection and irritation.
Q6: What type of clothing should I wear over my new tattoo?
Wear loose-fitting, breathable clothing over your new tattoo to prevent irritation and allow air to circulate.
Q7: Is it normal for my tattoo to itch during healing?
Yes, itching is a normal part of the healing process as the skin regenerates, but avoid scratching to prevent damage.
Q8: How often should I wash my new tattoo?
Wash your new tattoo gently with mild soap and lukewarm water 2-3 times a day during the healing process.
Q9: What should I do if my tattoo scabs?
If your tattoo scabs, avoid picking at the scabs and continue moisturizing to help them fall off naturally and prevent scarring.
Q10: Can sun exposure affect my healing tattoo?
Yes, sun exposure can fade your healing tattoo and cause damage. Always apply sunscreen after the initial healing phase to protect your ink.
Conclusion: Nurturing Your Ink
Understanding what a healing tattoo should look like is essential for ensuring your body art remains vibrant and infection-free. By following proper aftercare techniques, recognizing potential complications, and maintaining long-term care practices, you can keep your tattoo looking its best for years to come. At tattooat.com, we are dedicated to providing you with the knowledge and resources you need to nurture your ink and express your unique style.
Ready to explore stunning tattoo designs, connect with talented artists, and dive deeper into the world of tattoo culture? Visit tattooat.com today and discover the perfect inspiration for your next masterpiece!
Address: 1825 SW Broadway, Portland, OR 97201, United States
Phone: +1 (503) 725-3000
Website: tattooat.com