Hey everyone! As a tattoo artist, one of the questions I get asked most frequently revolves around how I create my Tattoo Flash Sheets. So, I decided to break down my process for you, from initial design selection to final varnishing.
The journey of creating compelling tattoo flash sheets begins with design selection. This is arguably the most crucial step. Think about establishing a theme to unify your sheet. You might draw inspiration from a particular artist’s style, or perhaps a specific era – think the bold lines of the 1920s, the classic Americana of the 1950s, or the vibrant energy of the 1980s. After you’ve chosen your designs, it’s vital to consider your color palette. Does everything harmonize? A smart move is to do a quick color study. You can use an iPad to digitally mock up colors, or even print your designs and test color combinations with colored pencils. This pre-planning prevents the disappointment of a finished flash sheet that just doesn’t quite click visually.
Once you’re confident in your designs and color scheme, it’s time to move onto the paper itself. For watercolor flash sheets, paper choice is key. I personally lean towards Arches or Fabriano hot pressed watercolor paper, 300gsm weight. Hot pressed paper gives a smooth finish, ideal for detailed linework. However, if you prefer a more textured, traditional look, cold pressed paper is an excellent alternative. Want to add a vintage touch right from the start? Try lightly staining your paper with diluted coffee or tea before you begin painting. Just make sure it’s completely dry before you start working on it.
 Tattoo artist sketching designs onto watercolor paper for tattoo flash sheets
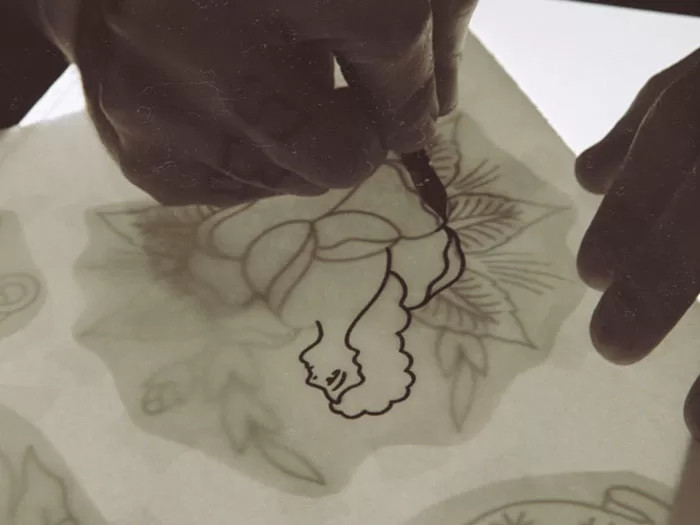
Next, we transfer the designs onto our chosen watercolor paper. Using a light table makes this process much easier and cleaner. Now, let’s talk lining pens. I opt for a dip pen and water-resistant Indian ink. Yes, it takes practice to achieve consistently clean lines compared to using a standard fineliner. But, the slight variations and character that a dip pen creates add a unique, hand-painted quality to your tattoo flash sheets, elevating them beyond just standard drawings.
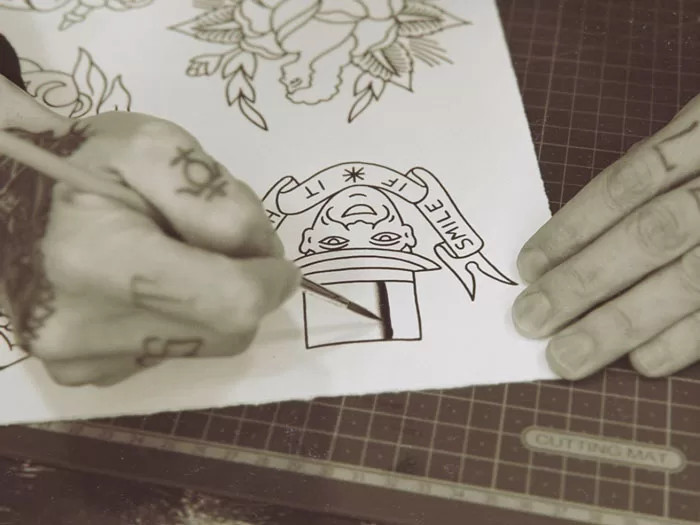
After all the designs are meticulously traced, it’s time for shading using the same water-resistant Indian ink and a couple of watercolor brushes – I use a fine tip and a medium thickness brush. I don’t use the spit shading technique, instead I prefer a controlled approach with a container of clean water and a piece of kitchen paper towel to manage the moisture.
 Close-up of shading tattoo flash sheet art with Indian ink and watercolor brushes
Start by applying a thin line of ink along the edge of the area you want to shade using the finer brush. Then, take your medium brush, dampen it with water, and lightly blot off the excess on your paper towel. Now, with smooth, consistent strokes, blend the wet brush along the ink line you just laid down, pulling the pigment outwards to create a subtle gradient. Repeat this process for all shaded areas across your flash sheet.
Once all the shading is complete and dry, we move on to color. For vibrant, lasting color on tattoo flash sheets, I prefer liquid acrylic inks. Brands like Liquitex or Golden offer excellent options. Ecoline watercolors are another great choice, known for their brilliant transparency. You can even experiment with traditional watercolors, depending on the look you’re aiming for.
 Vibrant colors being added to traditional tattoo flash art using liquid acrylic paints
After the painting is completely finished and dry, consider applying a varnish to protect your artwork and enhance its finish. Synthetic varnishes are available in various finishes – matte, gloss, or satin – allowing you to customize the final look of your tattoo flash sheets. However, be aware that these varnishes can have a strong odor, so ensure you are working in a well-ventilated area.
Finally, remember that this is just my method for creating traditional tattoo flash sheets. The beauty of art, especially in tattooing, is that there are endless approaches. Don’t be afraid to experiment and innovate! Try different types of pens, explore various papers, inks, paints, and techniques. The most exciting discoveries often come from stepping outside your comfort zone and trying something new. I’m always eager to learn about different processes, so please feel free to share your own techniques and discoveries with me!
Thanks for reading, and happy painting!
André Silva Tattooer, Porto, Portugal