Tattoos are a fantastic way to inject personality and visual interest into your characters. However, in manga and comics, redrawing intricate tattoos panel after panel can be tedious. If you’re looking for an efficient and consistent method to apply body art, especially if you want to create Tattoo Drawings Easy to manage, Clip Studio Paint offers powerful tools to streamline this process. This guide will show you how to design tattoos once and effortlessly apply them to your characters, saving you valuable time while maintaining consistency.
In this article, we will explore:
Designing and Saving Your Tattoo Art as a Material
Applying Your Tattoo to a Character Using Clip Studio Paint
Let’s dive into creating some tattoo drawings easy to use!
Designing and Saving Your Tattoo Art
First, we need to set up a new canvas specifically for our tattoo design. Consider the placement of the tattoo on your character. For a full arm tattoo stretching from shoulder to wrist, a long rectangular canvas works best. It’s always wise to create your tattoo art larger than you anticipate needing it. Scaling down artwork is much easier and preserves quality better than scaling up a design that’s too small.
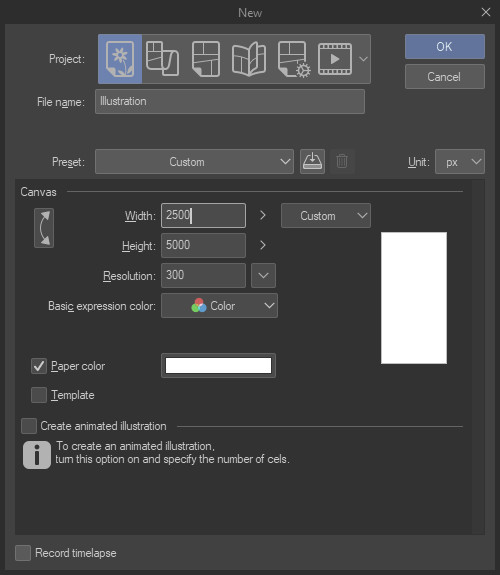 Canvas setup for tattoo art in Clip Studio Paint
To visualize how the tattoo will look on skin, fill the canvas background with your character’s base skin tone. This provides a more realistic preview than a stark white background, making it easier to design your tattoo drawings easy to integrate with your character’s look.
Now, start sketching your tattoo elements. For this example, we’ll create a design featuring rows of magical symbols flowing down the arm, topped with a magic circle on the shoulder. Clip Studio Paint Assets is an excellent resource for finding brushes and image materials to enhance your designs, especially for magical or decorative elements.
Position a magic circle at the top for the deltoid area. Then, using a parallel line ruler and various brushes, create lines of magical script extending downwards. Below is the completed tattoo design we’ll be working with – a great example of tattoo drawings easy to create and reuse.
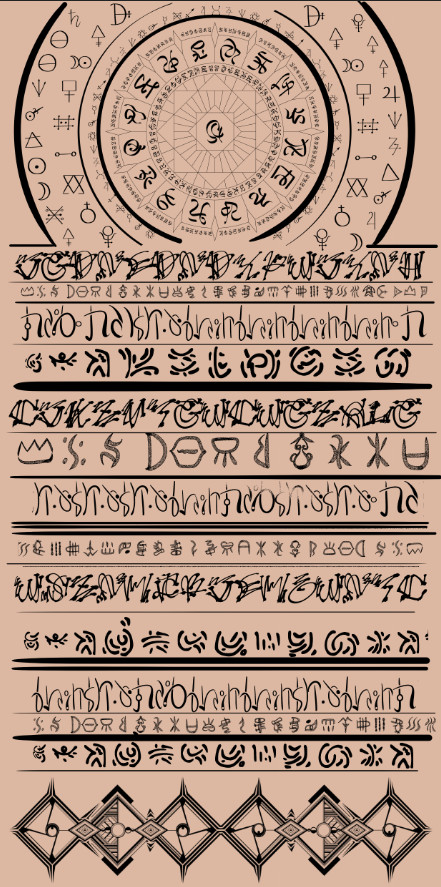 Magical symbol tattoo design created in Clip Studio Paint
To make this design easily reusable, we’ll save it as a Material in Clip Studio Paint. This way, it will be readily accessible in your Material Library, eliminating the need to open the tattoo file and copy-paste each time you want to use it. This is key to making tattoo drawings easy to implement across your artwork.
Before saving, ensure all tattoo elements are on a single layer. Hide the skin tone layer as it’s just for preview purposes and not part of the tattoo material. Then, go to Layer > Merge visible to new layer. This command combines all visible layers into a new layer, keeping your original layers intact. (If “Merge visible to new layer” is greyed out, ensure your currently active layer is visible.)
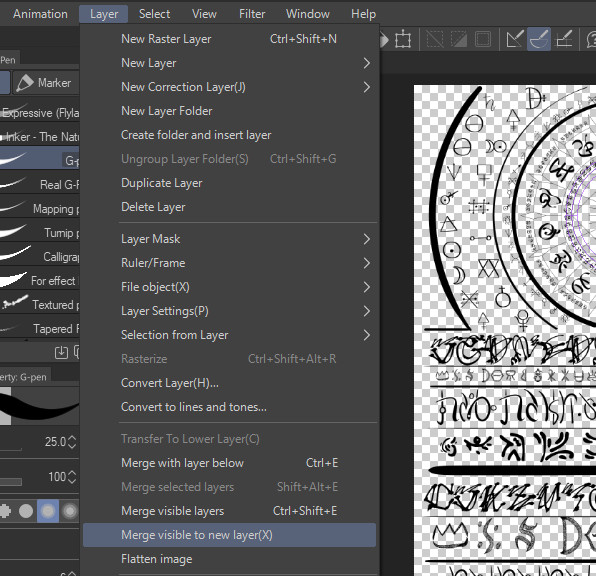 Merge visible layers to create a single tattoo layer
In the Layer palette, you’ll see your original layers (skin tone and tattoo design layers) are preserved, along with a new layer named “Tattoo Merged” containing the flattened tattoo design. This merged layer is what we’ll save as a material, making our tattoo drawings easy to manage.
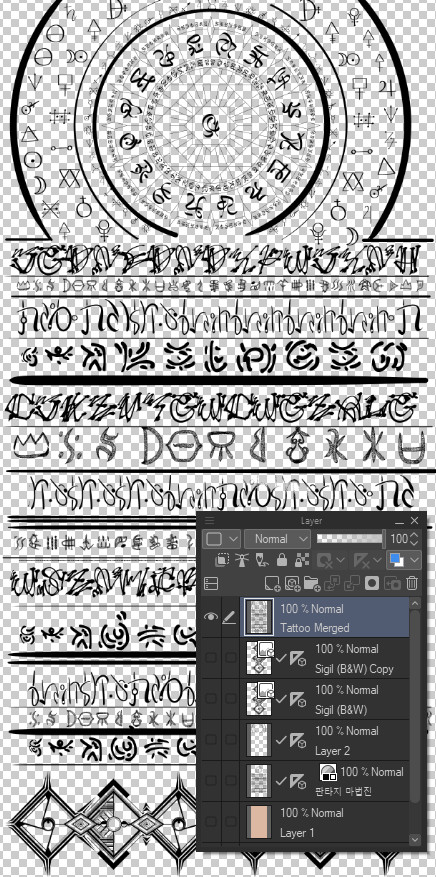 Layer palette showing original and merged tattoo layers
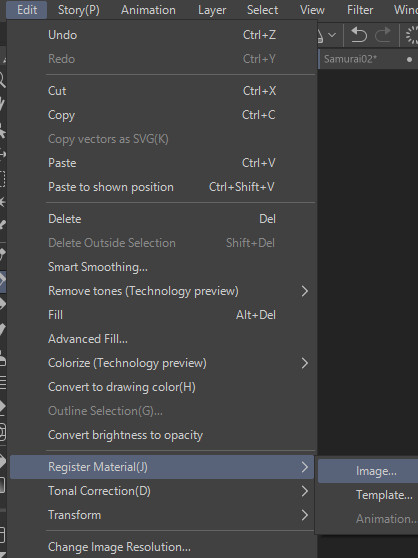
Next, navigate to Edit > Register Material > Image.
 Register Image as Material in Clip Studio Paint
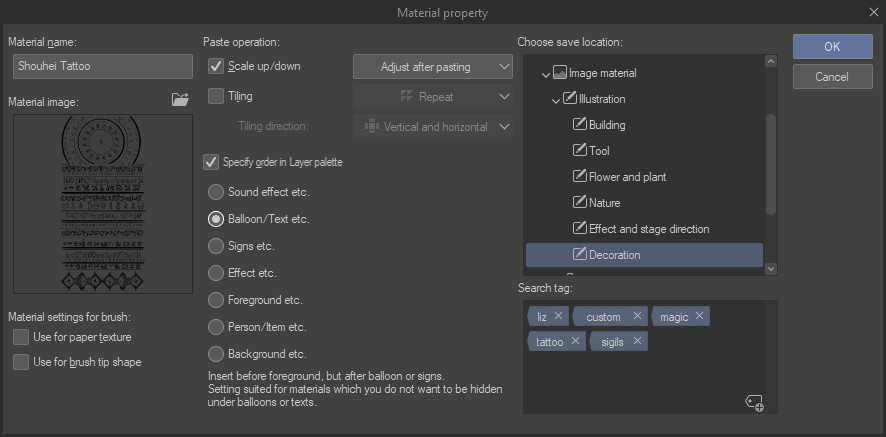
The Material Property window will appear. In the “Material Image” preview on the left, confirm the image is correct. Enter a descriptive “Material Name” in the text box – something like “Arm Tattoo Magic Symbols”. Check the “Scale up/down” box and ensure the dropdown is set to “Adjust after pasting.” This crucial setting allows you to resize and rotate the tattoo material directly on the canvas after pasting, making tattoo drawings easy to adjust.
Consider checking “Specify order in Layer palette” and choose a higher level to ensure the tattoo material pastes above your coloring layers, saving you time rearranging layers.
Choose a suitable folder in the “Choose save location” area. “Image material – Illustration – Decoration” is a logical choice for tattoo designs.
Finally, in the “Search tag” area, click the “+” icon to add tags like “tattoo,” “magic,” “symbols,” “arm,” “decoration” to help you easily find this material later. Press Enter and click the icon again after each tag. This tagging system is vital for keeping your tattoo drawings easy to locate within your library.
 Material Property window for saving tattoo design
Click “OK” to save your material. Now, let’s apply this tattoo drawings easy material to a character!
Applying Tattoos Effortlessly to Your Character
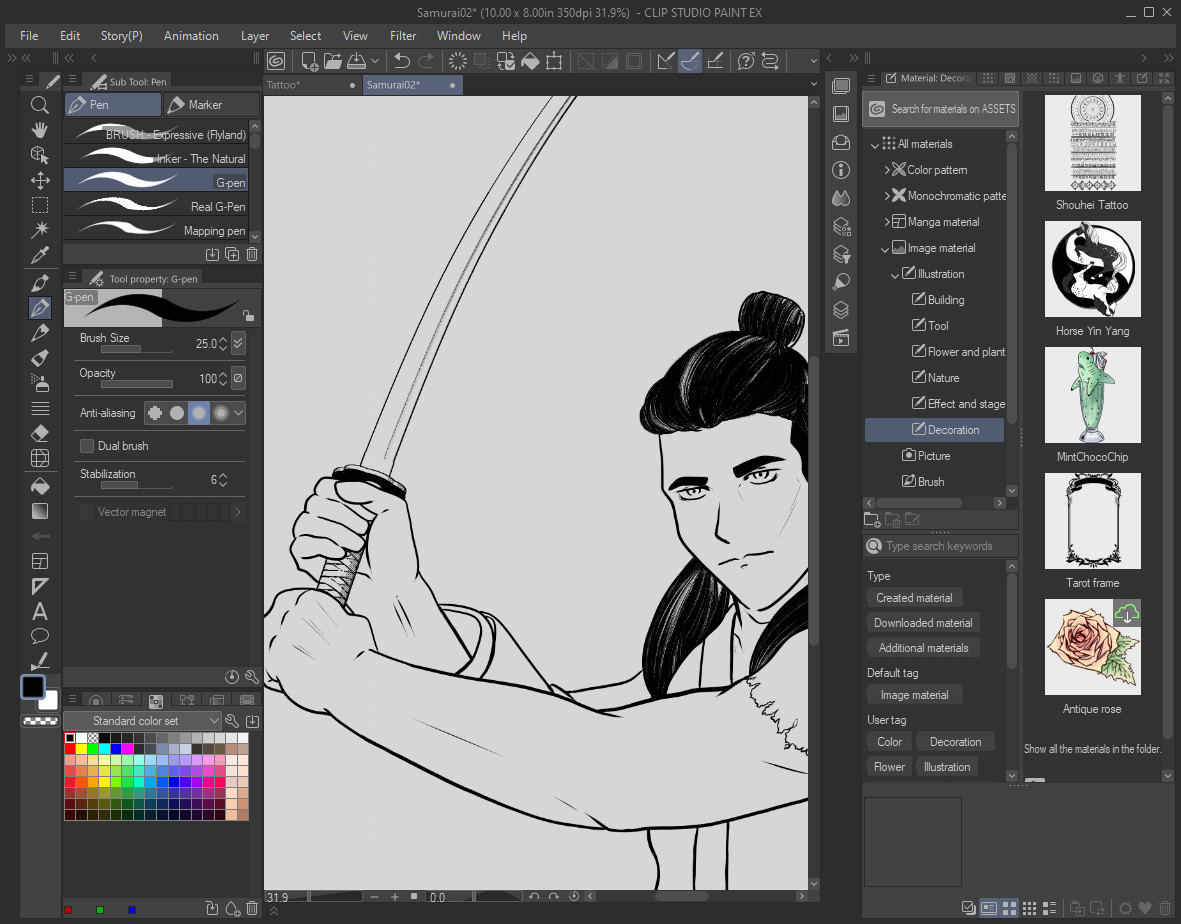
With your tattoo design saved as a material, it’s incredibly simple to apply it to your characters. Open the character image you want to tattoo. Then, from the Material Library, simply drag and drop your newly created tattoo material onto the canvas.
 Drag and drop tattoo material onto character artwork
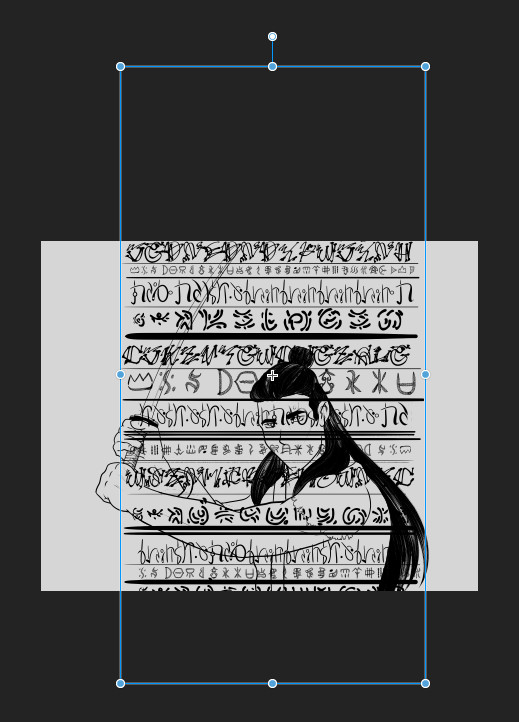
The tattoo material will appear on its own layer, surrounded by a bounding box ready for transformation because we enabled “Scale up/down” during material registration. Initially, the size and orientation will likely need adjustment to fit your character, as seen below. This initial placement is just the first step in making tattoo drawings easy to apply.
 Tattoo material initially placed on character – needs scaling and rotation
Scale and rotate the tattoo design to roughly the correct position on your character’s body. Align the magic circle with the character’s upper arm and adjust the size and rotation until the design is positioned as desired. This step ensures your tattoo drawings easy to manipulate for different character poses.
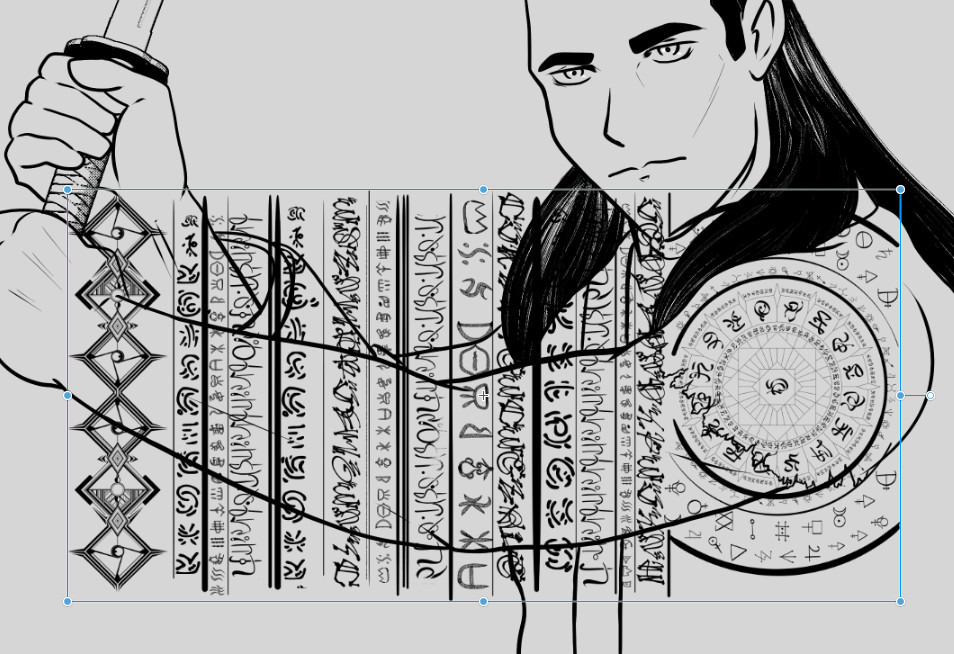 Scaled and rotated tattoo material in approximate position
Currently, the tattoo looks flat and pasted on, lacking realism. To make it appear like a genuine tattoo conforming to the body’s contours, we need to use Mesh Transformation. This technique elevates tattoo drawings easy application to a professional level.
First, we need to rasterize the tattoo layer to enable editing. Right-click on the tattoo layer in the Layer palette and select “Rasterize” (or go to Layer > Rasterize). This converts the material layer into a raster layer, ready for further manipulation.
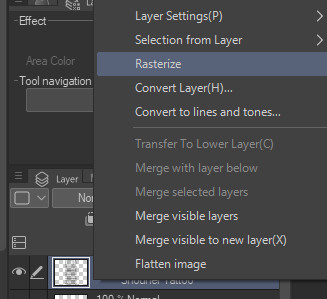 Rasterize the tattoo layer for mesh transformation
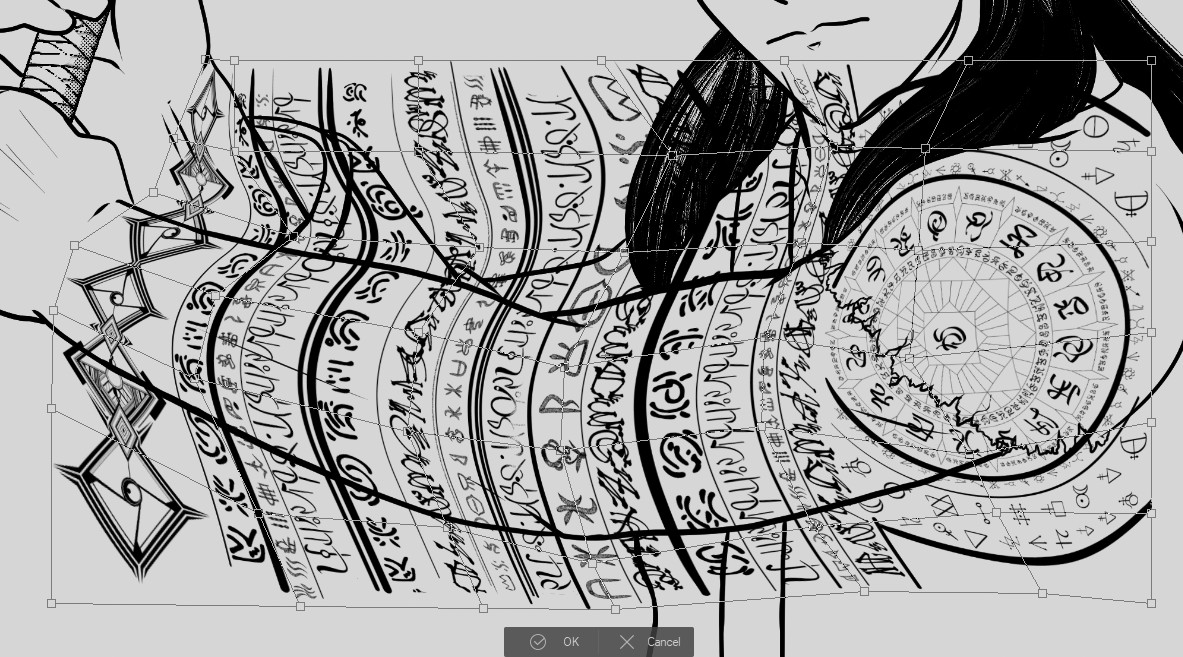
Next, go to Edit > Transform > Mesh Transformation.
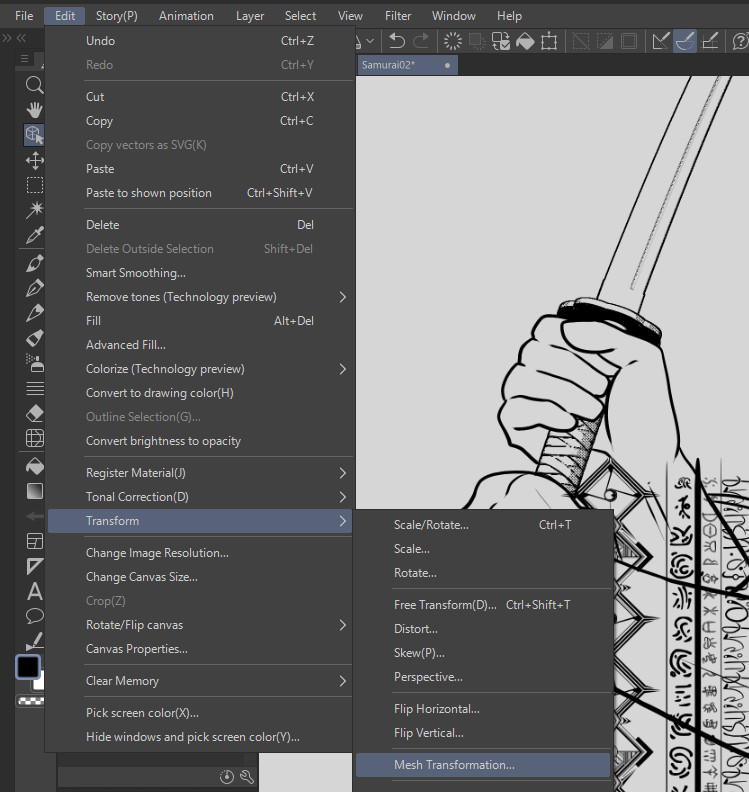 Select Mesh Transformation in Clip Studio Paint
A grid mesh will overlay your tattoo design, marked with squares at each intersection. This mesh is your control for shaping the tattoo to fit the form. Crucially, before manipulating the mesh, check the Tool Property window and adjust the “Number of vertices” in both directions (horizontal and vertical).
Increasing the vertices gives you finer control over the mesh, essential for wrapping the tattoo convincingly around curved surfaces like an arm. Adjusting this beforehand is key to making tattoo drawings easy to contour.
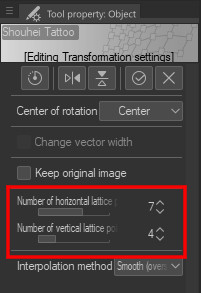 Adjust Mesh Transformation vertices for finer control
Now, manipulate the mesh vertices to mold the tattoo to your character’s body. Drag the vertices to curve the design, making it follow the arm’s shape and contours. This mesh transformation is what makes tattoo drawings easy to integrate seamlessly onto your characters.
 Adjusting the mesh to contour the tattoo to the arm
To better visualize the mesh adjustments, here’s a highlighted version emphasizing the manipulated areas. Mastering mesh transformation might take practice, but it’s an invaluable tool for many artistic tasks beyond just tattoo drawings easy application.
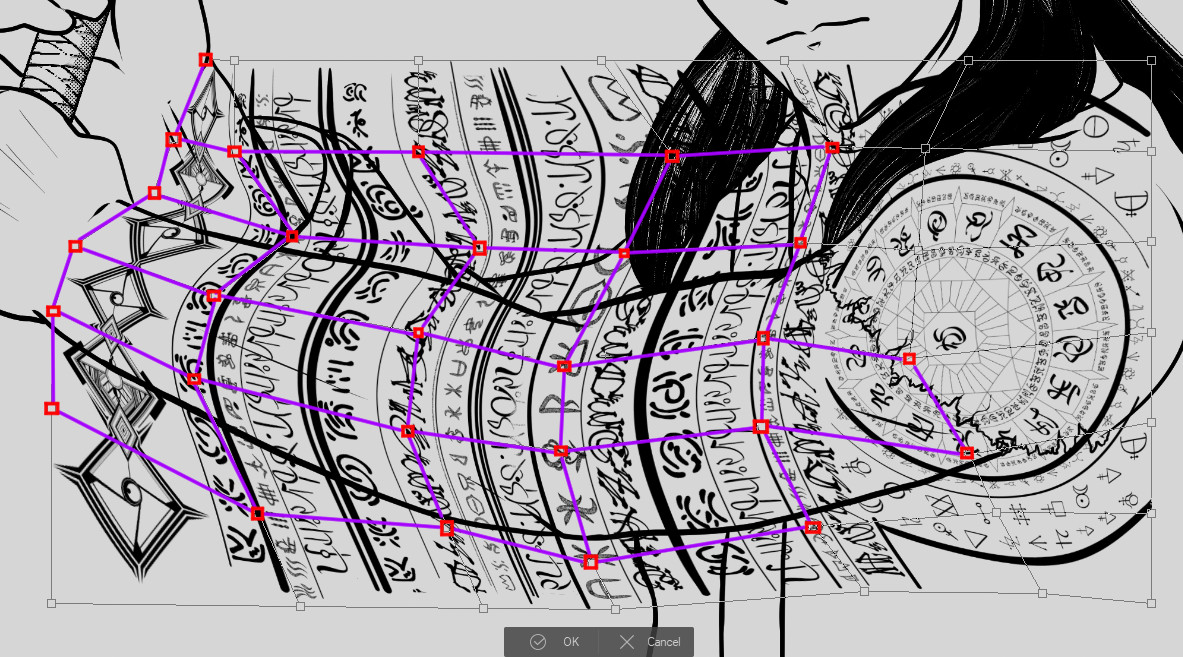 Highlighted mesh transformation for clarity
Finally, clean up any tattoo edges that extend beyond the character’s arm using a layer mask. Layer masks are non-destructive, allowing you to hide portions of a layer without permanent erasure, preserving the original tattoo design. This feature ensures tattoo drawings easy to refine and adjust.
Click the “Add Layer Mask” icon (marked below) in the Layer palette. A white box will appear next to the layer preview, indicating the mask. Ensure the mask is selected (white outline) when editing it.
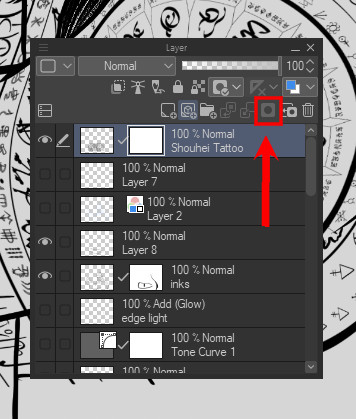 Add a layer mask to clean up tattoo edges
For better visibility while erasing, temporarily enable “Layer Color” to change the tattoo to blue (or another contrasting color). This helps distinguish the tattoo from the character art, ensuring precise edge cleanup. This visual aid makes tattoo drawings easy to finalize.
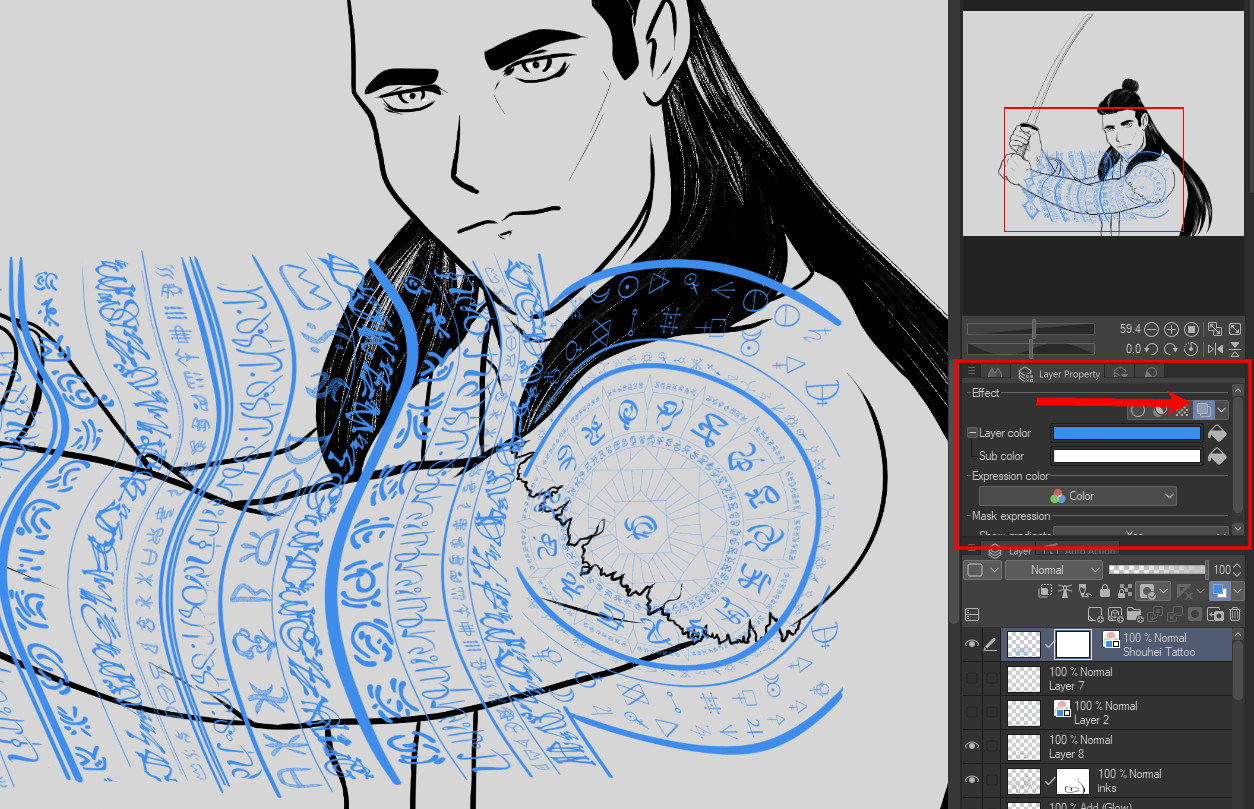 Enable Layer Color for better visibility during cleanup
Using an eraser tool on the Layer Mask, erase the unwanted parts of the tattoo extending beyond the arm’s outline. Remember, you are “hiding” pixels on the mask, not permanently erasing the tattoo. Switching to a pen tool and drawing with black on the mask will reveal hidden portions again.
Once cleanup is complete, click the “Layer Color” icon again to revert the tattoo to its original color.
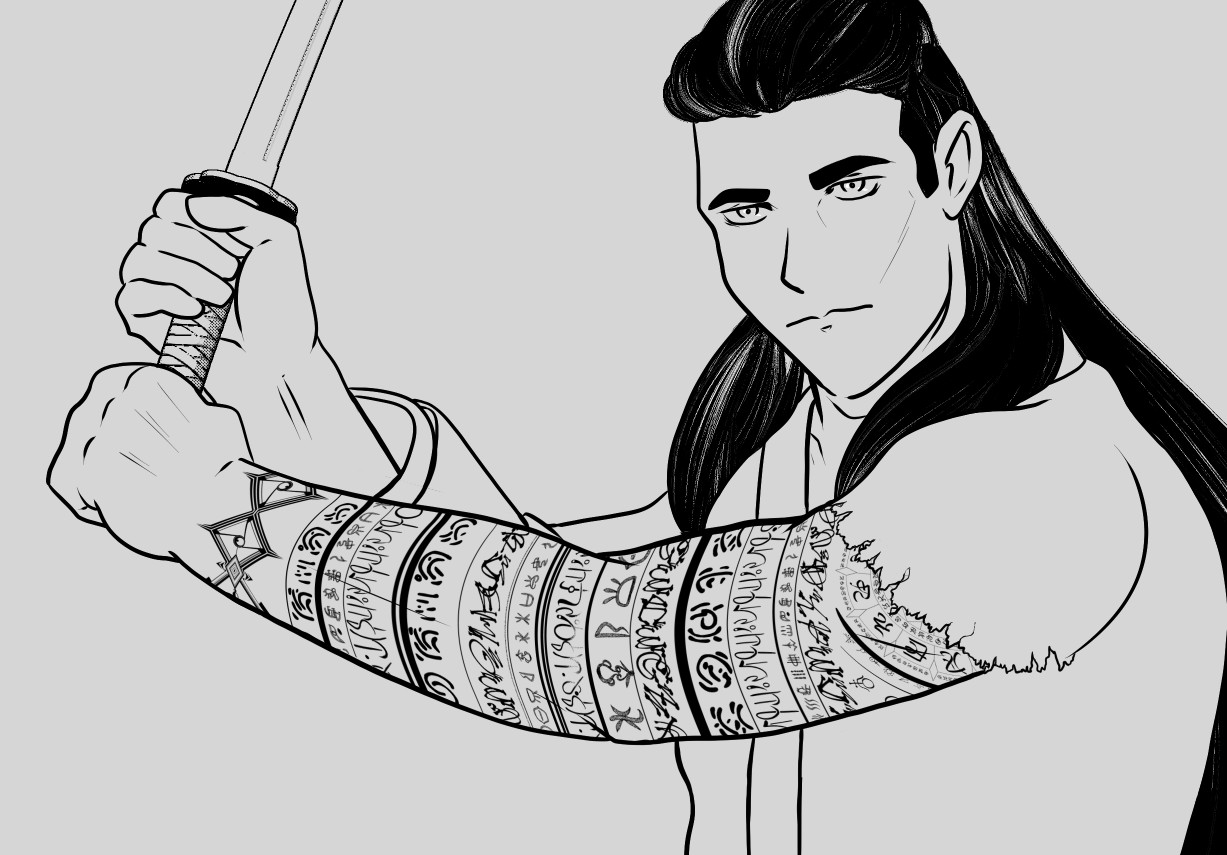 Final tattoo application with cleaned edges
And there you have it! Your tattoo is seamlessly applied.
Conclusion
This technique extends far beyond just tattoos. Use it to add patterns to clothing, apply designs to props, and more. It’s a powerful time-saver for any repeating design elements in your character art, ensuring consistency and making complex designs, like tattoo drawings easy to manage and reuse throughout your projects.
For more in-depth information and resources on Clip Studio Paint, visit https://www.clipstudio.net/en or https://graphixly.com.