Like many others, I was intrigued by the Lip Blush Tattoo technique. The idea of a subtle, natural-looking lip color enhancement was incredibly appealing, especially considering my own struggles with pale, undefined lips. Traditional lip tattooing always seemed too harsh, but lip blush promised a softer, more modern approach. When Tina Davies announced her line of lip pigments, I knew I had to experience this procedure firsthand and document my journey.
For years, my lips have been a makeup challenge. As someone with a makeup background, I understand the struggle of applying lip products to lips lacking a defined vermilion border. Even professional makeup artists have commented on the difficulty, noting the lack of a clear lip line. While I appreciate the look of lipstick, the constant maintenance – smudging, transferring, reapplication – never quite fit my lifestyle. I wanted a low-maintenance solution that provided a natural boost of color. Lip blush seemed like the answer I had been searching for.
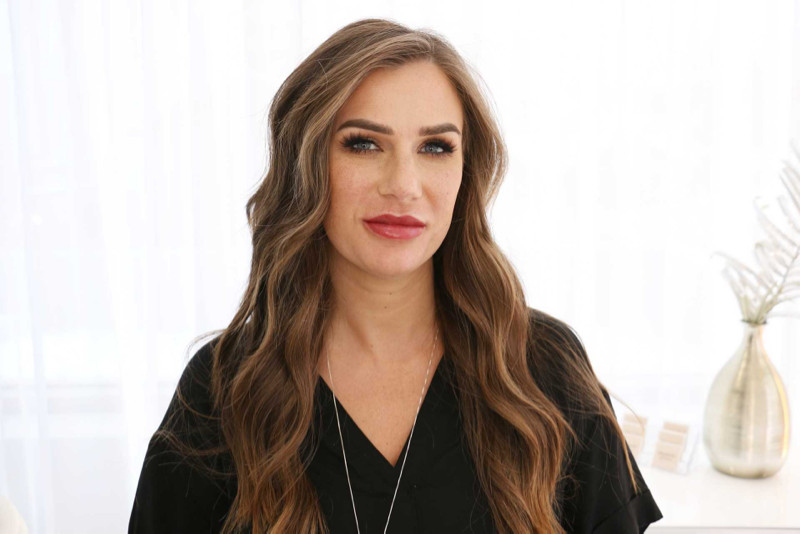
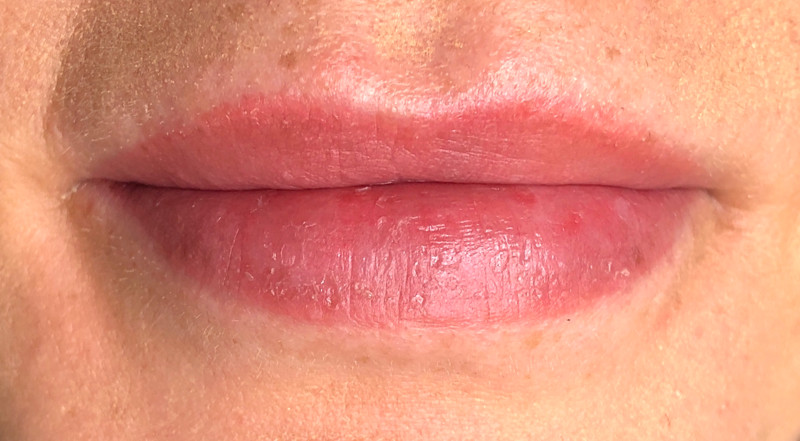
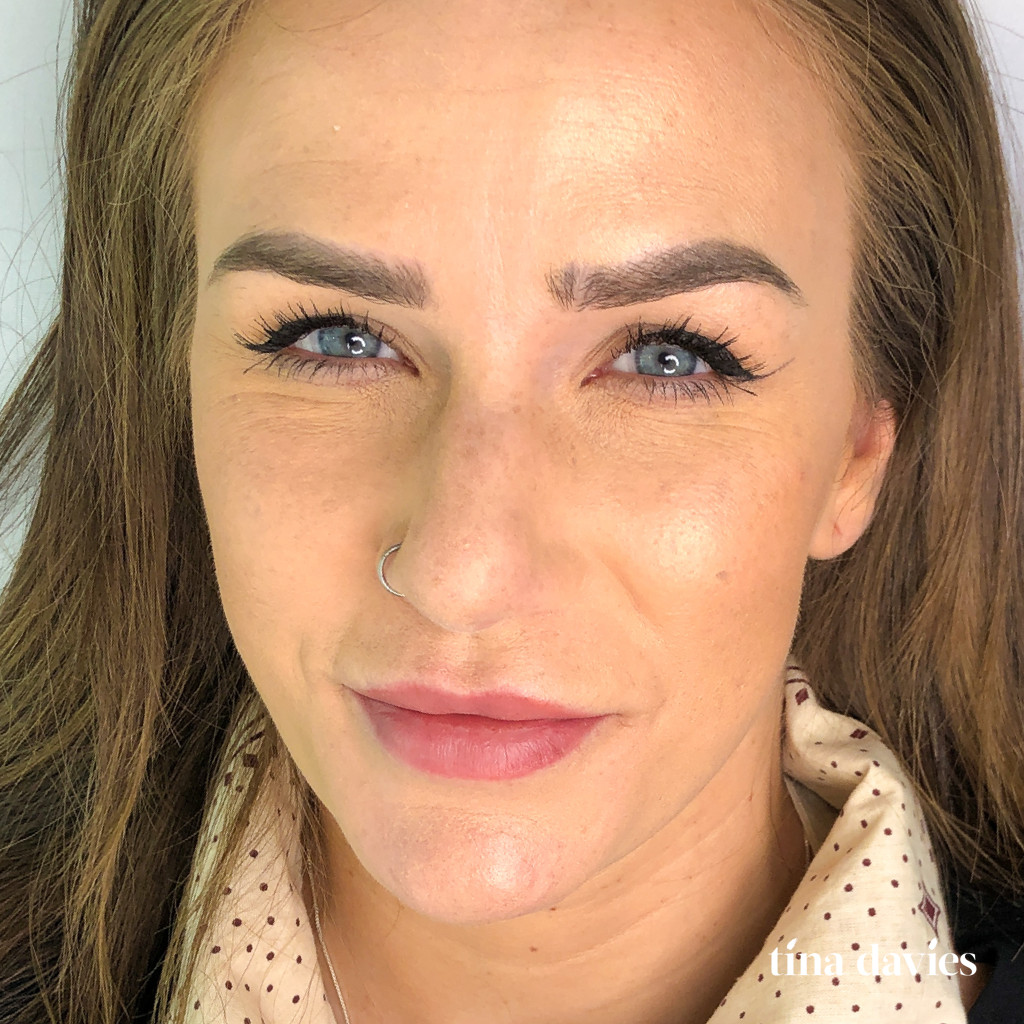
BEFORE
Bare lips before the lip blush tattoo procedure, showing lack of definition and natural color.
Before committing to the procedure, I did extensive research on healed lip blush results, particularly those achieved with Perma Blend pigments. I wanted to understand the color palettes and techniques that created the soft, natural look I desired. This research helped me narrow down my color preferences within the Tina Davies Envy Lip Collection.
Dusty Pink immediately stood out as my ideal shade. My go-to lip colors are typically nudes with mauve undertones. During my consultation with Tina, we reviewed the Tina Davies Lip Pigment Color Chart in detail. I shared my desired outcome, and Tina expertly guided me towards the perfect custom blend. She suggested adding a few drops of Wine to Dusty Pink to achieve that essential hint of mauve in the healed color.
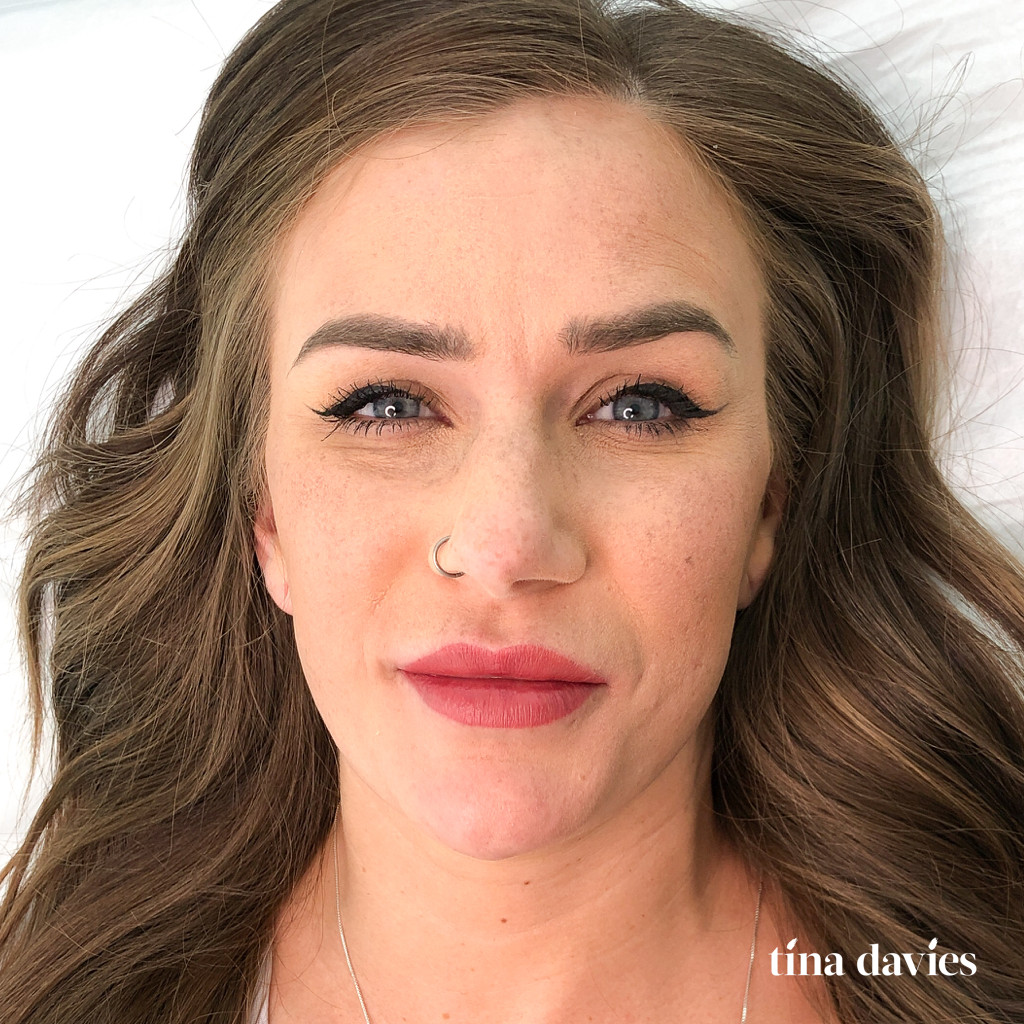
To visualize the final result, we tested the custom color mix directly on my lips. Tina then expertly outlined my lip shape with a lip pencil in a similar shade. This step was crucial, allowing me to preview the shape and color, and reinforcing my confidence in the chosen shades. Seeing the lip pencil outline truly eased any lingering anxieties and solidified my excitement for the lip blush tattoo.
Color try-on using Tina Davies Dusty Pink and Wine lip pigments to preview the final lip blush shade.
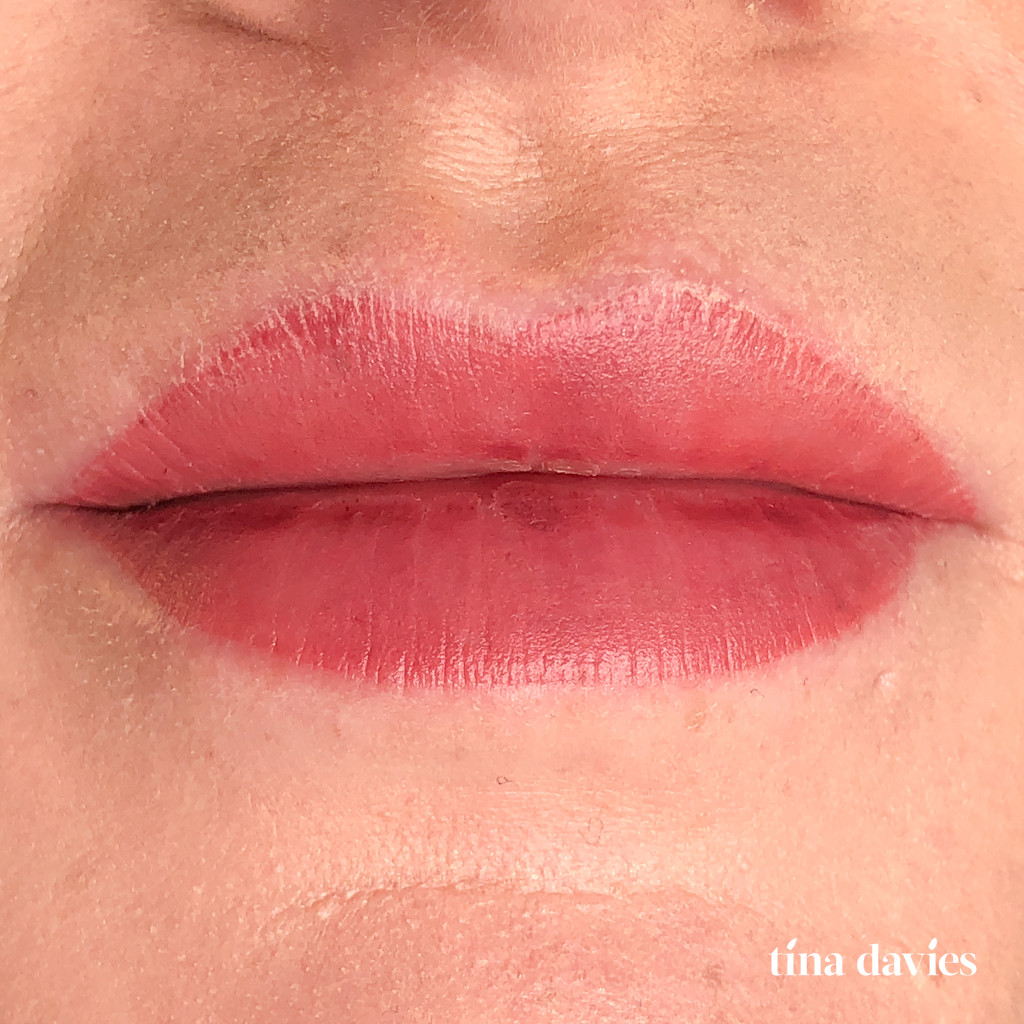
DAY 1 – IMMEDIATELY AFTER PROCEDURE
Lips immediately after the lip blush tattoo procedure, exhibiting vibrant color and noticeable swelling.
Following the lip blush procedure, I received a comprehensive aftercare kit, ensuring I had everything needed for optimal healing and color retention.
The Tina Davies aftercare goodie bag included:
- Tina Davies Studio Brochure: Information about the studio, services, and Tina Davies’ expertise.
- Tina Davies Service Menu: A detailed list of all available permanent makeup services and pricing.
- Tina Davies Business Cards: Perfect for sharing with friends interested in lip blush or other PMU treatments.
- Tina Davies Aftercare Healing Gel Sachets (x2) and Aftercare Card: Easy-to-follow instructions for aftercare with pre-portioned healing gel.
- Small Container: For convenient dispensing of the Aftercare Healing Gel.
- Aquatat: A moisturizing ointment for extra hydration throughout the healing process.
- Gentle Unscented Soap: For cleansing the tattooed lips.
- Cotton Swabs (x12): Hygienic applicators for the Aftercare Healing Gel.
(For more in-depth information on Tina Davies Aftercare Healing Gel, you can read more here.)
Having experienced body tattoos before, I can say that lip blush is a unique sensation. I initially attempted to go without numbing for the lip outline, and succeeded. However, for the full lip shading, I opted for numbing. Tina expertly applied secondary numbing throughout the procedure to maintain my comfort, along with cold compresses to soothe any intensity.
The first glimpse in the mirror post-procedure was quite a surprise! I anticipated swelling, but the reality was almost comical. My lips were significantly larger than expected, reminding me of the swollen character from Monsters Inc.!
 Monsters Inc. Character with Swollen Lips Comparison to Lip Blush Swelling
Humorous comparison of post-lip blush swelling to a character from Monsters Inc. with enlarged lips.
For the initial hours after the procedure, I diligently blotted my lips to remove lymph fluid. This is crucial for preventing thick scab formation and promoting optimal healing. Frequent icing also helped manage the swelling and provided soothing relief. I then applied a thin layer of Tina Davies Aftercare Healing Gel. As my lips started to feel dry, I added a touch of Aquatat for extra hydration. Around this time, I took an Advil to alleviate inflammation and discomfort, which were described as feeling sunburned, raw, bruised, and tight due to swelling. The combination of Advil and the aftercare products significantly improved my comfort.
Throughout the afternoon, my lip color deepened, taking on a more pronounced red/wine hue. By evening, about five hours post-procedure, the tightness and swelling began to subside slightly, although my lips remained tender to the touch.
That evening, I followed the aftercare instructions precisely, gently cleansing my lips with a sulfate-free, fragrance-free soap. After patting them dry, I reapplied a thin layer of Aftercare Healing Gel. While cleansing, I noticed a strange sensation – the feeling in my lips was altered, almost numb. Despite a textured appearance, my lips felt surprisingly smooth like silk after cleansing. The pigment color at this stage appeared slightly coral.
I finished the first day by applying a light layer of Aquatat before bed to prevent dryness and tightness overnight.
 Tina Davies Dusty Pink and Wine Lip Pigment Blend Immediately After Lip Blush Tattoo
Close-up view of lips immediately after the lip blush tattoo, showcasing the initial color intensity and pigment blend.
DAY 2
 Day 2 of Lip Blush Tattoo Healing Process Showing Darker Color and Initial Dryness
Day 2 of the lip blush tattoo healing process, revealing a darker, more intense color and early signs of dryness.
Day 2 was definitely an adjustment period. A peculiar sensation I noticed was a tingling, numb feeling, like pins and needles without the pain.
By midday, dryness became prominent, requiring frequent applications of Aquatat to combat the extreme dehydration. The lip edges felt particularly chapped and uncomfortable. The color continued to evolve, transitioning from red/coral to a deeper dusty pink shade.
By evening, the swelling had significantly reduced, and my lips were nearly back to their normal size. As the swelling decreased, natural lip lines began to reappear.
DAY 3-4
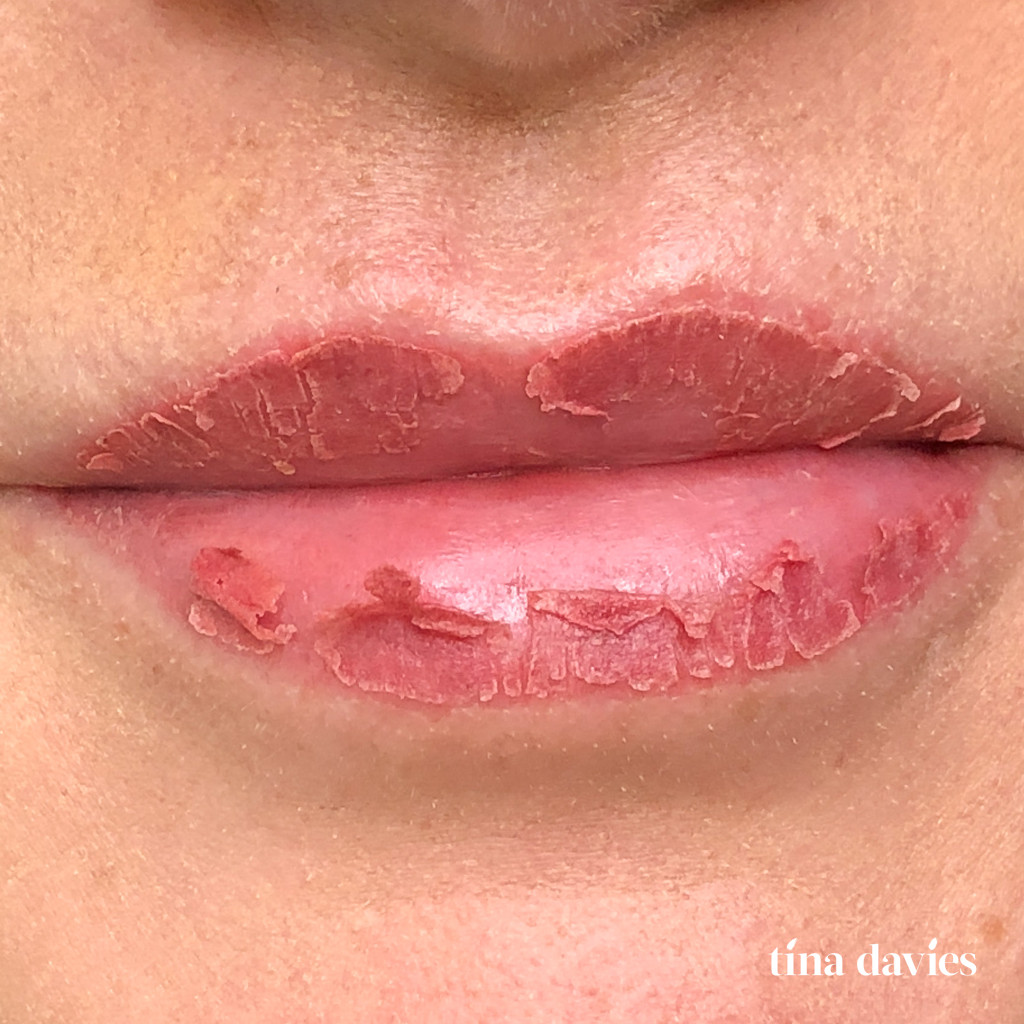
 Day 3 of Lip Blush Tattoo Healing Process with Scabbing Formation
Day 3 of lip blush tattoo healing, characterized by the formation of a noticeable scab layer.
Day 3 started with intensely dry and tight lips. By this point, a full scab had formed, thicker than on Day 2. Cracks began to appear in the scab, and opening my mouth too wide to eat or yawn caused stinging in the corners. Any excessive mouth movement, like laughing or talking animatedly, risked splitting the scabs. I found myself physically pressing my fingers against my upper lip when laughing to prevent splitting – a rather comical sight in the office!
The need for hydration intensified. By midday, the inner edges of my lips began to lift, indicating the start of the peeling process. I knew lip blush healing was faster than eyebrow procedures, but the speed was still surprising.
Day 4 marked the peak of the scabbing and peeling phase – and the ultimate test of willpower. Resisting the urge to pick or lick at the lifting scabs was incredibly challenging. I woke up to thick, hard, and crusty scabbing – not a glamorous look! The scabs were splitting but not yet fully peeling.
 Day 4 of Lip Blush Tattoo Healing Process with Significant Peeling
Day 4 of lip blush tattoo healing, showing substantial peeling of the scab layer, revealing the softer color underneath.
As the morning progressed, the peeling accelerated. By early afternoon, about one-third to one-half of the scab had lifted, but not fully detached. At one point, a piece of scab on my lower lip felt like a snaggle tooth when I pursed my lips. However, by the end of the workday, almost all the scabbing had peeled away, except for the outer edges. The lower lip peeled much faster than the upper lip. Despite the visually unappealing peeling stage, the color underneath was incredibly natural and exactly what I had hoped for!
During the peak peeling days, a scarf became my essential accessory when out in public, allowing me to discreetly cover my chin and lips and avoid unwanted stares.
DAY 5-7
 Days 5-7 of Lip Blush Tattoo Healing Process Showing Continued Dryness and Lighter Peeling
Days 5-7 of lip blush tattoo healing, characterized by continued dryness, sensitivity, and a second phase of lighter peeling.
From Day 5 to Day 7, extreme dryness persisted, requiring constant hydration. My lips also went through a second phase of thinner peeling. They remained sensitive to touch but surprisingly, not as sensitive to spice (I accidentally ate something with a mild kick).
I continued the aftercare routine from Day 1, adding a fragrance-free hydrating serum to further combat the dryness.
DAY 8-10
On Day 8, the dryness took on a different character – my lips felt very dry and hard, with flaky patches, unlike the thin peeling of days 5-7. The dryness was so intense I felt like my lower lip might split. I also noticed another color shift, with the pigment appearing to lighten slightly from the previous few days.
By Day 10, my lips finally started to feel more “normal.” However, they were still drier than usual, requiring frequent applications of hydrating lip balm.
 Day 10 of Lip Blush Tattoo Healing Process Showing Settled Color and Texture
Close-up view of lips on Day 10 of lip blush tattoo healing, showing a more settled, natural color and texture.
DAY 14-21
 Days 14-21 of Lip Blush Tattoo Healing Process with Blooming Color and Hydration Improvement
Days 14-21 of lip blush tattoo healing, showcasing the “blooming” of the color and improved hydration levels.
Around Day 14, the dryness began to significantly subside, and the color started to “bloom,” settling into a deeper, more natural tone. A slight coral undertone was still present.
Approaching Day 21, my lips felt almost completely back to normal, and I could finally start using glossy lip balms again. Waking up, applying makeup, and seeing my lips with natural color was amazing! A simple coat of my favorite lip balm enhanced the color beautifully.
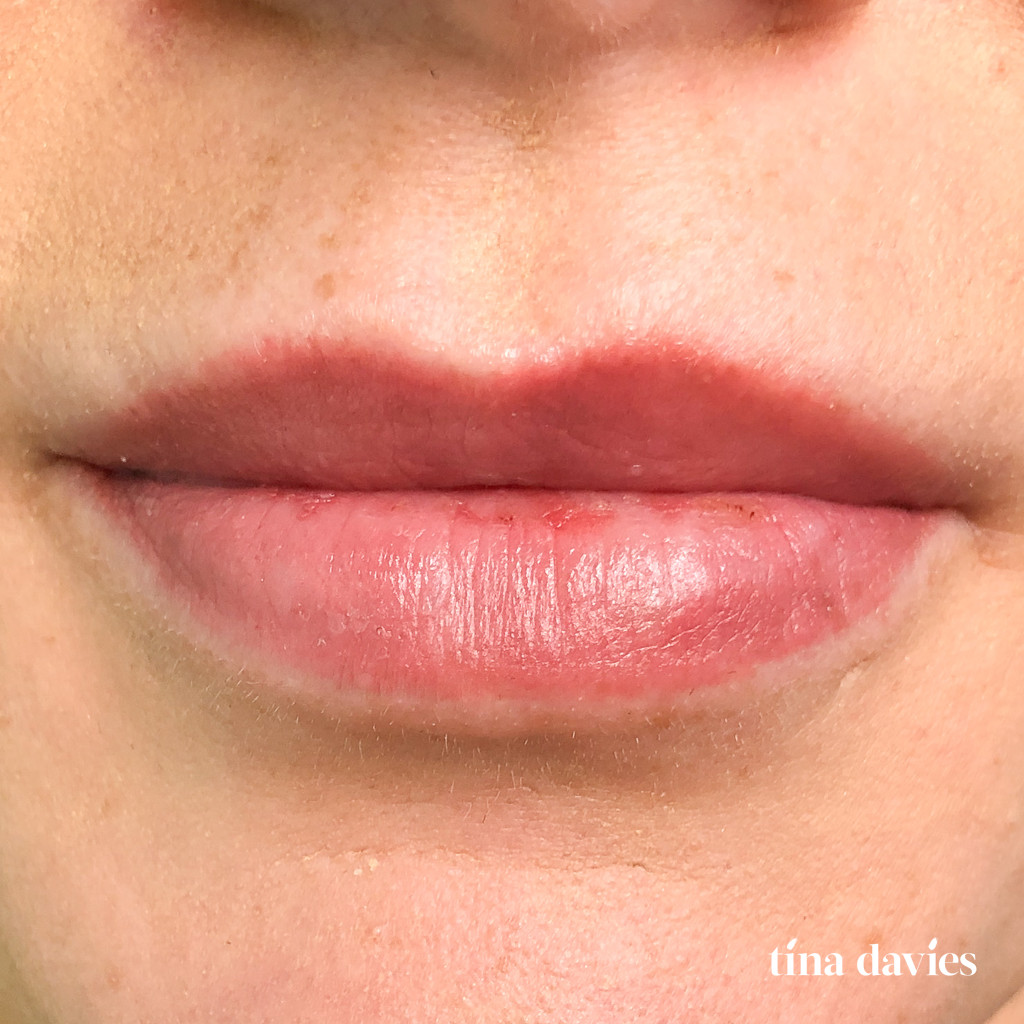
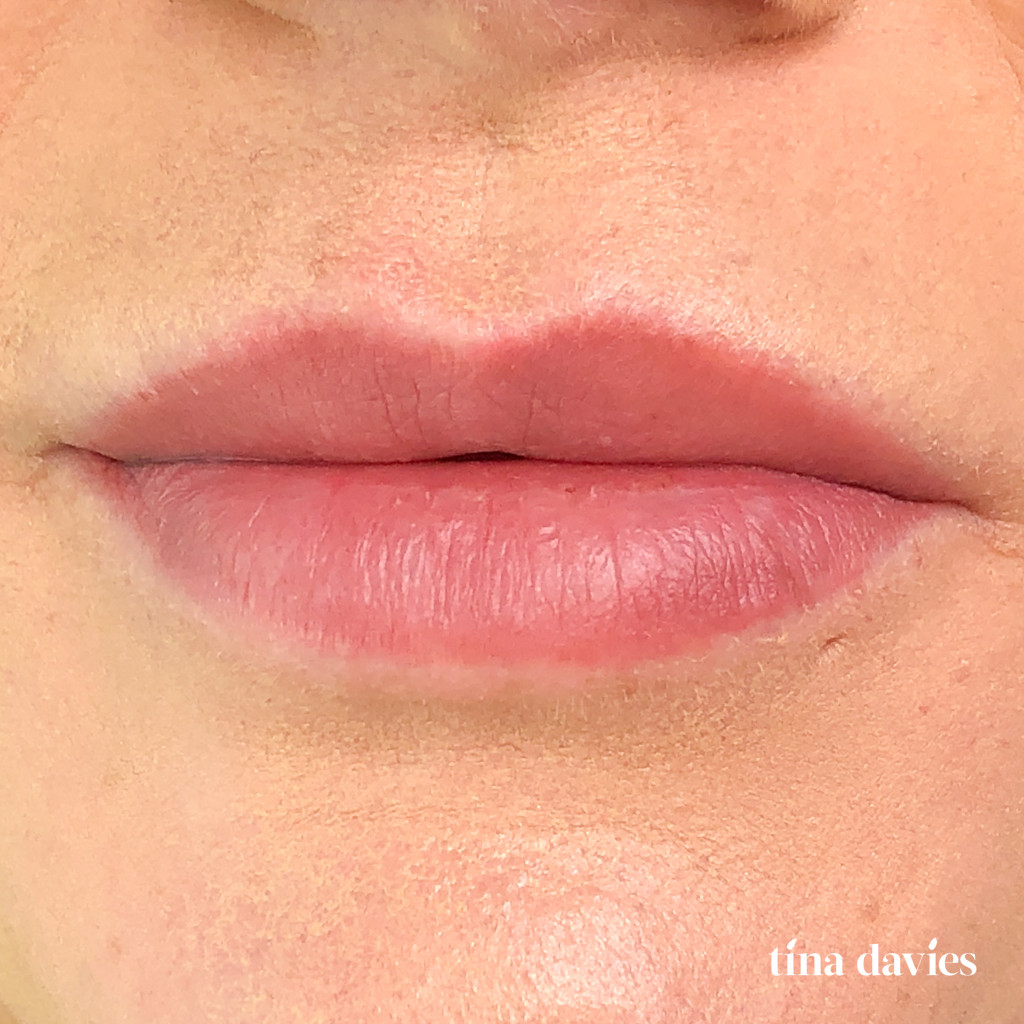
DAY 30
 Day 30 of Lip Blush Tattoo Healing Process Showing Final Healed Lip Color
Day 30 of lip blush tattoo healing, displaying the final healed lip blush color – a soft, natural mauve-pink.
By Day 30, I had achieved my dream lip color, 24/7! I love never feeling washed out, and the color has settled into the perfect mauve/nude/pink – exactly what I envisioned. The freedom of wearing a full face of makeup with naturally colored lips and zero touch-ups is incredible!
During the procedure, I admit there were moments of internal cursing and questioning my decision, but in retrospect, it’s a definite 10/10 experience. I now have my dream lips and have said goodbye to lipsticks.
 Day 30 Close-up of Healed Lip Blush Tattoo for Natural Lip Enhancement
Day 30 close-up view of the fully healed lip blush tattoo, highlighting the subtle enhancement and natural appearance.
The key takeaway from my lip blush journey is to trust the process. Your lips will go through various color phases and peeling stages over the first 30 days – it’s all part of the healing. Adhere to your aftercare diligently, resist picking, and be patient. I promise, the final result is absolutely worth it!
Learn more about the Tina Davies Lust & Envy Lip Pigment Collections here.
Want to read more about the healing process for other permanent makeup procedures? Check out these related blogs:
Laura’s Combo Brows Healing Day by Day
Microblading Healing Day by Day