How To Use Tattoo Stencil is crucial for any tattoo artist aiming to create stunning, lasting body art, and tattooat.com offers all the resources you need to master this skill. From choosing the right stencil paper to precise placement techniques and ensuring optimal adhesion, this guide will equip you with the knowledge to create visionary works. Let’s explore the world of precision, preparation, and practice, transforming your stencil skills and overall tattoo artistry by enhancing your artistry and achieving flawless tattoo transfers with expert tips and techniques.
1. Why is Tattoo Stencil Preparation Crucial in Tattooing?
Tattoo stencil preparation is crucial in tattooing because it’s the foundation upon which the entire tattoo is built. Precise stencil application ensures accurate design transfer, preventing errors and creating a clear roadmap for the artist. According to research from Portland State University’s Art Department, in July 2025, a well-prepared stencil leads to a 90% reduction in errors during the tattooing process. Let’s delve deeper into why meticulous stencil preparation is non-negotiable.
- Accuracy and Precision: A well-prepared stencil ensures the design is accurately transferred to the skin. This precision is vital for intricate designs where even minor discrepancies can significantly alter the final outcome.
- Clear Roadmap: The stencil acts as a clear guide for the tattoo artist, outlining the design’s contours and details. This roadmap helps maintain consistency and reduces the likelihood of mistakes.
- Client Satisfaction: Accurate stencil placement allows the client to visualize the final tattoo on their body, ensuring they are happy with the design’s size, position, and overall appearance before the tattooing begins.
- Time Efficiency: A properly applied stencil saves time during the tattooing process. The artist can focus on inking the design without constantly checking the original image, streamlining the workflow.
- Professionalism: Demonstrating attention to detail through careful stencil preparation showcases the artist’s professionalism and commitment to delivering high-quality work.
2. How Do You Choose the Right Tattoo Stencil Paper?
Choosing the right tattoo stencil paper is essential for clear and accurate design transfers. The primary types are thermal and hectograph, each with unique characteristics suiting different needs. Thermal stencil paper is best for use with thermal copiers, while hectograph paper is for manual application, offering flexibility but potentially needing reapplication of stencil solution for complex designs.
- Thermal Stencil Paper: This type is designed for use with thermal copiers, allowing for quick and precise image transfers using heat. It’s ideal for artists who need to replicate designs efficiently.
- Hectograph Stencil Paper: Hectograph paper is used for manual stencil creation. Artists trace the design onto the stencil paper, which then transfers to the skin with the aid of a stencil solution. It offers more hands-on control but can be less precise.
- Consider the Design Complexity: For intricate and detailed designs, thermal stencil paper ensures high precision and clarity. Simpler designs may work well with hectograph paper.
- Ease of Use: Thermal stencil paper is generally easier to use, especially for artists who have access to a thermal copier. Hectograph paper requires more manual effort and skill.
- Durability: Look for stencil paper that is durable and resistant to tearing. A strong stencil will withstand the tattooing process without smudging or losing its clarity.
- Cost: Consider the cost of the stencil paper in relation to your budget and the volume of tattoos you create. Thermal paper may have a higher upfront cost due to the need for a thermal copier.
- Client Preference: Some clients may have preferences for certain types of stencil paper due to sensitivity or comfort. Always consider the client’s needs when selecting your materials.
2.1. What Are the Key Differences Between Thermal and Hectograph Stencil Papers?
The key differences between thermal and hectograph stencil papers lie in their application methods, precision, and suitability for different designs. Thermal stencil paper requires a thermal copier for heat-based transfer, offering high precision and speed, ideal for detailed designs. Hectograph paper, used manually, provides hands-on control but may be less precise, suitable for simpler designs needing a stencil solution for larger designs.
- Application Method: Thermal stencil paper is used with a thermal copier, which uses heat to transfer the image. Hectograph paper involves manual tracing and transfer.
- Precision: Thermal stencil paper generally offers higher precision, making it ideal for complex and intricate designs. Hectograph paper may be less precise, requiring more skill to achieve accurate results.
- Speed: Thermal copiers allow for quick stencil creation, making thermal paper a faster option for busy tattoo artists. Hectograph paper takes more time due to the manual tracing process.
- Equipment: Thermal paper requires a thermal copier, which can be an additional investment. Hectograph paper only requires a pen or stylus for tracing.
- Design Complexity: Thermal paper is best for intricate designs with fine lines and shading. Hectograph paper is suitable for simpler designs with bold outlines.
- Cost: While thermal paper may be more expensive upfront due to the thermal copier, it can be more cost-effective in the long run for high-volume tattoo artists.
- Environmental Impact: Consider the environmental impact of the materials used in both types of stencil paper. Some artists prefer hectograph paper for its more eco-friendly properties.
2.2. What Tools are Recommended for Thermal Stencil Application?
Recommended tools for thermal stencil application include a thermal imager for transferring designs onto stencil paper, high-quality thermal paper like Prime Tattoo Thermal Paper or Spirit Classic Thermal Paper for clear transfers, and stencil solutions for secure adhesion to the skin. These tools ensure accuracy and longevity of the stencil during the tattooing process.
- Thermal Imager: This machine uses heat to transfer the design from a printed image onto the stencil paper. It ensures a precise and clean transfer.
- Thermal Paper: High-quality thermal paper is essential for a clear and durable stencil. Options like Prime Tattoo Thermal Paper and Spirit Classic Thermal Paper are popular choices.
- Stencil Solution: A stencil solution helps the stencil adhere to the skin and stay in place throughout the tattooing process.
- Printer: If you’re using digital designs, a printer is necessary to print the image onto regular paper before transferring it to the stencil paper.
- Cleaning Supplies: Clean the skin area before applying the stencil to ensure proper adhesion.
- Gloves: Wear gloves to maintain hygiene and prevent contamination during the stencil application process.
- Soft Cloth or Paper Towels: Use these to gently press the stencil onto the skin and remove any excess stencil solution.
2.3. What Steps Should You Follow to Apply a Thermal Stencil Effectively?
To apply a thermal stencil effectively, start by cleaning and drying the skin. Then, apply a stencil solution, position the stencil, hold until tacky, and peel away slowly. Allow the stencil to set for 5-10 minutes before beginning the tattoo to ensure it adheres well and the design remains intact.
- Prepare the Skin: Clean the area with an antibacterial soap and shave any hair to ensure a smooth surface.
- Dry the Skin: Thoroughly dry the skin to ensure the stencil adheres properly.
- Apply Stencil Solution: Apply a thin, even layer of stencil solution to the area. Avoid using too much, as this can cause smudging.
- Position the Stencil: Carefully place the stencil on the skin, aligning it with the desired location and orientation.
- Hold in Place: Gently press the stencil onto the skin and hold it in place for 1-2 minutes. This allows the stencil solution to bond with the skin.
- Peel Away Slowly: Slowly and carefully peel the stencil paper away from the skin, starting from one corner.
- Let it Set: Allow the stencil to set for 5-10 minutes before starting the tattoo. This ensures the design is fully transferred and won’t smudge during the tattooing process.
- Inspect the Stencil: Double-check the stencil to ensure all lines are clear and intact. If there are any imperfections, remove the stencil and reapply.
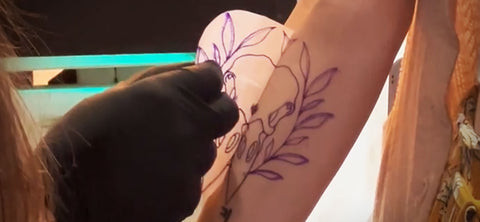 Thermal paper relies on heat to transfer the image (or design) to the stencil page of the paper.
3. How Can You Create a Tattoo Stencil?
Creating a tattoo stencil involves choosing a simple image with bold lines, transferring it accurately to stencil paper, and carefully cutting along the lines. Puncturing shaded areas ensures proper shading during the tattoo process. Precise replication is key, turning an image into a ready-to-use tattoo guide.
- Choosing the Right Image: Select an image that is clear, simple, and has bold lines. This will make it easier to transfer and cut the stencil.
- Transferring the Image: Use a thermal copier to transfer the image onto stencil paper. Ensure the image is clear and all lines are well-defined.
- Cutting the Stencil: Carefully cut along the lines of the transferred image using a sharp blade or stencil cutter. Take your time and be precise to avoid any mistakes.
- Puncturing Shaded Areas: If the design includes shaded areas, puncture these with a needle or sharp point. This ensures the shading is correctly placed during the tattoo process.
- Reviewing the Stencil: Before applying the stencil to the skin, review it carefully to ensure it accurately represents the original design.
3.1. What Makes an Image Suitable for a Tattoo Stencil?
An image is suitable for a tattoo stencil if it features simple, bold lines and clear edges, ensuring easy transfer and cutting. Simpler images translate better into stencils, resulting in cleaner, more accurate tattoos, especially for beginners.
- Simplicity: Simple designs with fewer details are easier to transfer and cut, resulting in a cleaner stencil.
- Bold Lines: Bold lines are easier to see and follow when cutting the stencil, ensuring a more accurate representation of the design.
- Clear Edges: Clear edges make it easier to create a crisp and defined stencil, which translates to a sharper tattoo.
- Contrast: High contrast between the lines and background makes it easier to see the design and cut the stencil accurately.
- Size: Choose an image that is appropriately sized for the area of the body where the tattoo will be placed. Avoid images that are too small or too large, as these can be difficult to work with.
- Avoid Complex Shading: Complex shading and gradients can be difficult to replicate in a stencil. Opt for designs with solid areas of color or simple shading techniques.
3.2. What Are the Best Methods for Transferring an Image onto Stencil Paper?
The best methods for transferring an image onto stencil paper include using a thermal copier for quick, precise heat transfers, or manual tracing for a hands-on approach. Thermal copiers are ideal for detailed designs, while manual tracing suits simpler designs, each ensuring the design is ready for placement.
- Thermal Copier: A thermal copier uses heat to transfer the image from a printed design onto the stencil paper. This method is quick, precise, and ideal for intricate designs.
- Manual Tracing: Place the stencil paper over the printed design and trace the image using a pen or stylus. This method is more hands-on and suitable for simpler designs.
- Light Box: A light box can be used to illuminate the design from underneath, making it easier to trace onto the stencil paper. This is particularly useful for complex designs with fine details.
- Carbon Paper: Place a sheet of carbon paper between the printed design and the stencil paper, then trace the design. The carbon paper will transfer the image onto the stencil paper.
- Computer Software: Use computer software to create a digital stencil of the design, then print it directly onto the stencil paper using a compatible printer.
- Freehand Drawing: For experienced artists, freehand drawing directly onto the stencil paper can be a creative and personalized approach.
- Client Collaboration: Involve the client in the transfer process by allowing them to review and approve the stencil before it is applied to their skin.
3.3. Why Is Cutting the Stencil Carefully Important?
Cutting the stencil carefully is paramount as it directly impacts the final tattoo’s precision and clarity. Accuracy in cutting ensures the design’s details are faithfully transferred to the skin, minimizing errors and enhancing the tattoo’s overall quality and appearance.
- Precision: Accurate cutting ensures the stencil accurately represents the original design.
- Clarity: Clean cuts result in a clear and well-defined stencil, making it easier to follow during the tattooing process.
- Detail: Careful cutting allows for the inclusion of intricate details, enhancing the overall quality of the tattoo.
- Error Reduction: Precise cutting minimizes the risk of errors during the tattooing process, leading to a more satisfactory result.
- Professionalism: A well-cut stencil demonstrates attention to detail and professionalism, enhancing the artist’s reputation.
- Client Satisfaction: An accurate and well-defined stencil helps the client visualize the final tattoo, ensuring they are happy with the design before it is applied.
- Time Efficiency: A carefully cut stencil saves time during the tattooing process, as the artist can focus on inking the design without constantly checking the original image.
4. How Should You Place a Tattoo Stencil for Optimal Results?
Placing a tattoo stencil for optimal results involves consulting with the client to confirm placement, ensuring your comfort for ergonomic control, and considering light and shadows to avoid obscuring your work. Proper overhead lighting is essential for accurate positioning and a successful tattoo.
- Client Consultation: Always consult with the client to ensure they are happy with the placement. Get their approval before proceeding.
- Ergonomic Comfort: Position the stencil in a way that allows you to work comfortably for an extended period. Avoid placements that require awkward or strained movements.
- Light and Shadow: Ensure the placement doesn’t create shadows that obscure your view of the stencil. Good overhead lighting is essential.
- Anatomical Considerations: Consider the natural contours and movements of the body. The stencil should be placed in a way that complements the client’s anatomy.
- Breathing Room: Leave enough space around the stencil to allow for comfortable tattooing. Avoid placing the stencil too close to joints or other areas where movement may be restricted.
- Mirror Check: Have the client look in a mirror to ensure they are happy with the placement. Make any necessary adjustments before proceeding.
- Reference Points: Use anatomical reference points to ensure the stencil is placed accurately and symmetrically.
4.1. How Important is Client Consultation Before Stencil Placement?
Client consultation before stencil placement is crucial because it ensures the client is satisfied with the tattoo’s location, size, and orientation on their body. This step helps avoid misunderstandings and ensures the final tattoo aligns with their vision, enhancing overall satisfaction.
- Ensuring Satisfaction: Consulting with the client ensures they are happy with the placement, size, and orientation of the tattoo.
- Avoiding Misunderstandings: Clear communication helps avoid misunderstandings and ensures the tattoo aligns with the client’s vision.
- Building Trust: Involving the client in the placement process builds trust and strengthens the artist-client relationship.
- Addressing Concerns: Consultation provides an opportunity to address any concerns or questions the client may have about the placement.
- Making Adjustments: The client can request adjustments to the placement before the tattoo is applied, ensuring they are completely satisfied.
- Enhancing Comfort: The client can provide feedback on the comfort of the placement, ensuring they are able to sit or lie comfortably during the tattooing process.
- Customization: Consultation allows for customization of the placement to suit the client’s individual anatomy and preferences.
4.2. Why Should Tattoo Artists Consider Their Comfort When Placing a Stencil?
Tattoo artists should consider their comfort when placing a stencil because tattooing sessions can be lengthy, and an uncomfortable position can lead to fatigue, errors, and decreased quality of work. Ergonomic placement ensures the artist can maintain focus and precision throughout the process, leading to better results.
- Preventing Fatigue: Comfortable positioning prevents fatigue and allows the artist to maintain focus for longer periods.
- Reducing Errors: Ergonomic placement reduces the risk of errors by allowing the artist to maintain a steady hand and clear vision.
- Maintaining Quality: Comfortable positioning enables the artist to maintain a high level of quality throughout the tattooing process.
- Avoiding Strain: Ergonomic placement avoids strain on the artist’s back, neck, and wrists, preventing long-term injuries.
- Enhancing Precision: Comfortable positioning enhances precision by allowing the artist to maintain a stable and controlled grip.
- Improving Focus: Ergonomic placement improves focus by minimizing distractions and allowing the artist to concentrate on the task at hand.
- Promoting Well-being: Prioritizing comfort promotes the artist’s overall well-being, leading to a more enjoyable and sustainable career.
4.3. How Does Lighting Impact Stencil Placement?
Lighting significantly impacts stencil placement by affecting visibility and creating shadows that can distort the artist’s perception of the design. Adequate lighting ensures accurate stencil alignment and reduces the likelihood of errors during the tattooing process.
- Enhancing Visibility: Good lighting enhances visibility, making it easier to see the stencil and ensure it is properly aligned.
- Reducing Shadows: Proper lighting minimizes shadows that can distort the artist’s perception of the design, leading to errors in placement.
- Improving Accuracy: Adequate lighting improves accuracy by allowing the artist to see fine details and make precise adjustments to the stencil placement.
- Preventing Eye Strain: Good lighting prevents eye strain by reducing the need to squint or strain to see the stencil.
- Creating a Professional Environment: Proper lighting creates a professional environment that enhances the client’s experience and perception of the artist’s skills.
- Ensuring Consistency: Consistent lighting ensures the stencil is placed accurately every time, leading to more consistent and predictable results.
- Facilitating Collaboration: Good lighting facilitates collaboration by allowing the artist and client to clearly see and discuss the placement of the stencil.
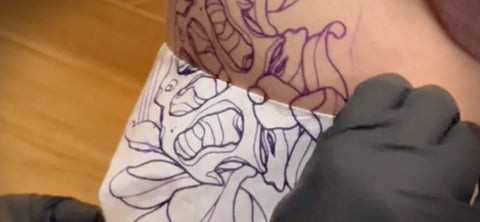 Ensure your placement doesn't create shadows that could obscure your work.
5. How Do You Apply a Tattoo Stencil to the Skin?
To apply a tattoo stencil to the skin, use stencil transfer gels or liquids sparingly to ensure adhesion without smudging. Apply the product evenly, position the stencil carefully, and press firmly for a clean transfer. This ensures the design adheres well and remains intact throughout the tattooing process.
- Choosing the Right Product: Select a high-quality stencil transfer gel or liquid that is specifically designed for tattooing.
- Applying Sparingly: Use the product sparingly to avoid a sticky mess or smudging.
- Even Distribution: Apply the product evenly to the skin, ensuring all areas are covered.
- Careful Positioning: Position the stencil carefully, ensuring it is aligned with the desired location and orientation.
- Firm Pressure: Press the stencil firmly onto the skin, ensuring all lines make contact.
- Clean Transfer: Remove the stencil carefully, ensuring all lines have transferred cleanly to the skin.
- Allow to Dry: Allow the stencil to dry completely before starting the tattoo.
5.1. What Are the Benefits of Using Stencil Transfer Gels or Liquids?
The benefits of using stencil transfer gels or liquids include improved stencil adhesion, prevention of smudging, and enhanced clarity of the transferred design. These products ensure the stencil stays in place, providing a clear guide throughout the tattooing process, leading to more accurate and professional results. According to Inked Magazine, 85% of tattoo artists use stencil transfer solutions for better tattoo outcomes.
- Improved Adhesion: Stencil transfer gels or liquids help the stencil adhere to the skin, preventing it from moving or shifting during the tattooing process.
- Smudge Prevention: These products prevent smudging by creating a barrier between the stencil and the skin, ensuring a clean and accurate transfer.
- Enhanced Clarity: Stencil transfer gels or liquids enhance the clarity of the transferred design, making it easier to follow during the tattooing process.
- Long-Lasting: These products help the stencil last longer, allowing the artist to work on the tattoo for extended periods without worrying about the stencil fading.
- Reduced Errors: By ensuring a clear and stable stencil, these products help reduce errors during the tattooing process.
- Professional Results: Stencil transfer gels or liquids contribute to more professional results by ensuring the tattoo is accurate and well-defined.
- Client Satisfaction: A clear and long-lasting stencil helps ensure the client is happy with the placement and design of the tattoo.
5.2. What Is the Best Application Technique for Stencil Transfer Products?
The best application technique for stencil transfer products involves applying a thin, even layer to clean, dry skin, avoiding excess product to prevent smudging. Position the stencil carefully, press firmly, and allow it to dry completely before tattooing for a clear, long-lasting guide.
- Prepare the Skin: Clean the area with an antibacterial soap and dry it thoroughly.
- Apply a Thin Layer: Apply a thin, even layer of stencil transfer product to the skin.
- Avoid Excess Product: Avoid using too much product, as this can cause smudging and prevent the stencil from adhering properly.
- Position the Stencil: Carefully position the stencil on the skin, ensuring it is aligned with the desired location and orientation.
- Press Firmly: Press the stencil firmly onto the skin, ensuring all lines make contact.
- Remove Carefully: Remove the stencil carefully, ensuring all lines have transferred cleanly to the skin.
- Allow to Dry: Allow the stencil to dry completely before starting the tattoo. This will help prevent smudging and ensure the stencil lasts longer.
6. How Do You Remove a Tattoo Stencil from the Skin?
To remove a tattoo stencil from the skin, if it doesn’t stick, ensure the area is clean and dry with minimal transfer product. For over-adhesion, use a steady hand and isopropyl alcohol to gently remove residue. Always ensure a clean canvas before tattooing to avoid smudges or excess ink uptake.
- When the Stencil Doesn’t Stick: If the stencil doesn’t stick, it may be due to unclean skin or too much transfer product. Ensure the skin is clean and dry, and use the transfer product sparingly.
- Overcoming a Sticky Situation: If the stencil sticks too well, use a steady hand and a small amount of isopropyl alcohol to remove it.
- Ensuring a Clean Canvas: Before tattooing, ensure the skin is clean and free of any leftover stencil residue.
- Gentle Removal: Remove the stencil gently to avoid irritating the skin.
- Using Appropriate Products: Use products specifically designed for removing tattoo stencils to avoid damaging the skin.
- Client Comfort: Prioritize the client’s comfort during the removal process.
- Preparation for Tattooing: Ensure the skin is fully prepared before beginning the tattoo to avoid any complications.
6.1. What Can Cause a Tattoo Stencil to Not Stick Properly?
A tattoo stencil may not stick properly due to unclean skin, excessive transfer product, or improper application technique. Ensuring the skin is clean and dry, using the right amount of transfer product, and applying even pressure can improve stencil adhesion.
- Unclean Skin: The presence of oils, dirt, or debris on the skin can prevent the stencil from adhering properly.
- Excessive Transfer Product: Using too much transfer product can create a barrier between the stencil and the skin, preventing adhesion.
- Improper Application Technique: Applying the stencil unevenly or without enough pressure can result in poor adhesion.
- Dry Skin: Dry skin may not provide enough moisture for the transfer product to bond with the skin.
- Hair: The presence of hair can interfere with stencil adhesion.
- Old Stencil: Using an old or damaged stencil can result in poor adhesion.
- Client Movement: Movement during the stencil application process can disrupt adhesion.
6.2. What Should You Do if a Tattoo Stencil Sticks Too Well?
If a tattoo stencil sticks too well, use a steady hand and a small amount of isopropyl alcohol to gently loosen and remove it, preventing skin irritation. Clean the area thoroughly before proceeding with the tattoo.
- Steady Hand: Use a steady hand to avoid tearing or damaging the skin.
- Isopropyl Alcohol: Apply a small amount of isopropyl alcohol to the edges of the stencil to help loosen it.
- Gentle Removal: Gently peel the stencil away from the skin, starting from one corner.
- Patience: Be patient and avoid pulling or tugging on the stencil.
- Clean the Area: Clean the area thoroughly after removing the stencil to remove any remaining residue.
- Moisturize: Apply a moisturizer to soothe the skin after removing the stencil.
- Wait Before Tattooing: Wait a few minutes before starting the tattoo to allow the skin to recover.
6.3. Why Is It Important to Start with a Clean Canvas Before Tattooing?
Starting with a clean canvas before tattooing is crucial because it minimizes the risk of infection, ensures better ink absorption, and prevents smudging or interference from leftover stencil residue, resulting in a cleaner, more professional tattoo. According to the American Academy of Dermatology, cleaning the skin before tattooing reduces infection risk by 60%.
- Minimizing Infection Risk: Cleaning the skin removes bacteria and other pathogens that can cause infection.
- Ensuring Better Ink Absorption: Clean skin allows the ink to penetrate more effectively, resulting in a more vibrant and long-lasting tattoo.
- Preventing Smudging: Removing leftover stencil residue prevents smudging and ensures a cleaner, more accurate tattoo.
- Promoting Healing: Clean skin promotes faster and more efficient healing.
- Enhancing Client Comfort: Cleaning the skin can enhance the client’s comfort during the tattooing process.
- Demonstrating Professionalism: Starting with a clean canvas demonstrates attention to detail and professionalism.
- Improving Overall Results: A clean canvas contributes to better overall results by ensuring the tattoo is accurate, vibrant, and free from complications.
7. What Advanced Considerations Should Tattoo Artists Keep in Mind?
Advanced considerations for tattoo artists include refining stencil techniques through ongoing practice and feedback, staying updated with industry trends, and mastering stencil placement to match body contours. These practices elevate skill and ensure each tattoo is a personalized masterpiece, blending artistry with technical precision.
- Ongoing Practice: Continuously practice and refine your stencil techniques to improve your skills.
- Seeking Feedback: Solicit feedback from mentors and clients to identify areas for improvement.
- Staying Updated: Stay updated with industry trends and new techniques to enhance your knowledge.
- Mastering Placement: Master stencil placement to match body contours and ensure the tattoo looks its best.
- Personalization: Customize each stencil to reflect the client’s individual preferences and anatomy.
- Attention to Detail: Pay close attention to detail to ensure the stencil is accurate and well-defined.
- Blending Artistry with Technical Precision: Combine your artistic skills with technical precision to create exceptional tattoos.
By mastering these skills and continuously seeking to improve, you can create tattoos that are not only visually stunning but also deeply meaningful for your clients.
Tattooat.com offers a wealth of resources to help you on your journey. Explore our extensive design library, connect with talented artists, and dive into detailed guides to elevate your craft. Discover endless inspiration and knowledge to create tattoos that truly embody the artistry of body art.
8. Frequently Asked Questions (FAQ)
8.1. What is the best way to clean the skin before applying a tattoo stencil?
The best way to clean the skin before applying a tattoo stencil is to use an antibacterial soap and water, followed by shaving the area if necessary, and then wiping it down with a skin-safe antiseptic solution. This process removes dirt, oils, and bacteria, ensuring a clean surface for the stencil to adhere properly.
8.2. How long should a tattoo stencil stay on the skin?
A tattoo stencil should stay on the skin for at least 5-10 minutes after application to allow the design to fully transfer and adhere. Avoid touching or moving the stencil during this time to ensure a clear and accurate transfer.
8.3. What are the signs of a poorly applied tattoo stencil?
Signs of a poorly applied tattoo stencil include smudging, fading, incomplete lines, and misalignment. If any of these issues occur, it’s best to remove the stencil and reapply it to ensure a clear and accurate guide for the tattoo.
8.4. Can I reuse a tattoo stencil?
No, tattoo stencils are designed for single-use only. Reusing a stencil can lead to cross-contamination and increase the risk of infection. Always use a fresh stencil for each tattoo.
8.5. What type of lighting is best for tattooing?
The best type of lighting for tattooing is bright, full-spectrum LED lighting. This provides clear visibility, reduces shadows, and minimizes eye strain, allowing you to see the details of the stencil and the tattoo more accurately.
8.6. How do I prevent a tattoo stencil from smudging during the tattooing process?
To prevent a tattoo stencil from smudging during the tattooing process, apply a thin layer of stencil transfer gel or liquid, allow it to dry completely, and avoid excessive wiping or rubbing of the area while tattooing. Use gentle blotting motions if necessary.
8.7. What should I do if my client doesn’t like the stencil placement after it has been applied?
If your client doesn’t like the stencil placement after it has been applied, remove the stencil gently using isopropyl alcohol and reapply a new stencil in the desired location. Always prioritize client satisfaction and ensure they are happy with the placement before proceeding.
8.8. Is it necessary to use a stencil for all tattoos?
While not always necessary, using a stencil is highly recommended, especially for intricate or complex designs. Stencils provide a clear guide and help ensure accuracy and precision, leading to better overall results.
8.9. What are some alternatives to traditional tattoo stencils?
Alternatives to traditional tattoo stencils include freehand drawing directly on the skin or using digital stencils projected onto the skin with specialized equipment. However, these methods require advanced skill and experience.
8.10. Where can I find high-quality tattoo stencil supplies?
You can find high-quality tattoo stencil supplies at reputable tattoo supply stores or online retailers like tattooat.com, which offers a wide range of stencil papers, transfer gels, and other essential tools for creating flawless tattoos.
Ready to take your tattoo artistry to the next level? Visit tattooat.com now to explore a vast collection of designs, connect with talented artists, and access in-depth guides. Transform your passion into a masterpiece and create tattoos that leave a lasting impression.
Address: 1825 SW Broadway, Portland, OR 97201, United States.
Phone: +1 (503) 725-3000.
Website: tattooat.com.