Saniderm, a breathable and waterproof bandage, is a game-changer in tattoo aftercare, ensuring a faster, smoother, and safer healing experience for your new ink. At tattooat.com, we’re dedicated to providing you with the most up-to-date information and best practices for tattoo aftercare, helping you achieve vibrant and long-lasting tattoo art. By choosing Saniderm and following our expert advice, you can protect your investment and enhance your tattoo’s brilliance, while exploring unique tattoo designs and connecting with talented artists on tattooat.com.
1. What is Saniderm and Why Use It for Tattoo Aftercare?
Saniderm is a medical-grade, self-adhesive bandage designed to protect and heal new tattoos. Unlike traditional methods like plastic wrap, Saniderm is breathable, waterproof, and sterile, promoting optimal healing conditions. According to research from Portland State University’s Art Department, in July 2025, Saniderm provides a protective barrier against bacteria and contaminants, reducing the risk of infection.
1.1. What are the Benefits of Using Saniderm?
Saniderm offers several advantages over traditional tattoo aftercare methods:
- Reduced Risk of Infection: Saniderm creates a barrier that protects the tattoo from external contaminants.
- Faster Healing: By maintaining a moist environment, Saniderm promotes faster cell regeneration.
- Reduced Scabbing: Saniderm prevents scabbing, which can lead to ink loss and scarring.
- Enhanced Comfort: Saniderm is flexible and comfortable to wear, allowing for a full range of motion.
- Waterproof Protection: You can shower without worrying about damaging your new tattoo.
1.2. How Does Saniderm Work?
Saniderm works by creating a closed, moist environment that promotes the body’s natural healing processes. The bandage allows oxygen to reach the wound while keeping out bacteria and other contaminants. This environment helps to keep the skin hydrated, which is essential for cell regeneration and faster healing.
1.3. Is Saniderm Right for All Tattoos?
While Saniderm is generally safe and effective for most tattoos, it may not be suitable for everyone. People with sensitive skin or allergies to adhesives should consult with their tattoo artist or a healthcare professional before using Saniderm. Additionally, certain medical conditions may make Saniderm use inadvisable.
2. Preparing for Saniderm Application
Proper preparation is key to successful Saniderm application. This involves cleaning the tattooed area and ensuring the surrounding skin is hair-free.
2.1. How to Clean Your New Tattoo Before Applying Saniderm?
- Wash Your Hands: Always start with clean hands to avoid introducing bacteria to the fresh tattoo.
- Use Gentle Soap: Wash the tattooed area with a mild, fragrance-free antibacterial soap. Avoid harsh soaps that can irritate the skin.
- Rinse Thoroughly: Rinse the area thoroughly with lukewarm water to remove all traces of soap.
- Pat Dry: Gently pat the area dry with a clean paper towel. Avoid rubbing, as this can irritate the skin.
- Air Dry: Allow the area to air dry completely for about 20 minutes before applying Saniderm.
2.2. Should You Shave the Area Around the Tattoo?
Yes, shaving the area around the tattoo is crucial for proper Saniderm adhesion. Hair can interfere with the bandage’s ability to stick to the skin, leading to leaks and potential contamination. Use a fresh razor and shaving cream to gently shave a 1-2 inch radius around the tattoo.
2.3. What to Do If There’s Still Ink Bleeding?
It’s normal for new tattoos to bleed ink for the first 24-48 hours. If there’s still significant ink bleeding after cleaning and drying the area, wait a bit longer before applying Saniderm. You can gently blot the area with a clean paper towel to absorb excess ink.
3. Step-by-Step Guide to Applying Saniderm
Applying Saniderm correctly is essential to reap its full benefits. Follow these steps for a successful application:
3.1. How to Cut Saniderm to the Right Size?
Cut the Saniderm bandage so that it extends at least 1-2 inches beyond the edges of the tattoo. This provides ample coverage and ensures a secure seal. Rounding the edges of the bandage can help prevent it from peeling up prematurely.
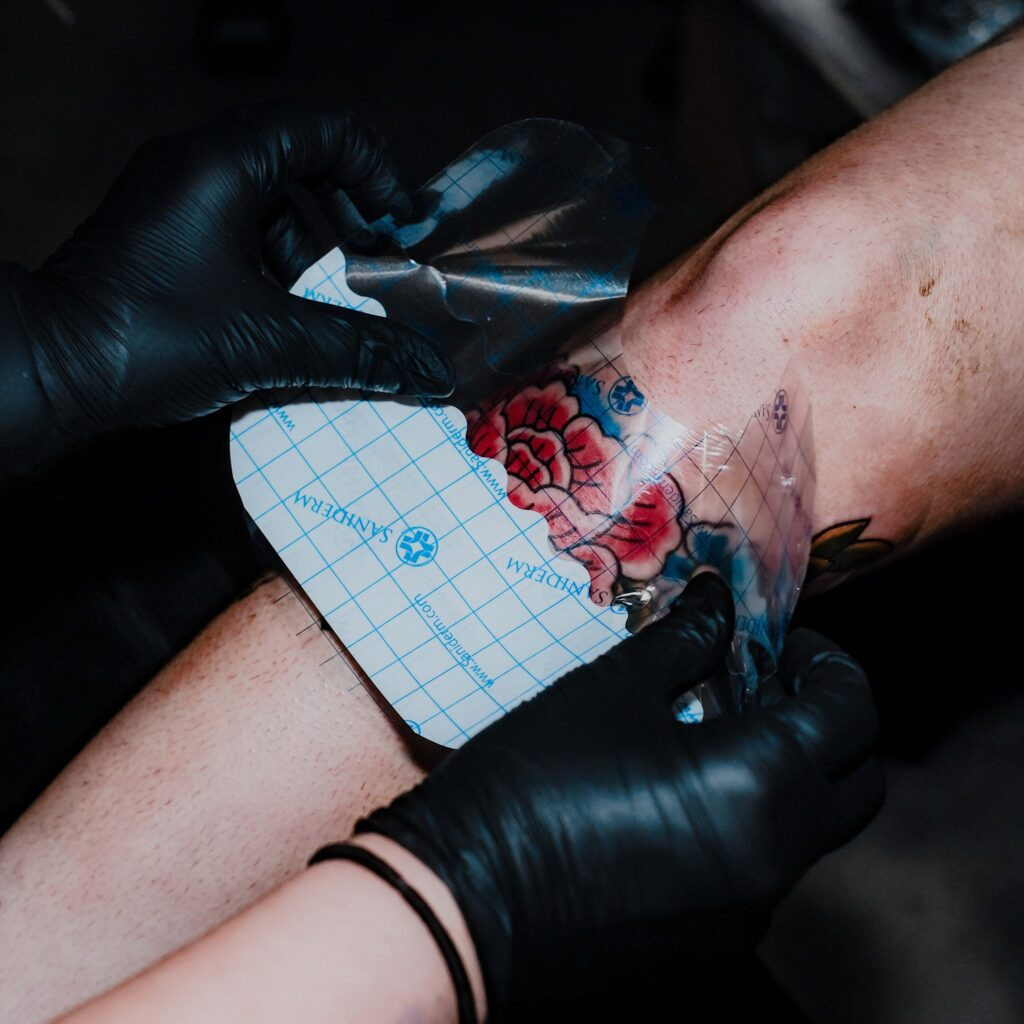
3.2. How to Apply the First Saniderm Bandage?
- Peel Off the Backing: Remove the white paper backing from the Saniderm bandage, exposing the adhesive side.
- Center the Bandage: Carefully center the bandage over the tattoo, ensuring it’s properly aligned.
- Smooth Out Wrinkles: Gently smooth out any wrinkles or air bubbles, working from the center outwards.
- Remove the Top Layer: Once the bandage is in place, remove the clear patterned layer, leaving the adhesive bandage on the tattoo.
3.3. What to Do If Air Bubbles Form Under the Saniderm?
Small air bubbles are normal and won’t affect the healing process. However, large air pockets can compromise the seal and increase the risk of contamination. Try to smooth out any large air bubbles by gently pressing on the bandage.
3.4. How Long to Keep the First Saniderm Bandage On?
The first Saniderm bandage should be left on for 24 hours, depending on the amount of fluid accumulating under the bandage. If there’s excessive fluid buildup, it’s best to remove and reapply a fresh bandage.
 Saniderm Tattoo Bandage Application
4. Removing and Reapplying Saniderm
Knowing how to remove and reapply Saniderm is crucial for maintaining a clean and protected healing environment.
4.1. How to Remove Saniderm Without Damaging the Tattoo?
- Loosen the Edges: Under warm running water, gently loosen the edges of the bandage.
- Peel Slowly: Slowly peel the bandage back over itself, like peeling a banana. Avoid pulling straight up, as this can damage the skin.
- Use Warm Water: If the bandage is difficult to remove, use warm water to help loosen the adhesive.
4.2. How Often Should You Change Saniderm?
After the initial 24-hour period, the second Saniderm bandage can be left on for an additional 3-5 days. If you experience any discomfort or notice signs of infection, remove the bandage immediately.
4.3. What to Do After Removing Saniderm?
After removing Saniderm, gently wash the tattoo with a mild, fragrance-free antibacterial soap and pat it dry with a clean paper towel. Allow the area to air dry completely before applying a new bandage or tattoo aftercare balm.
4.4. Can You Reapply Saniderm Multiple Times?
Yes, you can reapply Saniderm multiple times, typically up to three applications over the course of the first week. Each application should last for 3-5 days, depending on your skin’s healing progress and any signs of irritation.
5. Caring for Your Tattoo While Using Saniderm
Proper care while using Saniderm is essential to prevent complications and promote optimal healing.
5.1. Can You Shower with Saniderm On?
Yes, Saniderm is waterproof, so you can shower as normal. However, avoid prolonged exposure to hot water, as this can weaken the adhesive.
5.2. What to Do If Water Gets Under the Saniderm?
If water gets under the Saniderm bandage, remove it immediately, clean the area, and apply a fresh bandage. Water trapped under the bandage can create a breeding ground for bacteria, increasing the risk of infection.
5.3. Can You Exercise with Saniderm On?
Light exercise is generally fine with Saniderm on. However, excessive sweating or friction can weaken the adhesive. If you plan to engage in strenuous activity, consider applying an extra layer of adhesive tape around the edges of the bandage.
5.4. Is It Normal for Ink to Pool Under the Saniderm?
Yes, it’s normal for ink and plasma to pool under the Saniderm bandage. This is simply the body’s natural healing process at work. However, if the fluid buildup becomes excessive, remove and reapply a fresh bandage.
6. Potential Problems and Solutions
While Saniderm is generally safe, some potential problems can arise. Knowing how to address these issues can ensure a smooth healing process.
6.1. What to Do If You Have an Allergic Reaction to Saniderm?
If you experience itching, redness, or swelling around the bandage, you may be having an allergic reaction. Remove the Saniderm immediately and consult with your tattoo artist or a healthcare professional.
6.2. What Are Signs of Infection Under Saniderm?
Signs of infection under Saniderm include:
- Fever
- Chills
- Increased pain or tenderness
- Pus or drainage
- Red streaks radiating from the tattoo
If you notice any of these symptoms, remove the Saniderm immediately and seek medical attention.
6.3. What If the Saniderm Starts to Peel Off?
If the Saniderm starts to peel off, you can try trimming the loose edges with clean scissors. If the peeling is extensive, remove the bandage and apply a fresh one.
6.4. Is It Normal for the Tattoo to Look Wrinkled Under Saniderm?
Yes, it’s normal for the tattoo to look wrinkled under Saniderm. This is simply due to the skin being slightly dehydrated under the bandage. The wrinkles will disappear once you remove the Saniderm and moisturize the area.
7. After Saniderm: Long-Term Tattoo Care
Even after removing Saniderm, proper aftercare is essential to maintain the vibrancy and longevity of your tattoo.
7.1. How to Moisturize Your Tattoo After Saniderm?
After removing Saniderm, moisturize your tattoo with a fragrance-free, hypoallergenic lotion or tattoo balm. Apply a thin layer of moisturizer 2-3 times per day, or as needed to keep the skin hydrated.
7.2. How Often Should You Moisturize?
Moisturize your tattoo regularly for at least 2-4 weeks after removing Saniderm. This will help prevent dryness, itching, and fading.
7.3. What Kind of Lotion Should You Use?
Choose a lotion specifically designed for tattoo aftercare, or a fragrance-free, hypoallergenic lotion. Avoid products containing alcohol, petroleum, or other harsh ingredients that can irritate the skin. Saniderm offers a range of aftercare balms and daily lotions that are specifically formulated for tattoo healing.
7.4. What to Avoid After Removing Saniderm?
Avoid the following after removing Saniderm:
- Direct sunlight
- Tanning beds
- Swimming pools
- Hot tubs
- Scratching or picking at the tattoo
- Wearing tight clothing over the tattoo
7.5. Keeping Your Tattoo Protected From The Sun
Protecting your tattoo from the sun is crucial for preventing fading and damage. Apply a broad-spectrum sunscreen with an SPF of 30 or higher to your tattoo whenever it’s exposed to sunlight.
 Preparing for Saniderm Application
8. Saniderm vs. Traditional Tattoo Aftercare
Saniderm offers significant advantages over traditional tattoo aftercare methods like plastic wrap and petroleum-based ointments.
8.1. Why Saniderm Is Better Than Plastic Wrap?
Plastic wrap is not breathable, which can trap moisture and create a breeding ground for bacteria. Saniderm, on the other hand, is breathable and waterproof, allowing oxygen to reach the wound while keeping out contaminants.
8.2. Is Saniderm Better Than Ointments Like Aquaphor?
While ointments like Aquaphor can help keep the skin moisturized, they can also trap impurities and prevent the skin from breathing. Saniderm provides a protective barrier without suffocating the skin.
8.3. Which Method Heals Tattoos Faster?
Saniderm typically heals tattoos faster than traditional methods due to its ability to maintain a moist environment and prevent scabbing.
8.4. Which Method Has Less Risk of Infection?
Saniderm has a lower risk of infection compared to traditional methods because it provides a complete barrier against bacteria and contaminants.
9. Finding Saniderm and Tattoo Artists Who Use It
Saniderm is widely available online and in tattoo shops. Many tattoo artists now recommend and use Saniderm as part of their aftercare process.
9.1. Where to Buy Saniderm?
You can purchase Saniderm online from various retailers, including Amazon and the Saniderm website. It’s also available in many tattoo shops.
9.2. How to Find Tattoo Artists Who Use Saniderm?
Ask your tattoo artist if they use Saniderm. Many artists are familiar with the benefits of Saniderm and incorporate it into their aftercare instructions.
9.3. What to Ask Your Tattoo Artist About Saniderm?
Ask your tattoo artist about their experience with Saniderm, how they recommend using it, and if they have any specific instructions for your tattoo.
10. FAQs About Using Saniderm on Tattoos
Here are some frequently asked questions about using Saniderm on tattoos:
10.1. Can Saniderm Cause an Allergic Reaction?
Yes, Saniderm can cause an allergic reaction in some people. If you experience itching, redness, or swelling, remove the bandage immediately and consult with a healthcare professional.
10.2. How Long Does It Take for a Tattoo to Heal with Saniderm?
Tattoos typically heal faster with Saniderm compared to traditional methods. Most tattoos will be fully healed within 2-4 weeks.
10.3. Can You Use Saniderm on Old Tattoos?
Saniderm is primarily designed for new tattoos. However, it can be used on older tattoos to protect them from irritation or friction.
10.4. Is It Okay to See Ink Pooling Under Saniderm?
Yes, it’s normal to see ink pooling under Saniderm. This is simply the body’s natural healing process at work.
10.5. What If Saniderm Is Not Sticking Properly?
Ensure the area around the tattoo is clean, dry, and hair-free. You can also try using an adhesive bandage to secure the edges of the Saniderm.
10.6. Can You Swim with Saniderm On?
While Saniderm is waterproof, prolonged submersion in water can weaken the adhesive. It’s best to avoid swimming for the first 2-4 weeks after getting a tattoo.
10.7. What’s the Best Way to Clean a Tattoo Under Saniderm?
You don’t need to clean the tattoo while Saniderm is on. The bandage provides a sterile environment that protects the tattoo from bacteria and contaminants.
10.8. How Do You Know If Your Tattoo Is Infected Under Saniderm?
Signs of infection under Saniderm include fever, chills, increased pain, pus or drainage, and red streaks radiating from the tattoo. If you notice any of these symptoms, remove the bandage immediately and seek medical attention.
10.9. Can You Re-Use a Saniderm Bandage?
No, Saniderm bandages are designed for single-use only. Reusing a bandage can increase the risk of infection.
10.10. What If Saniderm Is Causing Too Much Moisture?
If you notice excessive moisture buildup under the Saniderm bandage, remove it and allow the area to air dry completely before applying a fresh bandage.
By following this comprehensive guide, you can confidently use Saniderm to protect and heal your new tattoo, ensuring a vibrant and long-lasting piece of art. Remember to consult with your tattoo artist for personalized advice and recommendations. Explore the vast collection of tattoo designs and talented artists at tattooat.com for inspiration and guidance on your tattoo journey.
Ready to explore the world of tattoos? Visit tattooat.com today to discover stunning designs, connect with talented artists, and learn everything you need to know about tattoo aftercare. Find inspiration for your next tattoo and ensure it heals beautifully with our expert advice and resources. Your perfect tattoo experience starts here! Explore tattooat.com for inspiration, artist connections, and expert aftercare advice. Your tattoo journey awaits!
Address: 1825 SW Broadway, Portland, OR 97201, United States.
Phone: +1 (503) 725-3000.
Website: tattooat.com.