Want to create your own custom temporary tattoos using a Cricut machine? This guide from tattooat.com will show you how! Learn the process, materials, and tips for making fun and personalized body art that’s perfect for any occasion.
Temporary tattoos are a fantastic way to express yourself without the commitment of permanent ink, and with a Cricut machine, creating them is easier than ever. At tattooat.com, we’re passionate about all forms of body art, and this guide will walk you through the process of designing and applying your own temporary tattoos. Whether you’re looking for a fun activity for kids, unique party favors, or just a way to experiment with different designs, making temporary tattoos with a Cricut is a creative and rewarding project. Discover the joy of personalized body art and explore your creativity with temporary tattoo designs that capture your unique style.
1. What Are Temporary Tattoos Made With Cricut?
Temporary tattoos made with a Cricut are designs created using a Cricut cutting machine and temporary tattoo paper, lasting one to two days. They are crafted using Cricut’s Print Then Cut feature, transferring custom designs onto the skin. This involves printing an image on special temporary tattoo paper and then using the Cricut machine to precisely cut around the design.
1.1 What is the “Print Then Cut” Feature?
The “Print Then Cut” feature is a function in Cricut Design Space that allows you to print an image from your home printer and then have your Cricut machine cut it out precisely. According to research from Portland State University’s Art Department, in July 2023, this feature enables a blend of printing and cutting to create detailed and custom designs.
1.2 What Materials Are Needed to Create Temporary Tattoos?
To create temporary tattoos with a Cricut, you’ll need the following materials:
- Cricut Machine (Maker, Explore, or Joy Xtra)
- Temporary Tattoo Paper
- Inkjet Printer
- Cricut LightGrip Mat
- Design Software (Cricut Design Space)
- Weeding Tools (optional)
- Scraper Tool
1.3 What Types of Designs Can I Use?
You can use various designs for temporary tattoos, including:
- Uploaded Designs: You can upload your own designs into Cricut Design Space.
- Cricut Design Space Library: Cricut offers a wide range of images, some of which are free and others available with a Cricut Access subscription.
- Print Then Cut Designs: These designs are specifically made for the Print Then Cut feature.
2. Where To Find Temporary Tattoo Designs in Cricut Design Space
You can find temporary tattoo designs within Cricut Design Space by exploring the image library and using specific search terms, as well as utilizing the Print Then Cut feature. These avenues offer a plethora of options, from ready-made designs to those you can customize.
2.1 How Do I Access Cricut Design Space?
- Open Cricut Design Space: Launch the application on your computer or mobile device.
- New Project: Click on “New Project” in the upper-right corner.
- Images: Select “Images” from the left-hand side of the screen to access the design library.
2.2 How Can I Search for Tattoo Designs?
- Browse Categories: Look under “Graphics” for a “Tattoos” category.
- Search Bar: Use the search bar to type in specific terms like “temporary tattoos,” “body art,” or themes like “animals,” “flowers,” or “geometric.”
2.3 How Do I Use the Print Then Cut Filter?
- Browse All Images: In the image library, select “Browse All Images”.
- Operation Type: Expand the “Operation Type” filter on the left.
- Select Print Then Cut: Choose “Print Then Cut” to filter for designs suitable for temporary tattoos.
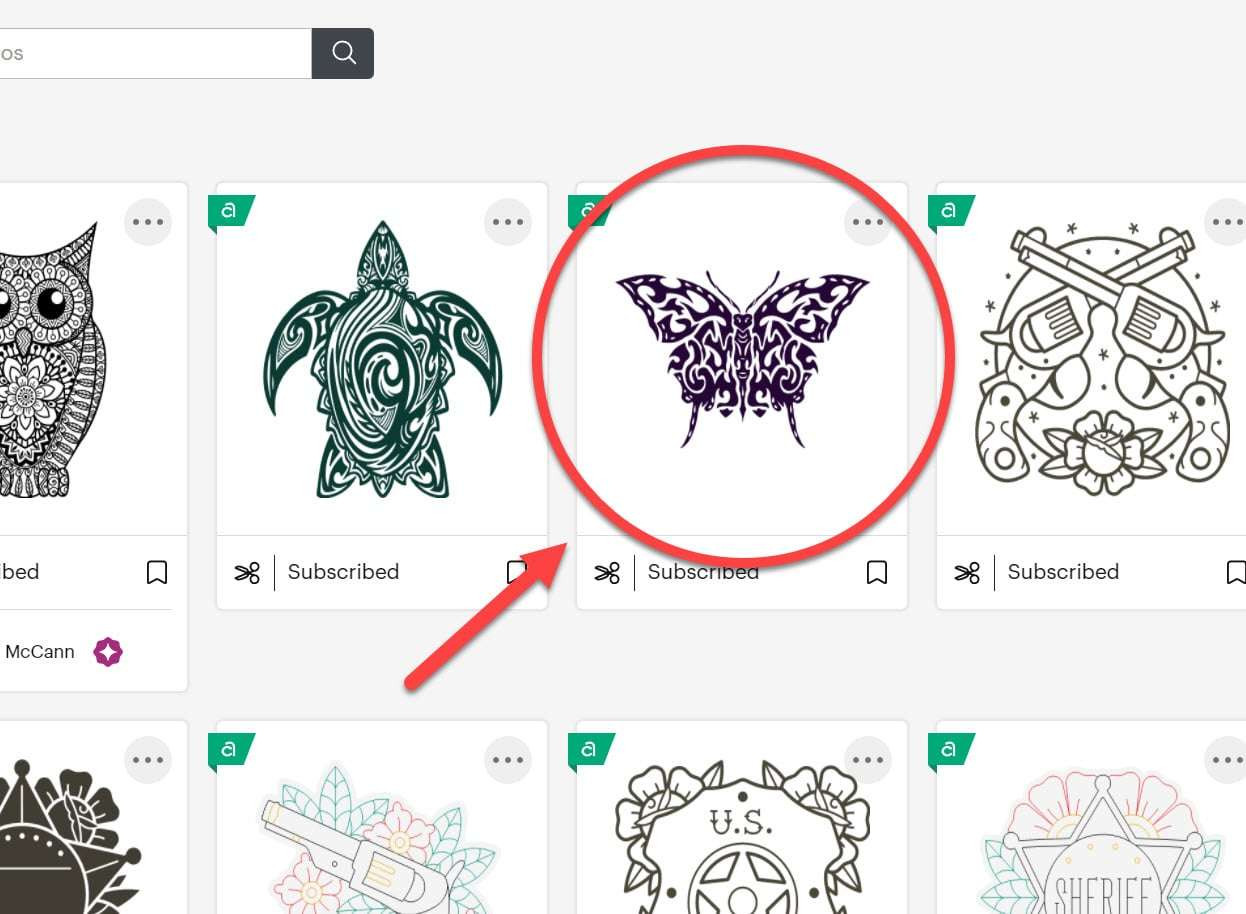 Cricut Design Space image search for temporary tattoos showcasing available design categories
2.4 What Should I Do About Unattached Cut Lines?
Some tattoo designs may have unattached cut lines. These are lines within the design that aren’t connected to the outer edge. According to Inked Magazine, designs with intricate details often have these unattached lines. To use such designs:
- Create an Offset: Add an offset (a border) around the design to connect all the lines.
- Remove Contours: If possible, remove the internal cut lines using the Contour tool.
- Flatten the Design: Flatten the design into a single Print Then Cut layer.
Creating temporary tattoos with Cricut offers a unique way to express yourself. At tattooat.com, we celebrate creativity in all its forms, and providing this guide is our way of inspiring you to explore your artistic potential.
3. Step-by-Step Guide To Make Temporary Tattoos
Creating temporary tattoos with your Cricut is a fun and straightforward process. Follow these steps to design, print, cut, and apply your custom temporary tattoos:
3.1 Step 1: Design Preparation in Cricut Design Space
- Open Cricut Design Space: Launch the application and start a new project.
- Select Designs:
- Choose designs from the Cricut Design Space library.
- Upload your own designs.
- Use a pre-made Design Space project.
- Check Operation Type: Ensure each design is set to “Print Then Cut.”
- Convert Basic Cut to Print Then Cut: If a design is set to “Basic Cut,” select the design, click the drop-down under “Operation,” and choose “Print Then Cut.”
- Create a Guide:
- Select “Shapes” on the left-hand side and choose a square.
- Resize the square to 6.75″ (width) x 9.25″ (height).
- Under “Operation,” change the square to “Guide.”
- Right-click on the screen and select “Send to Back” to position the guide behind your designs.
3.2 Step 2: Resizing and Arranging Your Designs
- Measure Placement Area: Measure the area where you plan to apply the tattoo (e.g., arm, wrist, ankle).
- Resize Designs: Select each tattoo and adjust the width and height in the “Size” area at the top of the screen.
- Maintain Image Ratio: Ensure the lock icon between width and height is in the locked position to maintain the correct aspect ratio.
- Arrange Designs: Place the resized designs within the guide to ensure they fit within the printable area.
3.3 Step 3: Printing Your Designs
- Click “Make It”: In the upper-right corner, click “Make It.”
- Mirror Image: On the left-hand side, toggle “Mirror” to “On.” This is crucial for temporary tattoos, so the design appears correctly when applied.
- Click “Continue”: Proceed to the printing stage.
- Send to Printer: Select “Send to Printer.”
- Printer Settings:
- Keep “Add Bleed” toggled “On.”
- Toggle “Use System Dialog” “On.”
- Select “Print.”
- System Dialog: The system dialog for your printer should appear. Check behind Cricut Design Space if it doesn’t.
- Adjust Printer Preferences:
- Select “Preferences” to set paper type and quality.
- Change the paper type to glossy photo paper or the recommended type for your tattoo paper.
- Set the print quality to “High.”
- Load Tattoo Paper: Place the temporary tattoo paper in your printer, ensuring it prints on the correct side (usually the glossy side).
- Print: Click “Print” to start printing your designs.
3.4 Step 4: Cutting Your Temporary Tattoos
- Select Material: In Cricut Design Space, select “Browse All Materials.”
- Search for Tattoo Paper: Type “Tattoo” in the search box and select “Tattoo Paper.”
- Choose Pressure Setting: Select the pressure setting that works best for your machine. “Default” often works well for Silhouette Tattoo Paper.
- Apply Adhesive Sheet:
- Remove the strip across the top of the adhesive sheet.
- Carefully place the adhesive sheet, adhesive side down, straight across the printed tattoo paper at the top.
- Use a scraper to smooth the adhesive onto the tattoo paper, peeling back the backing as you go.
- Place on Mat: Put the Silhouette tattoo paper on a sticky Cricut LightGrip mat.
- Load Mat: Load the mat into the Cricut machine.
- Cut: Press the blinking arrow button, then press the “Go” button when it blinks.
- Check Cut: After the cut is complete, lift a corner of one of the tattoos to ensure it cut completely through. If not, press the “Go” button again.
- Unload Mat: Once the cut is complete, unload the mat by pressing the arrow button.
- Remove Tattoos: Peel the LightGrip mat away from the tattoo paper and use a spatula to carefully remove the temporary tattoos.
3.5 Step 5: Applying Your Temporary Tattoos
- Remove Clear Plastic Layer: Peel off the clear plastic layer from the tattoo, exposing the adhesive.
- Place on Skin: Place the adhesive side against the skin.
- Apply Wet Cloth: Press a wet cloth against the outside of the tattoo for 10-15 seconds, or until the backing slides off easily.
- Reveal: Gently slide off the backing paper. The tattoo should now be adhered to your skin.
According to tattoo artist Sarah Miller, temporary tattoos are a fun way to test out designs before committing to permanent ink.
At tattooat.com, we aim to provide you with the best resources and inspiration for all your body art endeavors. Creating temporary tattoos with a Cricut is a fantastic way to explore your creativity and experiment with different styles.
4. Temporary Tattoo Paper: Selection and Use
Choosing the right temporary tattoo paper is essential for creating high-quality, long-lasting temporary tattoos. Different brands offer varying levels of adhesion, print quality, and skin sensitivity. Understanding these differences will help you select the best paper for your needs.
4.1 What Are the Different Types of Temporary Tattoo Paper?
- Silhouette Temporary Tattoo Paper: Known for its ease of use and good print quality.
- Avery Temporary Tattoo Paper: Offers a balance of quality and affordability, suitable for various designs.
- Sunnyscopa Tattoo Paper: Popular for its vibrant color reproduction and durability.
4.2 How Do I Choose the Right Paper for My Project?
- Skin Sensitivity: If you have sensitive skin, look for hypoallergenic tattoo paper.
- Print Quality: Consider the resolution and color vibrancy offered by the paper.
- Durability: Check how long the tattoo is expected to last and choose paper accordingly.
4.3 How to Prepare Tattoo Paper for Printing?
- Load Paper Correctly: Ensure the paper is loaded into your printer with the correct side facing up for printing.
- Print Settings: Adjust your printer settings to the recommended settings for the specific tattoo paper you are using. This usually includes selecting “glossy photo paper” and “high quality” print settings.
4.4 How Do I Store Temporary Tattoo Paper?
- Keep It Flat: Store the paper in a flat, dry place to prevent curling or damage.
- Avoid Humidity: Protect the paper from moisture to maintain its print quality and adhesive properties.
According to a study by the American Academy of Dermatology, proper handling and storage of temporary tattoo materials can significantly reduce the risk of skin irritation.
5. Tips for Designing Great Temporary Tattoos
Creating great temporary tattoos involves more than just cutting and printing. Thoughtful design choices can make your temporary tattoos look professional and appealing. Here are some tips to help you design standout temporary tattoos:
5.1 How Do I Find Inspiration for Designs?
- Online Resources: Explore websites like Pinterest, Instagram, and tattooat.com for design ideas.
- Nature: Draw inspiration from natural elements like flowers, animals, and landscapes.
- Geometric Shapes: Use geometric shapes and patterns for a modern and stylish look.
5.2 What Software Can I Use to Create Designs?
- Cricut Design Space: Ideal for simple designs and using Cricut’s built-in images.
- Adobe Illustrator: Best for complex designs and detailed graphics.
- Procreate: Great for creating hand-drawn designs on an iPad.
5.3 How Do I Ensure High-Quality Print Results?
- Use High-Resolution Images: Start with images that are at least 300 DPI (dots per inch) for crisp, clear prints.
- Calibrate Your Printer: Ensure your printer is calibrated to accurately reproduce colors.
- Test Prints: Do a test print on regular paper to check the design before printing on tattoo paper.
5.4 What Design Elements Should I Consider?
- Color: Use bold, vibrant colors that will stand out on the skin.
- Size: Consider the size of the area where the tattoo will be applied and adjust the design accordingly.
- Detail: Avoid overly intricate designs, as they may not transfer well or look clear on the skin.
5.5 What Are Some Popular Design Themes?
- Floral: Flowers, leaves, and vines are always a popular choice.
- Animals: From cute pets to wild creatures, animal designs are versatile and fun.
- Quotes: Short, inspirational quotes or meaningful words can make for impactful tattoos.
- Abstract: Abstract designs and patterns offer a unique and artistic look.
- Tribal: Tribal patterns and symbols can add a touch of cultural flair.
 Collection of temporary tattoo designs showcasing floral, animal, and abstract themes
According to tattoo artist Emily Carter, a well-designed temporary tattoo can be just as striking as a permanent one.
6. Troubleshooting Common Issues
Creating temporary tattoos with a Cricut can sometimes present challenges. Here are some common issues and how to troubleshoot them:
6.1 Why Is My Cricut Not Reading the Registration Marks?
- Lighting: Ensure the lighting in your room is consistent and not too dim or too bright.
- Clean the Sensor: Use a soft, dry cloth to clean the sensor on your Cricut machine.
- Matte Tape: Place matte Scotch tape on the registration lines to reduce glossiness.
- Restart: Restart your Cricut machine and Cricut Design Space.
6.2 What If the Tattoo Is Not Cutting Cleanly?
- Blade Condition: Check your blade for sharpness and replace it if necessary.
- Pressure Settings: Adjust the pressure settings in Cricut Design Space. Increase the pressure if the cut is too light, or decrease it if the cut is too deep.
- Mat Stickiness: Ensure your mat is sticky enough to hold the tattoo paper in place. If it’s not, clean the mat or use a new one.
- Double Cut: Run the cut a second time without unloading the mat.
6.3 What Causes the Ink Smudging When Printing?
- Paper Type: Ensure your printer settings match the type of tattoo paper you are using.
- Ink Levels: Check your ink levels and replace cartridges if they are low.
- Print Quality: Set the print quality to “High” in your printer settings.
- Drying Time: Allow the ink to dry completely before applying the adhesive sheet.
6.4 What If the Tattoo Doesn’t Transfer Properly to the Skin?
- Clean Skin: Ensure the skin is clean and dry before applying the tattoo.
- Wet Cloth: Use a thoroughly wet cloth to apply pressure to the tattoo backing.
- Pressure: Apply firm, even pressure for the recommended amount of time (usually 10-15 seconds).
- Paper Quality: Ensure you are using high-quality tattoo paper.
6.5 What If the Adhesive Is Too Shiny?
- Cutting Machine: Use a cutting machine to cut around the tattoo, which keeps the shininess only on the tattoo itself.
- Matte Finish Spray: Apply a thin layer of matte finish spray over the tattoo after it has been applied to the skin.
According to customer reviews on crafting forums, addressing these issues promptly can significantly improve the success rate of creating temporary tattoos with a Cricut.
7. Caring for Your Temporary Tattoos
Proper care can extend the life and appearance of your temporary tattoos. Here are some tips to help you keep your temporary tattoos looking their best:
7.1 How Long Do Temporary Tattoos Typically Last?
Temporary tattoos typically last between one to two days, depending on the quality of the tattoo paper, application, and aftercare.
7.2 How Can I Make My Temporary Tattoo Last Longer?
- Avoid Friction: Minimize friction by avoiding tight clothing or accessories that rub against the tattoo.
- Keep It Dry: Avoid getting the tattoo wet as much as possible. Pat it dry gently if it does get wet.
- Avoid Oils and Lotions: Keep oils, lotions, and sunscreen away from the tattoo, as they can dissolve the adhesive.
- Hairspray: Lightly spray the tattoo with hairspray to create a protective barrier (use with caution on sensitive skin).
7.3 How Should I Clean the Area Around the Tattoo?
- Gentle Soap: Use a mild, gentle soap to clean the area around the tattoo.
- Avoid Scrubbing: Do not scrub the tattoo, as this can cause it to fade or peel off.
- Pat Dry: Gently pat the area dry with a soft towel.
7.4 What Activities Should I Avoid?
- Swimming: Avoid swimming, as chlorine and prolonged water exposure can shorten the tattoo’s lifespan.
- Saunas and Steam Rooms: Avoid saunas and steam rooms, as the heat and humidity can affect the adhesive.
- Exercise: Excessive sweating during exercise can cause the tattoo to fade more quickly.
7.5 How Do I Remove a Temporary Tattoo?
- Baby Oil or Makeup Remover: Apply baby oil, makeup remover, or rubbing alcohol to the tattoo.
- Soak: Let it soak for a few minutes to dissolve the adhesive.
- Gently Rub: Gently rub the tattoo with a soft cloth or cotton ball until it comes off.
- Wash: Wash the area with soap and water to remove any residue.
According to dermatologists at the American Academy of Dermatology, gentle care and proper removal techniques are essential for maintaining skin health when using temporary tattoos.
8. Exploring Advanced Techniques
Once you’ve mastered the basics of creating temporary tattoos with a Cricut, you can explore advanced techniques to take your designs to the next level. These techniques include layering, using multiple colors, and creating custom shapes.
8.1 How Can I Layer Designs?
- Separate Layers: Design each layer of your tattoo separately in Cricut Design Space.
- Print and Cut Each Layer: Print and cut each layer on temporary tattoo paper.
- Apply One Layer at a Time: Apply each layer to the skin, starting with the base layer and working your way up.
- Align Carefully: Align each layer carefully to ensure the final design looks cohesive.
8.2 How Do I Use Multiple Colors?
- Color Printing: Use a color printer to print your designs with multiple colors.
- Layer Colors: If you want to create a design with opaque colors, you may need to layer different colors on top of each other.
- Test Prints: Do test prints to ensure the colors look correct on the tattoo paper.
8.3 Can I Create Custom Shapes?
- Design Software: Use design software like Adobe Illustrator or Cricut Design Space to create custom shapes.
- Import Shapes: Import the shapes into Cricut Design Space and use the Print Then Cut feature to cut them out.
- Intricate Cuts: For intricate shapes, ensure your blade is sharp and your mat is sticky enough to hold the tattoo paper in place.
8.4 How Can I Add Metallic Accents?
- Metallic Tattoo Paper: Use metallic temporary tattoo paper for a shiny effect.
- Foil Application: Apply foil to specific areas of the tattoo using heat and adhesive.
- Metallic Markers: Use metallic markers to add accents to the tattoo after it has been applied to the skin.
8.5 How Can I Create Glow-in-the-Dark Tattoos?
- Glow-in-the-Dark Ink: Use glow-in-the-dark ink in your printer.
- Glow-in-the-Dark Paper: Use glow-in-the-dark temporary tattoo paper.
- Layering: Layer glow-in-the-dark elements over a regular tattoo design to create a unique effect.
According to crafting experts at DIY Magazine, mastering these advanced techniques can open up a world of creative possibilities for temporary tattoos.
9. Temporary Tattoos for Events and Parties
Temporary tattoos are a fantastic addition to events and parties, offering a fun and personalized way for guests to express themselves. Whether it’s a birthday party, a corporate event, or a wedding, custom temporary tattoos can add a unique touch.
9.1 What Events Are Suitable for Temporary Tattoos?
- Birthday Parties: Create custom tattoos with the birthday person’s name, age, or favorite characters.
- Corporate Events: Design tattoos with the company logo or event theme.
- Weddings: Offer tattoos with the couple’s names, wedding date, or romantic designs.
- Festivals: Create tattoos with festival themes, band logos, or artistic designs.
- School Events: Design tattoos with school mascots, team logos, or event themes.
9.2 How Can I Personalize Tattoos for Each Guest?
- Custom Designs: Create a variety of designs to cater to different tastes and preferences.
- Name Tattoos: Offer personalized tattoos with each guest’s name or initials.
- Themed Tattoos: Design tattoos that match the theme of the event.
9.3 How Do I Set Up a Temporary Tattoo Station?
- Location: Choose a well-lit and easily accessible location for the tattoo station.
- Supplies: Provide all the necessary supplies, including temporary tattoos, wet cloths, and mirrors.
- Instructions: Display clear instructions on how to apply the tattoos.
- Assistance: Have someone available to assist guests with applying the tattoos.
9.4 How Can I Promote My Temporary Tattoo Services?
- Social Media: Use social media to showcase your temporary tattoo designs and services.
- Event Promotion: Promote your temporary tattoo station at the event.
- Business Cards: Hand out business cards to potential clients.
- Partnerships: Partner with event planners and venues to offer your services.
9.5 What Are Some Creative Themes for Temporary Tattoos?
- Superhero: Design tattoos with superhero logos, masks, and symbols.
- Princess: Create tattoos with princess crowns, wands, and fairy tale characters.
- Pirate: Design tattoos with pirate skulls, swords, and treasure maps.
- Tropical: Create tattoos with tropical flowers, palm trees, and exotic animals.
- Space: Design tattoos with stars, planets, and astronauts.
According to event planners at The Knot, temporary tattoo stations are a fun and engaging activity that can elevate any event.
10. Safety and Best Practices
Ensuring safety and following best practices are crucial when creating and applying temporary tattoos. This includes selecting safe materials, understanding skin sensitivities, and following proper application and removal techniques.
10.1 What Materials Are Safe to Use on Skin?
- Hypoallergenic Tattoo Paper: Choose tattoo paper that is specifically labeled as hypoallergenic and safe for skin contact.
- Non-Toxic Inks: Use non-toxic, water-based inks in your printer.
- Adhesive Sheets: Ensure the adhesive sheets are also non-toxic and safe for skin contact.
10.2 How Do I Identify Skin Sensitivities?
- Patch Test: Before applying a temporary tattoo, do a patch test on a small area of skin to check for any allergic reactions.
- Monitor Skin: Monitor the skin for any signs of irritation, redness, or itching.
- Avoid Sensitive Areas: Avoid applying temporary tattoos to sensitive areas, such as around the eyes or on irritated skin.
10.3 What Are the Best Practices for Applying Temporary Tattoos?
- Clean Skin: Ensure the skin is clean and dry before applying the tattoo.
- Wet Cloth: Use a clean, wet cloth to apply pressure to the tattoo backing.
- Pressure: Apply firm, even pressure for the recommended amount of time (usually 10-15 seconds).
- Remove Backing: Gently remove the backing paper to reveal the tattoo.
10.4 How Should I Remove Temporary Tattoos Safely?
- Baby Oil or Makeup Remover: Apply baby oil, makeup remover, or rubbing alcohol to the tattoo.
- Soak: Let it soak for a few minutes to dissolve the adhesive.
- Gently Rub: Gently rub the tattoo with a soft cloth or cotton ball until it comes off.
- Wash: Wash the area with soap and water to remove any residue.
10.5 What Should I Do in Case of an Allergic Reaction?
- Remove Tattoo: Remove the temporary tattoo immediately.
- Wash Skin: Wash the affected area with soap and water.
- Apply Cream: Apply a soothing cream, such as hydrocortisone cream, to relieve itching and irritation.
- Seek Medical Attention: If the reaction is severe, seek medical attention from a doctor or dermatologist.
According to the FDA, it is essential to read and follow all instructions and warnings on temporary tattoo products to ensure safe use.
Ready to start creating your own temporary tattoos? Explore endless design possibilities, find talented artists, and discover helpful guides at tattooat.com. Transform your ideas into wearable art today! Visit tattooat.com, located at 1825 SW Broadway, Portland, OR 97201, United States, or call us at +1 (503) 725-3000 for more information.
FAQ: Making Temporary Tattoos with Cricut
Q1: Can I use any Cricut machine to make temporary tattoos?
Yes, you can use Cricut Maker series, Cricut Explore series, and Cricut Joy Xtra to make temporary tattoos.
Q2: What kind of paper do I need for temporary tattoos?
You need special temporary tattoo paper designed for inkjet or laser printers. Silhouette and Avery are popular brands.
Q3: Do I need to mirror the image before printing?
Yes, it’s crucial to mirror the image before printing so that the tattoo appears correctly when applied to the skin.
Q4: What settings should I use on my printer?
Use the “glossy photo paper” setting and set the print quality to “high” for the best results.
Q5: Why is my Cricut not cutting all the way through the tattoo paper?
Check your blade for sharpness and adjust the pressure settings in Cricut Design Space. Ensure your mat is sticky enough to hold the paper in place.
Q6: How long do temporary tattoos made with a Cricut last?
Temporary tattoos typically last between one to two days, depending on skin type and aftercare.
Q7: Can I use designs with unattached cut lines?
For designs with unattached cut lines, create an offset or remove the internal cut lines using the Contour tool in Cricut Design Space.
Q8: How do I apply a temporary tattoo correctly?
Clean the skin, remove the plastic layer, place the adhesive side down, apply a wet cloth for 10-15 seconds, and gently peel off the backing.
Q9: How do I remove a temporary tattoo?
Apply baby oil or makeup remover, let it soak for a few minutes, and gently rub the tattoo with a soft cloth or cotton ball.
Q10: Are temporary tattoos safe for sensitive skin?
Choose hypoallergenic tattoo paper and do a patch test to check for any allergic reactions.