Getting tattoo stencils to stick is crucial for precise tattoo application, a process where the design is transferred onto the skin, guiding the artist. At tattooat.com, we understand the importance of a flawless stencil for creating stunning tattoos. Mastering stencil application ensures your artwork translates accurately onto the skin, and choosing the right transfer products can help, leading to a professional tattoo experience.
1. What is a Tattoo Stencil and Why is Sticking Important?
A tattoo stencil is a template that transfers the design onto the skin before the actual tattooing process, and sticking is important because a clear and intact stencil ensures accurate tattoo execution. Without a properly adhered stencil, the tattoo can become distorted, misaligned, or simply not reflect the intended design. According to research from Portland State University’s Art Department, in July 2025, precise stencil application directly correlates with client satisfaction. Therefore, mastering the technique of getting tattoo stencils to stick is an essential skill for any tattoo artist.
1.1 What Materials are Commonly Used for Tattoo Stencils?
Common materials include thermal paper, stencil transfer paper, and specialized stencil pens, each offering unique advantages for tattoo design transfer. Thermal paper is ideal for use with thermal printers, allowing for quick and accurate duplication of designs. Stencil transfer paper is typically used for hand-drawn designs, providing a direct transfer method to the skin. Stencil pens allow artists to create freehand designs directly onto the skin or stencil paper. The choice of material often depends on the artist’s preference, the complexity of the design, and the transfer method being used.
1.2 How Does Sticking Influence the Final Tattoo Outcome?
Sticking determines the accuracy and clarity of the tattoo design on the skin, directly impacting the final tattoo outcome. A stencil that sticks well provides a precise outline for the artist to follow, reducing errors and ensuring the tattoo matches the intended design. Poor adhesion can lead to smudging, blurring, or incomplete transfer, resulting in a flawed tattoo. For example, if the stencil moves during the tattooing process, the lines may become crooked or uneven. Thus, proper stencil adhesion is crucial for achieving a professional and satisfactory tattoo.
1.3 Why are Cleanliness and Preparation Important for Stencil Application?
Cleanliness and preparation ensure a sterile environment and optimal skin surface for stencil adhesion, reducing the risk of infection and stencil failure. Cleaning the skin removes oils, dirt, and other contaminants that can prevent the stencil from sticking properly. Proper preparation may also involve shaving the area to remove hair that can interfere with the transfer process. A clean, smooth surface allows the stencil transfer solution to adhere effectively, resulting in a clear and long-lasting stencil. According to Inked Magazine, proper hygiene and preparation are fundamental to successful tattoo application.
2. How to Prepare the Skin for Tattoo Stencil Application?
Preparing the skin involves cleaning, shaving, and applying a stencil transfer solution to ensure optimal adhesion and clarity of the tattoo design. A well-prepared skin surface allows the stencil to adhere properly, minimizing the risk of smudging or fading during the tattooing process.
2.1 What Cleansing Agents Should Be Used to Prepare the Skin?
Use antibacterial soap or medical-grade skin cleansers to remove oils and contaminants, creating a clean surface for stencil application. Antibacterial soaps help eliminate bacteria that can cause infections, while medical-grade skin cleansers are specifically formulated to prepare the skin for tattooing. Avoid using harsh chemicals or alcohol-based cleansers, as they can dry out the skin and interfere with stencil adhesion.
2.2 Is Shaving Necessary for all Tattoo Placements?
Shaving is generally necessary for tattoo placements where hair may interfere with stencil adhesion and visibility, ensuring a smooth surface for accurate design transfer. Hair can prevent the stencil from making direct contact with the skin, leading to incomplete or uneven transfer. Shaving should be done carefully to avoid cuts or irritation, which can compromise the skin’s integrity and increase the risk of infection. However, for areas with minimal hair, such as the wrist or ankle, shaving may not be necessary.
2.3 What is the Best Way to Exfoliate the Skin Before Applying a Stencil?
Gently exfoliate with a mild scrub or exfoliating glove to remove dead skin cells, promoting better stencil adhesion and a smoother skin surface. Exfoliation helps to remove the buildup of dead skin cells that can prevent the stencil transfer solution from penetrating the skin properly. Avoid using harsh exfoliants or over-exfoliating, as this can irritate the skin and make it more sensitive. A gentle exfoliation a day or two before the tattoo appointment is usually sufficient.
2.4 How Does Skin Hydration Affect Stencil Adhesion?
Proper skin hydration ensures the skin is supple and receptive to the stencil transfer solution, enhancing stencil adhesion and prolonging its visibility during the tattooing process. Dry skin can repel the stencil transfer solution, leading to poor adhesion and a faded stencil. Applying a light, non-greasy moisturizer a few hours before the appointment can help hydrate the skin without leaving a residue that interferes with stencil transfer. However, avoid applying moisturizer immediately before stencil application, as this can create a barrier that prevents the stencil from sticking.
 Skin preparation before applying tattoo stencil
3. What Types of Stencil Transfer Products are Available?
Various stencil transfer products are available, including gels, lotions, and sprays, each with specific formulations designed to enhance stencil adhesion and clarity. The choice of product often depends on the artist’s preference, the skin type of the client, and the complexity of the design.
3.1 What are the Key Ingredients in Effective Stencil Transfer Gels?
Effective stencil transfer gels typically contain ingredients like isopropyl alcohol, propylene glycol, and various polymers that enhance adhesion and transfer quality. Isopropyl alcohol helps to clean and dehydrate the skin, promoting better stencil adhesion. Propylene glycol acts as a humectant, drawing moisture to the skin and improving the transfer of the stencil. Polymers help to create a thin, even layer that adheres the stencil to the skin. Some gels may also contain ingredients like glycerin or aloe vera to soothe and moisturize the skin.
3.2 How Do Stencil Lotions Differ From Stencil Gels?
Stencil lotions are generally lighter and more moisturizing than gels, making them suitable for clients with dry or sensitive skin. Lotions tend to have a higher water content and may contain ingredients like shea butter, cocoa butter, or vitamin E to hydrate and nourish the skin. Gels, on the other hand, typically have a higher alcohol content and provide a stronger, longer-lasting stencil transfer. The choice between lotion and gel often depends on the artist’s preference and the client’s skin type.
3.3 What are the Advantages of Using Stencil Transfer Sprays?
Stencil transfer sprays offer even application and quick drying times, making them ideal for large or complex designs. Sprays allow for a uniform coating of the stencil transfer solution, ensuring consistent adhesion across the entire design. They also dry quickly, reducing the risk of smudging or smearing during application. However, sprays may require more careful application to avoid oversaturation or uneven coverage.
3.4 Can Natural or Homemade Solutions Be Used for Stencil Transfer?
While some artists experiment with natural or homemade solutions, commercially available stencil transfer products are generally recommended for their reliability, consistency, and safety. Natural solutions like sugar water or diluted honey may provide some adhesion, but they are often less effective than commercial products and may not be sterile. Homemade solutions also lack the preservatives and antibacterial agents found in commercial products, increasing the risk of infection. Therefore, it’s best to stick with commercially available stencil transfer products that are specifically formulated for tattooing.
4. What is the Best Technique for Applying Stencil Transfer Products?
The best technique involves applying a thin, even layer of the product to the prepared skin, allowing it to become slightly tacky before applying the stencil. Proper application ensures optimal adhesion and clarity of the stencil design, minimizing the risk of smudging or fading during the tattooing process.
4.1 How Much Product Should Be Applied to the Skin?
Apply a thin, even layer of stencil transfer product to avoid oversaturation, which can lead to smudging and stencil distortion. Too much product can also create a barrier that prevents the stencil from adhering properly to the skin. A thin layer allows the stencil to make direct contact with the skin, ensuring a clear and accurate transfer. It’s always better to start with less product and add more if needed, rather than applying too much at once.
4.2 What is the Ideal Waiting Time Before Applying the Stencil?
Allow the stencil transfer product to sit for a few moments until it becomes slightly tacky, providing an optimal surface for stencil adhesion. The ideal waiting time can vary depending on the product and the skin type, but generally, a minute or two is sufficient. The product should feel slightly sticky to the touch, but not wet or slippery. Applying the stencil too soon can result in a smudged or incomplete transfer, while waiting too long can cause the product to dry out and lose its adhesive properties.
4.3 How to Ensure Even Coverage of the Transfer Product?
Use a clean, lint-free applicator, such as a gauze pad or sponge, to spread the stencil transfer product evenly across the prepared skin. Even coverage ensures consistent adhesion and clarity of the stencil design, preventing areas of the stencil from lifting or fading during the tattooing process. Avoid using your fingers to apply the product, as this can introduce oils and contaminants that interfere with stencil adhesion.
4.4 What Steps to Take if the Stencil Product Runs or Drips?
Blot excess product immediately with a clean, dry cloth to prevent smudging and ensure a clear stencil transfer. Running or dripping can occur if too much product is applied or if the product is too thin. Blotting the excess product helps to remove any excess moisture and prevent it from spreading beyond the intended area. If the stencil becomes smudged or distorted, remove it immediately and reapply the stencil transfer product before attempting another transfer.
5. How to Apply the Tattoo Stencil to the Skin?
Applying the tattoo stencil involves positioning the design accurately, pressing it firmly onto the skin, and carefully peeling it away to reveal the transferred image. Accurate application is crucial for ensuring the tattoo matches the intended design and is placed in the desired location.
5.1 What is the Best Way to Position the Stencil Accurately?
Consult with the client to determine the desired placement and use anatomical landmarks to align the stencil accurately, ensuring the tattoo is positioned correctly. Before applying the stencil, have the client stand in front of a mirror and mark the desired location with a skin-safe marker. Use anatomical landmarks, such as bones, muscles, or existing tattoos, to align the stencil and ensure it is straight and level. Take your time and double-check the placement before pressing the stencil onto the skin.
5.2 How Much Pressure Should Be Applied When Pressing the Stencil?
Apply firm, even pressure across the entire stencil to ensure consistent contact with the skin and optimal transfer of the design. Avoid applying too much pressure, as this can cause the stencil to stretch or distort. Use your fingers or a clean, flat object to press the stencil firmly onto the skin, paying particular attention to areas with curves or contours. Hold the stencil in place for several seconds to allow the transfer solution to adhere properly.
5.3 What Angle Should Be Used When Peeling the Stencil Away?
Peel the stencil away slowly and carefully at a shallow angle, starting from one edge and working your way across to avoid smudging or distorting the transferred image. A shallow angle minimizes the risk of lifting the stencil from the skin prematurely, ensuring a clean and accurate transfer. If any areas of the stencil fail to transfer properly, gently reapply the stencil and apply more pressure to those areas.
5.4 What to Do if the Stencil Tears or Sticks to the Skin?
If the stencil tears or sticks to the skin, use a clean, damp cloth to gently remove any remaining stencil paper, and reapply the stencil transfer product before attempting another transfer. Tearing or sticking can occur if the stencil is too dry or if the skin is not properly prepared. Removing the remaining stencil paper gently prevents further irritation to the skin. It’s always a good idea to have extra stencils on hand in case of accidents.
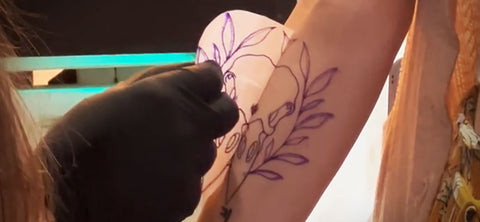
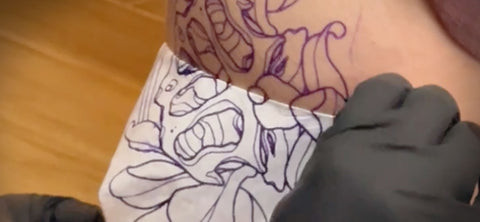 Tattoo stencil application
6. How to Troubleshoot Common Stencil Adhesion Problems?
Troubleshooting involves identifying the cause of the adhesion problem, such as improper skin preparation or product application, and implementing corrective measures to ensure a successful stencil transfer. Addressing these issues ensures a clear and accurate stencil, which is crucial for a high-quality tattoo.
6.1 What Causes a Stencil to Fade Quickly After Application?
A stencil may fade quickly due to inadequate skin preparation, insufficient transfer product, or excessive moisture. Improper skin preparation, such as failing to remove oils or contaminants, can prevent the stencil from adhering properly. Insufficient transfer product may not provide enough adhesion, causing the stencil to fade quickly. Excessive moisture, such as sweat or humidity, can dissolve the transfer solution and cause the stencil to disappear.
6.2 How to Prevent Smudging During the Tattooing Process?
Prevent smudging by allowing the stencil to dry completely, avoiding excessive wiping, and using a barrier film to protect the stencil during tattooing. Allowing the stencil to dry completely ensures that the transfer solution has fully adhered to the skin. Avoid excessive wiping of the stencil, as this can remove the transferred image. Applying a thin layer of barrier film, such as petroleum jelly or a specialized tattoo balm, can protect the stencil from smudging and keep it visible during the tattooing process.
6.3 What to Do if the Stencil Doesn’t Transfer Evenly?
If the stencil doesn’t transfer evenly, reapply the stencil transfer product to the affected areas, press firmly, and ensure consistent contact with the skin. Uneven transfer can occur if the skin is not properly prepared or if the stencil is not pressed firmly enough against the skin. Reapplying the stencil transfer product helps to ensure that all areas of the stencil make contact with the skin. Pay particular attention to areas with curves or contours, as these may require more pressure.
6.4 Can Certain Skin Types Affect Stencil Adhesion?
Yes, certain skin types, such as oily or dry skin, can affect stencil adhesion, requiring adjustments to the preparation and application techniques. Oily skin may require more thorough cleansing and degreasing to remove excess oils that can interfere with stencil adhesion. Dry skin may benefit from a light moisturizer to hydrate the skin and improve stencil transfer. Adjusting the stencil transfer product and application technique can help to overcome these challenges.
7. How to Care for the Stencil During the Tattooing Process?
Caring for the stencil involves protecting it from smudging, minimizing wiping, and reapplying transfer product as needed to maintain its visibility throughout the tattooing process. A well-maintained stencil ensures accurate tattoo execution and a high-quality final result.
7.1 What Products Can Be Used to Protect the Stencil While Tattooing?
Use petroleum jelly, tattoo balms, or stencil-specific protective sprays to create a barrier against smudging and ensure the stencil remains visible. Petroleum jelly is a classic choice for protecting the stencil, providing a thin layer of moisture that prevents the stencil from drying out or smudging. Tattoo balms, such as those containing shea butter or cocoa butter, can also protect the stencil while moisturizing the skin. Stencil-specific protective sprays are designed to create a clear, waterproof barrier that keeps the stencil visible throughout the tattooing process.
7.2 How Often Should the Stencil Be Reapplied During a Long Session?
Reapply the stencil as needed, typically every few hours or whenever the stencil begins to fade or smudge, to maintain its visibility throughout the tattooing session. The frequency of reapplication depends on the length of the session, the skin type of the client, and the tattooing technique being used. Keep a close eye on the stencil and reapply as soon as you notice any signs of fading or smudging.
7.3 What is the Best Way to Wipe the Area Without Removing the Stencil?
Use gentle, blotting motions with a clean, damp cloth to remove excess ink and blood without disturbing the stencil. Avoid rubbing or scrubbing the area, as this can remove the transferred image. Blotting gently helps to lift away the excess moisture without disrupting the stencil. Use a soft, lint-free cloth to avoid leaving fibers on the skin.
7.4 How to Deal With Stencil Fading in High-Traffic Areas?
In high-traffic areas, such as the hands or feet, reapply the stencil more frequently and consider using a stencil-specific protective spray to prolong its visibility. High-traffic areas are more prone to smudging and fading due to friction and exposure to moisture. Reapplying the stencil more frequently and using a protective spray can help to keep the stencil visible throughout the tattooing process. You may also want to consider using a more durable stencil transfer product that is designed to withstand friction and moisture.
8. Are There Any Advanced Techniques for Stencil Application?
Yes, advanced techniques include freehand stenciling, using digital stencils, and incorporating 3D elements to enhance the tattoo design and placement. These techniques require a high level of skill and experience but can result in stunning and unique tattoos.
8.1 What is Freehand Stenciling and When Should It Be Used?
Freehand stenciling involves drawing the design directly onto the skin using skin-safe markers, ideal for custom designs or when adapting to the body’s natural contours. Freehand stenciling allows for greater flexibility and creativity, as the artist can adjust the design to fit the client’s body perfectly. This technique is particularly useful for large or complex designs that would be difficult to transfer using traditional stencil methods. However, freehand stenciling requires a high level of skill and confidence, as there is no template to guide the artist.
8.2 How Can Digital Stencils Improve Accuracy and Efficiency?
Digital stencils, created using software like Procreate or Photoshop, offer precise design control and can be easily adjusted and resized, improving accuracy and efficiency. Digital stencils allow artists to create complex designs with intricate details, and the designs can be easily printed onto stencil paper using a thermal printer. Digital stencils also allow for easy resizing and adjustments, ensuring that the design fits the client’s body perfectly. This technique can save time and reduce errors, resulting in a more efficient tattooing process.
8.3 What are the Benefits of Incorporating 3D Elements into Stencil Design?
Incorporating 3D elements into stencil designs can add depth and realism to the tattoo, creating a more visually striking and dynamic effect. 3D tattoos can create the illusion of objects popping out of the skin or sinking into it, adding a unique and eye-catching dimension to the design. This technique requires careful planning and execution, as the artist must consider the lighting and shading to create the desired effect. However, the results can be truly stunning and can set the artist apart from the competition.
8.4 Are There Any Risks Associated with Advanced Stencil Techniques?
Yes, risks include increased complexity, potential for errors, and the need for specialized skills and equipment, requiring careful planning and execution. Advanced stencil techniques, such as freehand stenciling or incorporating 3D elements, require a high level of skill and experience. There is a greater potential for errors, such as misaligned lines or distorted shapes, if the artist is not properly trained. These techniques may also require specialized equipment, such as digital drawing tablets or 3D printers, which can be costly.
9. What Tools and Equipment are Essential for Stencil Application?
Essential tools and equipment include stencil paper, thermal printers, stencil transfer products, skin-safe markers, and barrier films to ensure accurate and long-lasting stencil application. Having the right tools and equipment on hand can make the stencil application process smoother and more efficient, resulting in a better tattoo.
9.1 What are the Best Brands of Stencil Paper and Transfer Products?
Reputable brands like Spirit, S8, and Stencil Stuff are known for their high-quality stencil paper and transfer products, ensuring reliable and consistent results. These brands have been tested and trusted by tattoo artists around the world, and their products are specifically formulated for tattooing. Investing in high-quality stencil paper and transfer products can make a significant difference in the clarity and longevity of the stencil, resulting in a better tattoo.
9.2 Should a Thermal Printer Be Used for All Stencil Transfers?
While not essential, a thermal printer offers speed and precision for stencil transfers, especially for intricate designs, improving efficiency and accuracy. Thermal printers allow artists to quickly and easily transfer designs from a computer or tablet onto stencil paper. This can save time and reduce errors, particularly for complex designs with intricate details. However, thermal printers can be costly, and they are not necessary for all stencil transfers. Simple designs can be easily transferred by hand using traditional stencil methods.
9.3 What Type of Lighting is Ideal for Stencil Application?
Bright, consistent lighting, such as LED lamps or natural sunlight, is ideal for stencil application, providing clear visibility and minimizing shadows. Good lighting is essential for ensuring accurate stencil placement and preventing errors. LED lamps are a popular choice for tattoo studios, as they provide bright, consistent light without generating excessive heat. Natural sunlight is also a great option, but it is important to avoid direct sunlight, as this can cause the stencil to fade quickly.
9.4 How Can Barrier Films Help During the Stencil Process?
Barrier films, such as petroleum jelly or stencil-specific protective sprays, protect the stencil from smudging and contamination, ensuring it remains visible throughout the tattooing process. Barrier films create a thin layer of moisture that prevents the stencil from drying out or smudging. They also protect the stencil from contamination by blood, ink, or other fluids. Using a barrier film can help to keep the stencil visible throughout the tattooing process, resulting in a better tattoo.
10. What Aftercare Steps Should Be Taken to Preserve the Stencil Image?
Aftercare steps include avoiding excessive moisture, minimizing friction, and using a gentle cleanser to preserve the stencil image during the initial stages of tattooing. Proper aftercare ensures that the stencil remains visible throughout the tattooing process, resulting in a better tattoo.
10.1 How Soon After Applying the Stencil Can the Tattooing Begin?
Allow the stencil to dry completely, typically for 5-10 minutes, before beginning the tattooing process to ensure it adheres properly and minimizes smudging. Allowing the stencil to dry completely ensures that the transfer solution has fully adhered to the skin. This can help to prevent smudging and ensure that the stencil remains visible throughout the tattooing process. Avoid touching or wiping the stencil during this time, as this can disrupt the transfer.
10.2 What Type of Cleanser is Safe to Use on the Stenciled Area?
Use a gentle, fragrance-free cleanser, such as antibacterial soap or a specialized tattoo cleanser, to clean the stenciled area without removing the transferred image. Harsh cleansers can irritate the skin and cause the stencil to fade quickly. Gentle, fragrance-free cleansers are less likely to cause irritation and will help to keep the stencil visible throughout the tattooing process. Avoid using alcohol-based cleansers, as these can dry out the skin and disrupt the transfer.
10.3 How Should the Area Be Dried After Cleaning to Avoid Stencil Removal?
Pat the area dry gently with a clean, lint-free cloth instead of rubbing, to avoid removing the stencil. Rubbing the area can cause the stencil to fade or smudge. Patting gently helps to remove excess moisture without disrupting the transfer. Use a soft, lint-free cloth to avoid leaving fibers on the skin.
10.4 Can Occlusive Dressings Help Preserve the Stencil?
While occlusive dressings can protect the tattooed area, they should be used cautiously during the initial stages, as they can trap moisture and cause the stencil to fade. Occlusive dressings, such as plastic wrap or adhesive bandages, create a barrier that protects the tattooed area from contamination. However, they can also trap moisture, which can cause the stencil to fade quickly. If you choose to use an occlusive dressing, be sure to monitor the area closely and remove the dressing if you notice any signs of fading or smudging.
Mastering the art of stencil application is an ongoing process that requires practice, patience, and attention to detail. By following these tips and techniques, you can ensure that your stencils adhere properly, remain visible throughout the tattooing process, and result in stunning, high-quality tattoos. Visit tattooat.com for more inspiration, resources, and expert advice to elevate your tattoo artistry. Find inspiration for your next tattoo, connect with talented artists, and learn valuable tips for creating stunning body art. Contact us at Address: 1825 SW Broadway, Portland, OR 97201, United States or Phone: +1 (503) 725-3000.
FAQ: How to Get Tattoo Stencils to Stick
1. Why is my tattoo stencil not sticking to the skin?
Your tattoo stencil might not be sticking due to oily skin, insufficient transfer solution, or improper application technique, so ensure the skin is clean and dry, use a quality transfer product, and apply even pressure.
2. What is the best stencil transfer solution for tattoo artists?
The best stencil transfer solutions often include Stencil Stuff or Spirit, known for their reliable adhesion and clear transfer, offering consistent results for detailed tattoo designs.
3. How long should I wait after applying the stencil transfer solution before placing the stencil?
Wait until the transfer solution becomes slightly tacky, usually 2-5 minutes, before placing the stencil to ensure optimal adhesion and prevent smudging.
4. Can I use deodorant as a stencil transfer solution?
While some artists use deodorant as a makeshift solution, it’s not recommended due to inconsistent results and potential skin irritation; professional transfer solutions are safer and more effective.
5. How do I remove a tattoo stencil that won’t come off?
To remove a stubborn tattoo stencil, use isopropyl alcohol or a specialized stencil remover, gently wiping the area until the stencil is fully removed without irritating the skin.
6. What is the best way to prepare the skin before applying a tattoo stencil?
The best way to prepare the skin is to clean it with antibacterial soap, shave the area, exfoliate gently, and then dry it thoroughly before applying the stencil transfer solution for optimal adhesion.
7. How can I prevent a tattoo stencil from smudging during the tattooing process?
To prevent smudging, allow the stencil to dry completely before starting, use a protective barrier like petroleum jelly sparingly, and avoid excessive wiping during the tattooing process.
8. Is it necessary to shave the area before applying a tattoo stencil?
Yes, shaving the area is necessary to ensure the stencil makes direct contact with the skin, improving adhesion and clarity of the transferred design for accurate tattooing.
9. What type of lighting is best for applying a tattoo stencil?
Bright, consistent LED lighting is best for applying a tattoo stencil, providing clear visibility and minimizing shadows to ensure accurate placement and transfer of the design.
10. How do I fix a tattoo stencil that has faded during a long tattoo session?
If a tattoo stencil fades, reapply the stencil transfer solution to the affected area, carefully reposition the stencil, and press firmly to refresh the design for continued accuracy during the session.