Stick and poke tattoos, also known as hand-poked tattoos, have surged in popularity, offering a unique and accessible form of self-expression; if you’re curious about how to create your own DIY tattoos, tattooat.com is here to guide you through the process safely and effectively. By understanding the proper techniques, safety precautions, and aftercare, you can create meaningful and lasting body art. Explore the world of stick and poke tattoos with us, learning about tattoo culture, tattoo design, and the art of self-expression through ink.
1. What Is A Stick And Poke Tattoo?
A stick and poke tattoo, also known as a hand-poked tattoo, involves manually inserting ink into the skin using a needle, as opposed to using a tattoo machine. This method, steeped in history and tradition, allows for a more personal and intimate tattooing experience.
1.1. The Essence Of Hand-Poked Tattoos
Hand-poked tattoos are created by repeatedly poking the skin with a needle dipped in tattoo ink. Unlike machine tattoos that use a powered device to rapidly insert ink, stick and poke tattoos rely entirely on manual precision and control. According to research from Portland State University’s Art Department, in July 2023, hand-poked tattoos have seen a resurgence due to their simplicity and the connection they offer between the artist and the recipient.
1.2. Is Stick And Poke As Good As Machine Tattoos?
Stick and poke tattoos can be just as visually appealing as machine tattoos, though they offer a different aesthetic; Vivien Su, a tattoo artist from Singapore, likens hand-poked tattoos to “drawing on a sheet of paper,” while machine tattoos are like “drawing on your iPad,” in an interview with VICE. While machine tattoos often provide a cleaner, more precise look, hand-poked tattoos have a unique, handcrafted charm.
1.3. A Brief History
Manual tattooing methods have been used across various cultures for thousands of years, with evidence found in ancient civilizations worldwide; these techniques often held spiritual or cultural significance, marking rites of passage, tribal affiliations, or personal milestones.
2. Is It Legal To Do Stick And Poke Tattoos At Home In The US?
The legality of performing stick and poke tattoos at home in the US varies by state and local regulations, with some areas requiring tattoo artists to be licensed and studios to meet specific health and safety standards. Many jurisdictions do not specifically address the legality of self-tattooing.
2.1. Understanding Regulations
In the United States, tattoo regulations are primarily determined at the state and local levels. Here’s a breakdown:
- Licensing Requirements: Many states require tattoo artists to obtain a license, which often involves completing a training program, passing an examination, and adhering to specific health and safety standards.
- Studio Regulations: Tattoo studios typically need to be inspected and licensed to ensure they meet hygiene and sanitation requirements. This includes proper sterilization of equipment, disposal of needles, and adherence to guidelines that prevent the spread of infections.
- Age Restrictions: Most states have laws regarding the minimum age for getting a tattoo, usually requiring parental consent for individuals under 18.
2.2. The Gray Area Of Self-Tattooing
While commercial tattooing is heavily regulated, self-tattooing occupies a legal gray area:
- No Specific Laws: Many states do not have specific laws that directly prohibit self-tattooing. This means that as long as you are tattooing yourself and not providing tattoo services to others for compensation, you might not be violating any explicit laws.
- Health and Safety Concerns: Even if self-tattooing is not explicitly illegal, it is essential to be aware of the health and safety risks involved. Using non-sterile equipment or improper techniques can lead to infections, scarring, and other complications.
2.3. States With Stricter Regulations
Some states have stricter regulations that could indirectly impact self-tattooing:
- Regulations on Tattoo Equipment: States may regulate the sale, possession, or use of tattoo equipment. If these regulations are stringent, obtaining professional-grade supplies for self-tattooing could be challenging or legally restricted.
- Public Health Laws: Public health laws aimed at preventing the spread of infectious diseases could be invoked if self-tattooing practices are deemed a public health risk.
2.4. City And County Ordinances
In addition to state laws, city and county ordinances can further regulate tattooing practices:
- Local Health Codes: Local health departments may have specific codes related to tattooing, including requirements for sterilization, waste disposal, and hygiene.
- Zoning Laws: Some cities may have zoning laws that restrict where tattoo services can be offered, which could indirectly affect the operation of home-based tattooing if it were to be considered a business activity.
2.5. Responsible Practices
Given the legal ambiguities and potential health risks, it is crucial to practice responsibly if you choose to self-tattoo:
- Educate Yourself: Understand the laws and regulations in your state and local area regarding tattooing.
- Prioritize Safety: Use sterile equipment, follow proper hygiene practices, and be aware of the risks of infection and complications.
- Consider Professional Alternatives: If you are unsure about the safety or legality of self-tattooing, consider visiting a licensed tattoo artist in a regulated studio.
3. What Supplies Do You Need For A Stick And Poke Tattoo?
To perform a stick and poke tattoo safely, you’ll need specific supplies, including sterile needles, tattoo ink, isopropyl alcohol, stencils, gloves, and aftercare products; ensuring that all materials are of high quality and properly sterilized is crucial to prevent infections and ensure a successful outcome.
- Sterile Needles: Choose single-use, pre-sterilized tattoo needles.
- Tattoo Ink: Use professional tattoo ink, not craft ink.
- Isopropyl Alcohol: Use for cleaning and disinfecting the skin.
- Stencil Paper and Pen: To transfer your design onto the skin.
- Gloves: Wear disposable gloves to maintain hygiene.
- Aftercare Products: Include antibacterial soap and a healing balm.
4. What Is The Best Design For A First DIY Stick And Poke Tattoo?
The best design for your first DIY stick and poke tattoo should be simple, small, and composed of straight lines to minimize complexity and potential errors; simple shapes, letters, or geometric patterns are ideal for beginners.
4.1. Simplicity Is Key
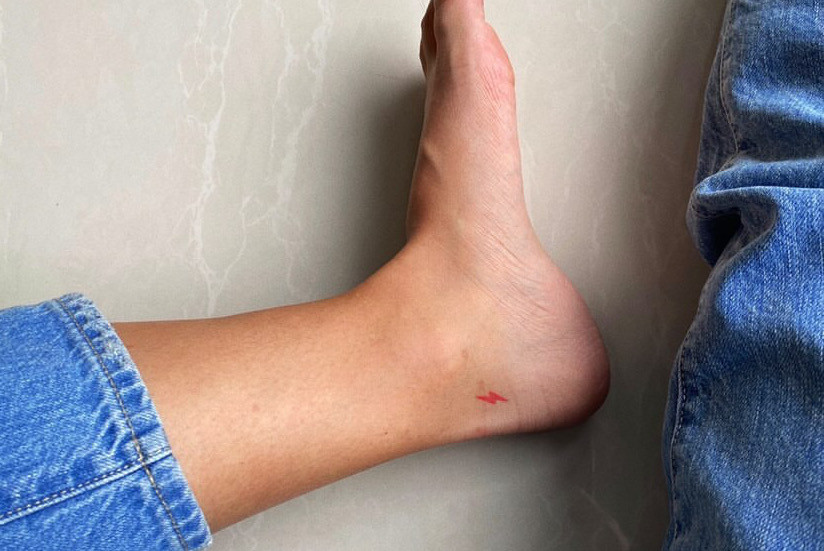
When starting with stick and poke tattoos, opting for simple designs is crucial. Intricate patterns and detailed artwork can be challenging to execute with the hand-poked method, especially without extensive experience. According to tattoo artist Vivien Su, a small lightning bolt was her first DIY tattoo, she says that anything with clean lines is a good starting point.
4.2. Ideal First Designs
Consider these options for your first stick and poke tattoo:
- Simple Shapes: Basic geometric shapes like circles, squares, or triangles are easy to create and offer a minimalist aesthetic.
- Straight Lines: Short, straight lines are simpler to manage than curves and can be combined to form various patterns.
- Letters or Initials: A single letter or a set of initials can be a meaningful and straightforward design.
- Minimalist Symbols: Small symbols with clear, uncomplicated outlines, such as a star, a heart, or a simple cross, are also excellent choices.
4.3. Designs to Avoid
Steer clear of these types of designs when you’re just starting out:
- Complex Patterns: Intricate mandalas, detailed portraits, or complex geometric patterns are best left to experienced artists.
- Curved Lines: Curves are more challenging to execute smoothly with the stick and poke method, often resulting in uneven lines.
- Shading: Shading requires a delicate touch and consistent ink depth, making it difficult for beginners to achieve a professional look.
- Large Designs: Large tattoos take more time and precision, increasing the risk of errors and skin irritation.
4.4. Placement Considerations
The location of your first tattoo also matters:
- Easy Access: Choose a spot that is easy to reach and work on, such as your forearm or thigh.
- Flat Surfaces: Areas with flat, smooth skin are easier to tattoo than bony or uneven areas.
- Visibility: Consider how visible you want the tattoo to be. If you prefer to keep it discreet, opt for a location that is easily covered.
4.5. Practicing Your Design
Before tattooing your skin, practice your design on a safe alternative:
- Practice Skin: Use synthetic practice skin, which mimics the texture of real skin, to get a feel for the stick and poke technique.
- Fruit: The skin of fruits like oranges or grapefruits can also be used for practice, as they have a similar texture to human skin.
5. Where On The Body Should You Put A Stick And Poke Tattoo?
The best locations for a stick and poke tattoo are areas with stretched, smooth skin, such as the forearms or thighs, to ensure a less painful and more manageable tattooing process; avoid bony or sensitive areas for your first tattoo.
5.1. Best Locations
- Forearms: The skin on the forearms is generally smooth and easy to access, making it a good choice for beginners.
- Thighs: The thighs offer a larger surface area with relatively flat skin, which is ideal for practicing and creating small designs.
- Calves: Similar to the forearms, the calves have smooth skin and are relatively easy to reach.
5.2. Locations to Avoid
- Ribs: The skin on the ribs is thin and close to the bone, making it a more painful area to tattoo.
- Feet and Ankles: These areas have many nerve endings and can be quite sensitive. The skin is also less forgiving due to the proximity to bone and tendons.
- Hands and Fingers: The skin on the hands and fingers is thin and prone to fading, and the numerous nerve endings make it a more painful location.
- Face and Neck: Tattooing the face and neck can be risky due to the sensitivity of the skin and the potential for infection. These areas are also highly visible, so any mistakes will be noticeable.
5.3. Pain Tolerance
Consider your pain tolerance when choosing a location. Areas with more fat and muscle tend to be less painful than areas where the skin is directly over bone.
5.4. Skin Elasticity
Choose areas where the skin is naturally stretched:
- Stretched Skin: Areas where the skin is already stretched, like the outer thigh or forearm, can make the tattooing process easier.
- Avoid Loose Skin: Loose or wrinkly skin can be more challenging to tattoo evenly, leading to inconsistent results.
5.5. Hygiene and Aftercare
Select a location that is easy to keep clean and protected during the healing process:
- Easy to Clean: Areas that are easy to wash and keep dry are ideal.
- Protection: Choose a spot where clothing won’t rub excessively against the new tattoo, as friction can cause irritation and slow down healing.
6. How Safe Is A Stick And Poke Tattoo?
The safety of a stick and poke tattoo depends on strict adherence to hygiene and sterilization practices; risks include infections, allergic reactions, and scarring if proper protocols are not followed.
6.1. Potential Risks
- Infections: Using non-sterile equipment or neglecting proper hygiene can lead to bacterial infections, such as staph infections. According to the Mayo Clinic, symptoms of a skin infection can include redness, swelling, pain, and pus.
- Allergic Reactions: Some individuals may have allergic reactions to tattoo ink, resulting in itching, rash, or swelling at the tattoo site.
- Scarring: Incorrect technique, such as going too deep with the needle, can cause scarring.
- Bloodborne Diseases: Sharing needles can transmit bloodborne diseases like hepatitis B, hepatitis C, and HIV.
- Ink Migration: Poor technique can cause the ink to spread under the skin, leading to a blurry or uneven tattoo.
6.2. Essential Safety Measures
To minimize the risks associated with stick and poke tattoos, follow these safety measures:
- Use Sterile Equipment: Always use single-use, pre-sterilized needles. Never reuse needles, even on the same person.
- Professional Tattoo Ink: Only use professional tattoo ink from reputable suppliers. Avoid using craft inks or homemade inks, as they may contain harmful substances.
- Wear Gloves: Wear disposable gloves throughout the tattooing process to prevent contamination.
- Disinfect the Skin: Clean the skin thoroughly with isopropyl alcohol before starting the tattoo. Shave the area if necessary to remove hair that could harbor bacteria.
- Clean Work Area: Ensure your work area is clean and disinfected. Cover surfaces with disposable barriers to prevent contamination.
- Proper Disposal: Dispose of used needles and other contaminated materials in a sharps container to prevent accidental injuries and the spread of disease.
6.3. Signs of Infection
Be vigilant for signs of infection and seek medical attention if you notice any of the following:
- Excessive Redness or Swelling: Some redness and swelling are normal in the first few days after getting a tattoo, but excessive redness or swelling could indicate an infection.
- Pus or Drainage: Pus or drainage from the tattoo site is a clear sign of infection.
- Fever or Chills: Systemic symptoms like fever or chills could indicate a more serious infection that requires medical treatment.
- Increased Pain: While some pain is expected, a significant increase in pain could be a sign of infection or inflammation.
6.4. Sterilization Techniques
Proper sterilization is critical to preventing infections:
- Autoclave: An autoclave is the most effective method for sterilizing tattoo equipment. It uses high-pressure steam to kill bacteria, viruses, and spores.
- Chemical Sterilization: If an autoclave is not available, chemical sterilization can be used as an alternative. Submerge equipment in a chemical sterilizing solution, following the manufacturer’s instructions for concentration and duration.
6.5. Research and Education
Educate yourself about the risks and best practices for stick and poke tattoos:
- Reputable Sources: Consult reputable sources such as professional tattoo artists, healthcare providers, and tattoo safety organizations for accurate information.
- Training and Workshops: Consider attending a workshop or training session on tattoo safety and technique to learn from experienced professionals.
 Hand-poked tattoos can look just as nice as machine tattoos
7. How To Do A Stick And Poke Tattoo
Doing a stick and poke tattoo involves sketching the design, stretching the skin, and carefully poking the skin at a 45-degree angle with an ink-dipped needle; it’s crucial to start light, maintain proper hygiene, and take breaks to avoid overworking the skin.
7.1. Step-by-Step Guide
- Prepare Your Materials: Gather all your supplies, ensuring everything is sterile and ready to use.
- Sketch Your Design: Use a stencil to transfer your design onto the skin. Make sure the design is clear and accurately placed.
- Clean the Skin: Thoroughly clean the area with isopropyl alcohol to remove any dirt, oil, or bacteria.
- Stretch the Skin: Use one hand to stretch the skin taut. This helps to create a smooth surface for tattooing.
- Dip the Needle: Dip the needle into the tattoo ink, ensuring you have enough ink on the tip.
- Poke the Skin: Hold the needle at a 45-degree angle and gently poke the skin. Aim for a consistent depth to ensure the ink stays in place.
- Wipe Away Excess Ink: Use a sterile wipe to remove any excess ink from the skin.
- Repeat: Continue poking along the lines of your design, maintaining consistent spacing and depth.
- Take Breaks: Take breaks as needed to avoid overworking the skin. If the skin becomes too red or swollen, stop and allow it to rest.
- Clean and Bandage: Once you’ve completed the tattoo, clean the area again and cover it with a sterile bandage or cling wrap.
7.2. Angle and Direction
- 45-Degree Angle: Holding the needle at a 45-degree angle is generally recommended for optimal ink placement.
- Consistent Direction: If you’re creating a straight line, start from one end and work your way to the other, maintaining a consistent direction.
7.3. Depth
Determining the correct depth is crucial:
- Start Light: It’s better to start light and add more ink as needed. You can always go back and darken the tattoo, but you can’t remove ink once it’s in the skin.
- Avoid Going Too Deep: Poking too deep can cause the ink to spread (blowout) and result in a blurry tattoo.
7.4. Skin Reaction
Pay attention to how your skin reacts during the process:
- Redness and Swelling: Some redness and swelling are normal, but excessive redness or swelling could indicate you’re overworking the skin.
- Adjust Technique: Adjust your technique based on how your skin responds. If the ink isn’t taking well, you may need to adjust the depth or angle of your pokes.
7.5. What To Do After A Stick And Poke Tattoo
After completing your stick and poke tattoo, proper aftercare is essential to ensure it heals well and remains vibrant; this includes cleaning, moisturizing, and protecting the tattoo from irritation and infection.
- Initial Cleaning: Gently clean the tattooed area with antibacterial soap and lukewarm water. Pat the skin dry with a clean paper towel.
- Apply a Thin Layer of Ointment: Apply a thin layer of tattoo aftercare ointment or balm to keep the area moisturized.
- Cover the Tattoo: Cover the tattoo with a sterile bandage or cling wrap to protect it from dirt and bacteria.
8. What Is The Best Aftercare For Stick And Poke Tattoos?
The best aftercare for stick and poke tattoos involves keeping the area clean and moisturized, avoiding sun exposure, and wearing loose clothing to prevent irritation; proper aftercare helps prevent infections and ensures the tattoo heals properly.
8.1. Essential Aftercare Steps
- Keep It Clean: Wash the tattoo gently with antibacterial soap and lukewarm water 2-3 times a day.
- Moisturize Regularly: Apply a thin layer of tattoo aftercare ointment or balm several times a day to keep the skin moisturized.
- Avoid Sun Exposure: Keep the tattoo out of direct sunlight, as UV rays can fade the ink and damage the skin.
- Wear Loose Clothing: Wear loose, breathable clothing to avoid irritating the tattoo.
- Avoid Soaking: Avoid soaking the tattoo in water for extended periods.
8.2. Specific Products to Use
- Antibacterial Soap: Use a mild, fragrance-free antibacterial soap to clean the tattoo.
- Tattoo Aftercare Ointment: Choose a reputable tattoo aftercare ointment or balm that is specifically designed for healing tattoos.
- Non-Scented Lotion: If you don’t have tattoo-specific products, a non-scented, hypoallergenic lotion can be used to keep the skin moisturized.
8.3. Things to Avoid
- Scratching or Picking: Avoid scratching or picking at the tattoo, as this can damage the skin and lead to infection.
- Tight Clothing: Avoid wearing tight clothing that can rub against the tattoo and cause irritation.
- Harsh Chemicals: Avoid using harsh chemicals, such as alcohol or hydrogen peroxide, on the tattoo, as they can dry out the skin and interfere with healing.
- Excessive Moisture: Avoid excessive moisture, such as prolonged soaking in water, as this can increase the risk of infection.
- Public Pools and Hot Tubs: Avoid swimming in public pools and hot tubs until the tattoo is fully healed, as they can harbor bacteria.
8.4. Healing Timeline
The healing process for a stick and poke tattoo typically takes 2-4 weeks:
- First Few Days: Expect some redness, swelling, and tenderness in the first few days.
- First Week: The tattoo will start to scab over. It’s important not to pick at the scabs.
- Second Week: The scabs will start to flake off on their own. Continue to keep the area clean and moisturized.
- Third and Fourth Weeks: The tattoo should be mostly healed. The skin may still be slightly sensitive.
8.5. When to Seek Medical Attention
Seek medical attention if you experience any signs of infection:
- Increased Pain: A significant increase in pain.
- Fever or Chills: Systemic symptoms like fever or chills.
- Red Streaks: Red streaks radiating from the tattoo site.
- Swollen Lymph Nodes: Swollen lymph nodes in the area.
 Chua Yi Min demonstrates her stick and poke technique over a zoom call
9. How To Avoid Blowouts With Stick And Poke Tattoos?
To avoid blowouts with stick and poke tattoos, maintain a consistent and shallow depth, stretch the skin properly, and avoid overworking the area; practicing on alternative surfaces can help develop the necessary technique and control.
9.1. What is a Blowout?
A blowout occurs when tattoo ink spreads beyond the intended lines of the tattoo, creating a blurry or smudged effect; this happens when the ink is deposited too deep into the skin, reaching the subcutaneous fat layer where it can migrate.
9.2. Key Strategies
- Consistent Depth: Aim for a consistent and shallow depth when poking the skin. The goal is to deposit the ink into the dermis layer, which is the middle layer of the skin. Poking too deep can cause the ink to seep into the deeper layers, leading to a blowout.
- Proper Stretching: Stretching the skin taut helps to create a smooth surface for tattooing and prevents the needle from going too deep. Use one hand to stretch the skin while tattooing with the other.
- Avoid Overworking: Overworking the skin can cause trauma and inflammation, which can lead to blowouts. Take breaks as needed and avoid going over the same area multiple times in a short period.
- Use the Right Needle: Using the appropriate needle size and configuration can also help prevent blowouts. Smaller needles are generally better for fine lines and detailed work, while larger needles are more suitable for filling in larger areas.
- Control Ink Flow: Control the amount of ink on the needle to prevent excess ink from being deposited into the skin. Dip the needle lightly into the ink and wipe off any excess before poking.
9.3. Practice and Technique
- Practice on Fake Skin: Before tattooing real skin, practice your technique on fake skin or fruit to get a feel for the correct depth and pressure.
- Start Small: Begin with small, simple designs to minimize the risk of blowouts. As you gain experience, you can gradually move on to more complex designs.
- Go Slow: Take your time and focus on precision. Rushing the process can increase the likelihood of mistakes and blowouts.
- Monitor the Skin: Pay attention to how the skin reacts during the tattooing process. If you notice any signs of trauma or inflammation, stop and allow the skin to rest.
9.4. Additional Tips
- Choose the Right Location: Certain areas of the body are more prone to blowouts than others. Avoid tattooing areas with thin skin or a lot of movement, such as the fingers or wrists.
- Proper Aftercare: Proper aftercare is essential for preventing blowouts and ensuring the tattoo heals properly. Follow the recommended aftercare instructions to keep the area clean, moisturized, and protected from infection.
10. How Much Do Stick And Poke Tattoos Cost?
Stick and poke tattoos done by professional artists typically range from $50 to $200 per hour, depending on the artist’s experience, the complexity of the design, and the location of the studio; DIY stick and poke tattoos have minimal supply costs, but carry significant risks if not done safely.
10.1. Factors Influencing The Cost
- Artist’s Experience: More experienced and reputable artists usually charge higher rates for their services. Their expertise and skill can justify the higher cost.
- Design Complexity: Simple designs with minimal detail will typically cost less than complex designs with intricate patterns and shading.
- Tattoo Size: Larger tattoos require more time and ink, which will increase the overall cost.
- Studio Location: Tattoo studios in urban areas or high-demand locations may charge more than studios in rural areas.
- Custom Designs: Custom designs that require the artist to create a unique piece of artwork may cost more than choosing a pre-existing design.
10.2. Average Cost Range
- Hourly Rate: Many professional stick and poke artists charge an hourly rate, which can range from $50 to $200 per hour, depending on the factors mentioned above.
- Minimum Charge: Some artists may have a minimum charge, regardless of the size or complexity of the tattoo. This minimum charge can range from $50 to $100.
- Small Tattoos: For small, simple designs, the cost may be a flat rate ranging from $50 to $150.
10.3. DIY Stick and Poke Tattoos
- Supply Costs: The cost of supplies for a DIY stick and poke tattoo can be relatively low. A basic kit with needles, ink, and other essentials may cost around $20 to $50.
- Hidden Costs: It’s important to factor in the cost of proper sterilization equipment and aftercare products, which can add to the overall expense.
- Risk Factor: DIY stick and poke tattoos carry significant risks if not done safely. The potential costs of infections, scarring, or other complications can far outweigh the initial savings on professional services.
10.4. Professional vs. DIY
- Professional Advantages: Professional artists offer expertise, sterile environments, and high-quality materials, which can ensure a safer and more satisfactory outcome.
- DIY Considerations: DIY stick and poke tattoos may seem like a cost-effective option, but the risks and potential complications can make it a more expensive choice in the long run.
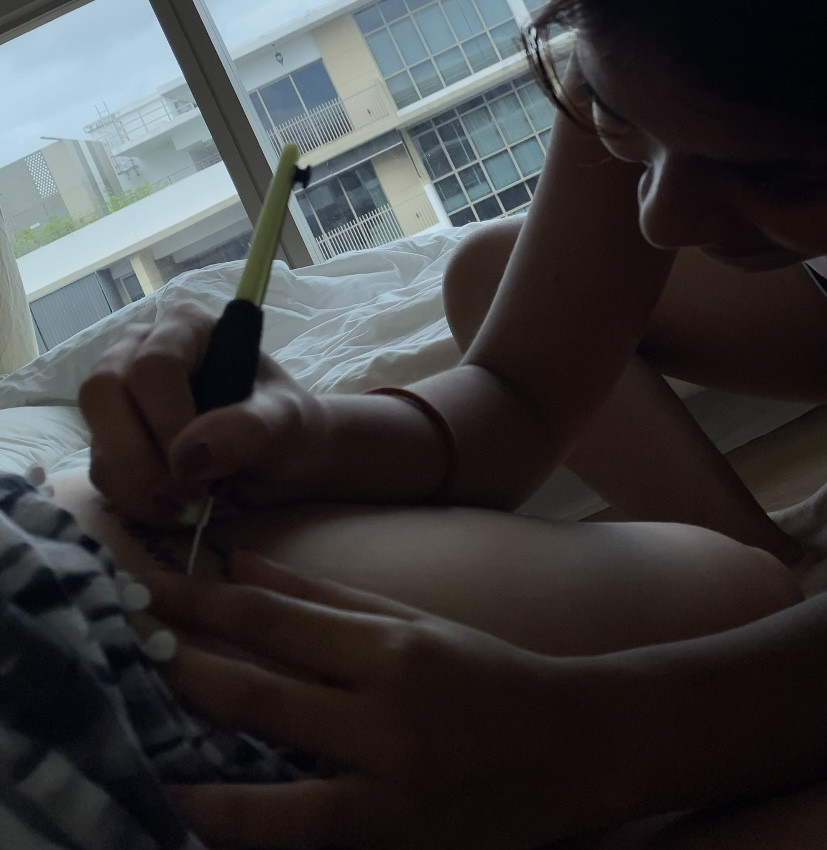 When people are tattooing their friends in their bedrooms it's just a nice moment between a couple of people and it results in a tattoo
FAQ: Stick And Poke Tattoos
1. Are stick and poke tattoos safe?
Yes, if you follow strict hygiene and sterilization practices, using sterile needles and professional ink.
2. How long do stick and poke tattoos last?
They are permanent, but may fade over time, depending on the ink used and aftercare.
3. Do stick and poke tattoos hurt more?
Pain levels vary, but many find it less intense than machine tattoos because it’s slower.
4. Can I use regular ink for stick and poke?
No, always use professional tattoo ink to avoid infections and ensure the tattoo lasts.
5. How do I care for a new stick and poke tattoo?
Keep it clean and moisturized, avoid sun exposure, and wear loose clothing.
6. What if my stick and poke tattoo gets infected?
Seek medical attention immediately.
7. Can I remove a stick and poke tattoo?
Yes, laser removal is an option, but it may require multiple sessions.
8. How deep should I poke for a stick and poke tattoo?
Aim for the dermis layer, about 1-2mm deep.
9. What is a tattoo blowout?
It’s when ink spreads beyond the intended lines, creating a blurry effect.
10. Can I touch up my stick and poke tattoo?
Yes, wait for the tattoo to heal completely before touching it up.
Ready to explore the art of stick and poke tattoos? At tattooat.com, we provide a wealth of resources to help you create your own unique body art safely and effectively. Discover design ideas, find reputable artists, and learn essential techniques to bring your vision to life. Visit tattooat.com today and start your tattoo journey with confidence. For more information, you can reach us at Address: 1825 SW Broadway, Portland, OR 97201, United States or Phone: +1 (503) 725-3000.