Want to ensure your tattoo comes out exactly as you envisioned? Knowing How To Apply A Tattoo Stencil is critical to achieving a flawless and lasting design. At tattooat.com, we’re dedicated to providing aspiring and seasoned tattoo artists with the knowledge and resources they need to master every aspect of the tattooing process, from design to aftercare. Explore the art of perfect stencil application and unlock your potential for creating stunning body art, with tips on stencil solutions, thermal imaging, and precise placement, enhancing your tattoo artistry skills.
1. Why is Mastering How to Apply a Tattoo Stencil So Important?
Mastering how to apply a tattoo stencil is paramount because it is the crucial first step in transferring your desired design accurately onto the skin. A well-applied stencil acts as a precise roadmap, guiding the tattoo artist throughout the entire inking process, ensuring the final tattoo matches the intended artwork.
Here’s why it’s so important:
- Accuracy: A clear, well-adhered stencil ensures the tattoo’s lines and shapes are precise, minimizing errors and preventing the final design from deviating from the original concept.
- Efficiency: A properly applied stencil saves time by providing a reliable guide, reducing the need for freehand corrections during the tattoo process.
- Client Satisfaction: An accurate stencil helps manage client expectations by allowing them to visualize the tattoo’s placement and size on their body before any permanent work begins, leading to greater satisfaction with the final result.
- Professionalism: Skillful stencil application reflects a commitment to quality and attention to detail, enhancing the artist’s reputation and building trust with clients.
- Creative Foundation: A good stencil provides the artist with the freedom to focus on their inking technique and artistic expression, rather than struggling with inaccurate outlines.
- Complex Designs: For intricate and detailed tattoos, a precise stencil is indispensable for accurately rendering fine lines, shading, and complex patterns.
By mastering stencil application, tattoo artists lay a solid foundation for creating exceptional, long-lasting tattoos that meet both their artistic vision and their clients’ expectations.
2. What are the Different Types of Tattoo Stencil Paper and How Do They Affect the Application?
The type of tattoo stencil paper used directly impacts the application process and the clarity of the transferred design. Understanding the differences between the main types – thermal and hectograph – is essential for achieving the best results.
Here’s a breakdown of each type:
| Type of Paper | Application Method | Pros | Cons | Best For |
|---|---|---|---|---|
| Thermal Stencil | Requires a thermal copier or printer to transfer the design onto the stencil sheet using heat. | Provides sharp, high-resolution transfers, ideal for intricate designs. Fast and efficient for reproducing complex images. | Requires specialized equipment (thermal copier). Can be more expensive than hectograph paper. | Detailed line work, complex patterns, designs created digitally. |
| Hectograph | The design is either drawn directly onto the stencil sheet or traced manually. Pressure from the drawing transfers the image. | No specialized equipment needed, making it cost-effective for small studios or individual artists. Simple to use for basic designs. | Can be less precise for intricate designs due to manual transfer. May require reapplication of stencil solution for larger designs. | Simpler designs, outlines, artists who prefer manual methods. |
Choosing the right stencil paper depends on the complexity of the design, the available equipment, and the artist’s personal preference. Thermal stencil paper is generally favored for its precision and efficiency, especially for intricate designs, while hectograph paper remains a viable option for simpler artwork and artists who prefer a more hands-on approach.
3. What Tools and Materials are Needed for Perfect Tattoo Stencil Application?
Achieving a perfect tattoo stencil application requires a combination of the right tools, high-quality materials, and careful technique. Here’s a comprehensive list of essential items:
- Stencil Paper: Choose either thermal or hectograph paper depending on your preference and the complexity of the design.
- Thermal Copier (for Thermal Paper): A thermal copier is essential for transferring designs onto thermal stencil paper quickly and accurately.
- Design Source:
- Digital Design: A tablet or computer with design software (e.g., Procreate, Adobe Photoshop) and a printer to create or modify the design.
- Hand-Drawn Design: Pencils, pens, and tracing paper for creating or refining the design manually.
- Stencil Solution: A high-quality stencil transfer solution is crucial for adhering the stencil to the skin and ensuring a clear, long-lasting transfer. Popular brands include Stencil Stuff, Electrum, and Spirit.
- Skin Preparation Supplies:
- Razor: To shave the area where the tattoo will be applied, ensuring a smooth surface for stencil adhesion.
- Green Soap or Antiseptic Skin Cleanser: To thoroughly clean and disinfect the skin, removing oils and impurities that can interfere with stencil transfer.
- Paper Towels or Gauze: For drying the skin after cleaning.
- Application Tools:
- Gloves: To maintain hygiene and prevent contamination.
- Applicator Bottles or Spray Bottles: For controlled application of the stencil solution.
- Cotton Swabs: For precise application of the stencil solution in small areas.
- Optional Tools:
- Skin Marker: For marking key points or guidelines on the skin before applying the stencil.
- Mirror: To allow the client to view the stencil placement and provide feedback.
- Good Lighting: Essential for clear visibility during stencil placement. Kingpin Tattoo Supply (tattooat.com) offers a range of overhead lighting solutions designed specifically for tattoo studios.
- Removal Supplies:
- Isopropyl Alcohol: For removing any stencil residue from the skin.
- Cotton Pads: For applying isopropyl alcohol.
Having all these tools and materials readily available will streamline the stencil application process, ensuring accuracy, hygiene, and a professional outcome. You can find many of these supplies at tattooat.com.
4. How to Choose the Right Image for a Tattoo Stencil?
Selecting the right image for a tattoo stencil is crucial for a successful tattoo. Simpler images with bold lines and clear edges translate best into stencils, ensuring accuracy and ease of application. Avoid overly complex designs with intricate details, as these can be difficult to replicate accurately on the stencil and may result in a blurry or unclear transfer.
Consider these factors when choosing an image:
- Line Thickness: Opt for images with well-defined, bold lines that will be easy to follow during the tattooing process. Thin, faint lines may not transfer well or may be difficult to see on the skin.
- Clarity: Choose images that are clear and free of excessive shading or gradients. High contrast between the lines and the background will make the stencil easier to cut and apply.
- Size and Placement: Consider the size and placement of the tattoo on the body. Simpler designs are often better suited for smaller tattoos or areas with limited space. Larger, more complex designs may require more careful planning and stencil application.
- Complexity: Avoid images with intricate details or fine lines that may be lost during the stencil transfer process. Simpler designs with clean, bold shapes are generally easier to work with.
- Client Preferences: Consult with the client to understand their preferences and expectations for the tattoo. Consider their feedback when selecting an image and making any necessary adjustments.
- Transferability: Choose images that will transfer well onto the stencil paper. Avoid images with very light or faded areas, as these may not reproduce accurately on the stencil.
- Scalability: Ensure the image can be scaled up or down without losing clarity or detail. This is especially important if the client wants a tattoo of a specific size.
By carefully considering these factors and selecting an appropriate image, tattoo artists can create stencils that are accurate, easy to apply, and result in a high-quality tattoo.
5. Step-by-Step Guide: How to Create a Tattoo Stencil Using Thermal Paper and a Thermal Copier
Creating a tattoo stencil using thermal paper and a thermal copier is a straightforward process that ensures accuracy and efficiency. Here’s a step-by-step guide:
- Prepare Your Design:
- Create or select your design using digital software (e.g., Procreate, Adobe Photoshop) or a hand-drawn image.
- Ensure the design is clear, with bold lines and high contrast.
- Adjust the size of the design to match the desired tattoo dimensions.
- Prepare the Thermal Paper:
- Thermal paper typically consists of three layers: a carrier sheet, a carbon sheet, and a transfer sheet.
- Remove the carrier sheet (usually a thin, translucent paper) to expose the carbon sheet.
- Insert the Design and Thermal Paper into the Thermal Copier:
- Place your design on top of the carbon sheet of the thermal paper.
- Insert the design and thermal paper into the thermal copier, following the manufacturer’s instructions. Most copiers have a slot or tray for this purpose.
- Adjust the Copier Settings:
- Adjust the copier settings to achieve the desired darkness and clarity. Start with a lower setting and increase as needed to avoid overburning the stencil.
- Refer to the thermal copier’s manual for specific instructions on adjusting the settings.
- Run the Thermal Copier:
- Start the thermal copier to transfer the design onto the transfer sheet.
- The copier uses heat to transfer the carbon from the carbon sheet to the transfer sheet, creating the stencil.
- Remove the Stencil:
- Once the copier has finished, carefully remove the thermal paper from the machine.
- Peel back the carbon sheet to reveal the stencil on the transfer sheet.
- Inspect the Stencil:
- Carefully inspect the stencil to ensure all lines and details have been transferred accurately.
- Use a fine-tipped pen to touch up any areas that may be faint or incomplete.
- Prepare the Stencil for Application:
- Cut out the stencil around the design, leaving a small margin.
- The stencil is now ready to be applied to the skin.
Following these steps will help you create a precise and high-quality tattoo stencil using thermal paper and a thermal copier, ensuring a successful tattoo application.
6. What is the Best Way to Prepare the Skin Before Applying a Tattoo Stencil?
Proper skin preparation is crucial for ensuring the tattoo stencil adheres correctly and the design transfers clearly. Here’s a step-by-step guide:
- Shave the Area:
- Use a clean, new razor to shave the area where the tattoo will be applied. Shaving removes hair that can interfere with stencil adhesion and clarity.
- Shave in the direction of hair growth to minimize irritation.
- Clean the Skin:
- Apply a generous amount of green soap or an antiseptic skin cleanser to the shaved area.
- Gently scrub the skin with a clean, sterile gauze pad or paper towel to remove oils, dirt, and other impurities. Green soap is a popular choice due to its gentle yet effective cleansing properties.
- Rinse the area thoroughly with clean water to remove all traces of soap.
- Dry the Skin:
- Pat the skin dry with a clean, sterile paper towel or gauze pad.
- Ensure the skin is completely dry before proceeding to the next step.
- Apply Stencil Solution:
- Apply a thin, even layer of stencil transfer solution to the prepared skin.
- Use a clean applicator bottle, spray bottle, or cotton swab to apply the solution.
- Popular stencil solutions include Stencil Stuff, Electrum, and Spirit.
- Allow the solution to sit on the skin for a few seconds until it becomes slightly tacky.
- Apply the Stencil:
- Carefully position the stencil on the prepared skin, ensuring it is aligned correctly.
- Gently press the stencil onto the skin, starting from the center and working outwards to avoid air bubbles.
- Hold the stencil in place for 1-2 minutes to allow the design to transfer fully.
- Remove the Stencil:
- Carefully peel the stencil away from the skin, starting from one edge and working slowly to avoid smudging.
- Once the stencil is removed, allow the transferred design to dry completely before beginning the tattoo process.
By following these steps, tattoo artists can ensure the skin is properly prepared for stencil application, resulting in a clear, accurate transfer that will guide the tattoo process.
7. How to Apply a Tattoo Stencil to Skin: A Detailed Guide
Applying a tattoo stencil to the skin is a delicate process that requires precision and care. Here’s a detailed guide to ensure a successful transfer:
- Prepare the Skin: Follow the skin preparation steps outlined above, ensuring the area is shaved, cleaned, and dried thoroughly.
- Apply Stencil Solution:
- Shake the stencil transfer solution well before use.
- Apply a thin, even layer of stencil transfer solution to the prepared skin.
- Use a clean applicator bottle, spray bottle, or cotton swab to apply the solution. Avoid using too much solution, as this can cause the stencil to smudge.
- Popular stencil solutions include Stencil Stuff, Electrum, and Spirit. According to tattoo artists at a convention in Portland, Oregon, Stencil Stuff is the most popular because of its reliability.
- Allow the solution to sit on the skin for a few seconds until it becomes slightly tacky.
- Position the Stencil:
- Carefully position the stencil on the prepared skin, ensuring it is aligned correctly.
- Consult with the client to confirm the placement and orientation of the design.
- Apply the Stencil:
- Gently press the stencil onto the skin, starting from the center and working outwards to avoid air bubbles.
- Use your fingers or a clean, soft cloth to smooth the stencil onto the skin, ensuring it makes full contact with the transfer solution.
- Avoid applying too much pressure, as this can cause the stencil to smudge or distort.
- Hold the Stencil in Place:
- Hold the stencil in place for 1-2 minutes to allow the design to transfer fully.
- Use a timer to ensure consistent transfer times.
- Remove the Stencil:
- Carefully peel the stencil away from the skin, starting from one edge and working slowly to avoid smudging.
- Peel the stencil back in a smooth, controlled motion, avoiding any sudden movements.
- Allow the Transferred Design to Dry:
- Once the stencil is removed, allow the transferred design to dry completely before beginning the tattoo process.
- This may take several minutes, depending on the humidity and temperature of the environment.
- Avoid touching or wiping the transferred design during the drying process.
- Inspect the Transferred Design:
- Carefully inspect the transferred design to ensure all lines and details have been transferred accurately.
- Use a skin marker to touch up any areas that may be faint or incomplete.
- Consult with the client to confirm they are satisfied with the transferred design before proceeding with the tattoo.
By following these steps carefully, tattoo artists can ensure a clear, accurate stencil transfer that will guide the tattoo process and result in a high-quality tattoo.
8. What are Common Mistakes to Avoid When Applying Tattoo Stencils?
Avoiding common mistakes during tattoo stencil application is crucial for achieving a clean, accurate transfer. Here are some pitfalls to watch out for:
- Inadequate Skin Preparation:
- Mistake: Failing to shave, clean, or dry the skin properly.
- Solution: Follow the skin preparation steps outlined above to ensure the area is free of hair, oils, and impurities.
- Using Too Much or Too Little Stencil Solution:
- Mistake: Applying too much stencil solution, which can cause the stencil to smudge. Applying too little, which can result in a faint or incomplete transfer.
- Solution: Use a thin, even layer of stencil transfer solution, allowing it to become slightly tacky before applying the stencil.
- Incorrect Stencil Placement:
- Mistake: Placing the stencil in the wrong location or orientation.
- Solution: Consult with the client to confirm the placement and orientation of the design before applying the stencil.
- Applying Too Much Pressure:
- Mistake: Pressing too hard on the stencil, which can cause it to smudge or distort.
- Solution: Gently press the stencil onto the skin, using your fingers or a soft cloth to smooth it into place.
- Removing the Stencil Too Quickly:
- Mistake: Peeling the stencil away from the skin before the design has fully transferred.
- Solution: Hold the stencil in place for 1-2 minutes to allow the design to transfer completely before removing it.
- Touching or Wiping the Transferred Design:
- Mistake: Touching or wiping the transferred design before it has dried completely.
- Solution: Allow the transferred design to dry completely before touching or wiping it.
- Using Expired or Low-Quality Stencil Solution:
- Mistake: Using expired or low-quality stencil solution, which can result in a faint or incomplete transfer.
- Solution: Use high-quality stencil solution and check the expiration date before use.
- Ignoring Client Feedback:
- Mistake: Failing to consult with the client about the stencil placement or design.
- Solution: Consult with the client to confirm they are satisfied with the stencil placement and design before proceeding with the tattoo.
By avoiding these common mistakes, tattoo artists can ensure a clean, accurate stencil transfer that will guide the tattoo process and result in a high-quality tattoo.
9. How to Remove a Tattoo Stencil from the Skin If Needed?
Sometimes, despite your best efforts, you may need to remove a tattoo stencil from the skin. Here’s how to do it safely and effectively:
- Use Isopropyl Alcohol:
- Dampen a clean cotton pad with isopropyl alcohol (70% concentration is recommended).
- Gently rub the cotton pad over the stencil, using a circular motion.
- Avoid applying too much pressure, as this can irritate the skin.
- Allow the Alcohol to Work:
- Allow the isopropyl alcohol to sit on the stencil for a few seconds to break down the stencil ink.
- Wipe Away the Stencil:
- Use a clean cotton pad to wipe away the stencil ink.
- Repeat the process as needed until the stencil is completely removed.
- Clean the Skin:
- Once the stencil is removed, clean the skin with green soap or an antiseptic skin cleanser to remove any remaining residue.
- Rinse the area thoroughly with clean water.
- Dry the Skin:
- Pat the skin dry with a clean, sterile paper towel or gauze pad.
- Reapply Stencil (If Necessary):
- If you need to reapply the stencil, allow the skin to dry completely before doing so.
- Follow the skin preparation and stencil application steps outlined above.
Important Considerations:
- Avoid Harsh Chemicals: Do not use harsh chemicals or abrasive cleaners to remove the stencil, as these can irritate or damage the skin.
- Be Gentle: Use a gentle touch when removing the stencil to avoid irritating the skin.
- Patch Test: If you have sensitive skin, consider doing a patch test with isopropyl alcohol on a small area of skin before applying it to the entire stencil.
- Consult a Professional: If you have any concerns about removing a tattoo stencil from the skin, consult with a professional tattoo artist or dermatologist.
By following these steps, you can safely and effectively remove a tattoo stencil from the skin without causing irritation or damage.
10. How Can tattooat.com Help You Master Tattoo Stencil Application?
At tattooat.com, we’re dedicated to providing you with the resources and knowledge you need to master every aspect of tattoo stencil application. We offer a comprehensive range of products and services designed to help you achieve perfect stencil transfers every time.
Here’s how tattooat.com can help:
- Extensive Product Selection:
- We offer a wide variety of high-quality stencil papers, including thermal and hectograph options, to suit your preferences and design needs.
- Our selection of stencil transfer solutions includes popular brands like Stencil Stuff, Electrum, and Spirit, ensuring reliable and long-lasting transfers.
- We also carry a range of skin preparation products, including green soap, antiseptic skin cleansers, and razors, to help you prepare the skin properly for stencil application.
- Expert Guidance and Tutorials:
- Our website features detailed articles and tutorials on every aspect of tattoo stencil application, from skin preparation to stencil removal.
- Learn from experienced tattoo artists and industry experts who share their tips and techniques for achieving perfect stencil transfers.
- Top-Quality Equipment:
- We offer state-of-the-art thermal copiers to streamline the stencil creation process and ensure accurate transfers.
- Our selection of tattoo equipment includes everything you need to set up a professional tattoo studio, from tattoo machines to power supplies.
- Community and Support:
- Connect with other tattoo artists and enthusiasts in our online community.
- Share your experiences, ask questions, and get feedback from fellow artists.
- Our customer support team is always available to answer your questions and provide assistance.
Ready to take your tattoo stencil application skills to the next level?
Visit tattooat.com today to explore our selection of products, read our expert articles, and join our vibrant community of tattoo artists. Whether you’re a seasoned professional or just starting out, tattooat.com has everything you need to master the art of tattoo stencil application and create stunning tattoos that will last a lifetime. Check out our Address: 1825 SW Broadway, Portland, OR 97201, United States. Phone: +1 (503) 725-3000 or visit our website tattooat.com.
FAQ: Your Questions About How to Apply a Tattoo Stencil Answered
Here are some frequently asked questions about applying tattoo stencils:
1. What is a tattoo stencil and why is it important?
A tattoo stencil is a template used to transfer a design onto the skin before tattooing. It’s crucial for accuracy, ensuring the final tattoo matches the intended artwork.
2. What are the different types of tattoo stencil paper?
The main types are thermal stencil paper, which requires a thermal copier, and hectograph paper, which is used manually. Thermal paper is generally more precise for complex designs.
3. How do I prepare the skin before applying a tattoo stencil?
Shave the area, clean it with green soap or an antiseptic cleanser, and dry it thoroughly. Then, apply a thin layer of stencil transfer solution.
4. What is the best stencil transfer solution to use?
Popular options include Stencil Stuff, Electrum, and Spirit. The best choice often depends on personal preference and skin type.
5. How do I apply the stencil to the skin?
Apply a thin, even layer of stencil solution, position the stencil carefully, press it onto the skin for 1-2 minutes, and then gently peel it away.
6. What if the stencil doesn’t stick to the skin?
Ensure the skin is properly prepared and that you’re using enough stencil solution. Avoid applying too much, which can also prevent adhesion.
7. How long should I leave the stencil on the skin?
Hold the stencil in place for 1-2 minutes to allow the design to transfer fully. Use a timer for consistent results.
8. How do I remove a tattoo stencil if I make a mistake?
Use isopropyl alcohol (70%) on a cotton pad to gently rub away the stencil. Clean the area with green soap afterward.
9. Can I reuse a tattoo stencil?
No, tattoo stencils are single-use items to prevent cross-contamination and ensure hygiene.
10. Where can I find high-quality tattoo stencil supplies?
Visit tattooat.com for a wide selection of stencil papers, transfer solutions, skin preparation products, and expert guidance.
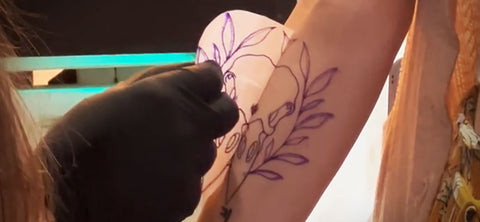
 Tattoo artist applying a stencil to a client's arm, showing precision and care