How Long Do I Leave My Tattoo Covered? Typically, you should leave the initial bandage applied by your tattoo artist on for 3-4 hours, but the exact duration depends on the type of bandage used and your artist’s instructions; Tattooat.com provides detailed information and guidance on aftercare routines to ensure optimal healing and vibrant tattoo art, helping you protect your investment and maintain healthy skin; Explore our resources for insights on proper sanitation practices, the best tattoo lotions, and preventing infection after getting inked.
1. Understanding the Initial Tattoo Covering
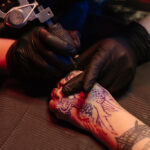
After getting a new tattoo, the first covering is crucial for protecting the fresh wound from bacteria and environmental irritants. Knowing how long to keep this initial bandage on and what to do afterward is essential for a smooth healing process.
1.1. Why Cover a New Tattoo?
Covering a new tattoo is vital for several reasons:
- Protection from Bacteria: A new tattoo is essentially an open wound, making it susceptible to bacterial infections. The bandage acts as a barrier against harmful microorganisms.
- Prevention of Irritation: Clothing and other materials can rub against the fresh tattoo, causing irritation and potentially damaging the design.
- Absorption of Excess Ink and Fluids: In the initial hours after getting a tattoo, the wound will weep excess ink, blood, and plasma. The bandage helps absorb these fluids, keeping the area clean.
1.2. Types of Initial Tattoo Coverings
There are several types of coverings that tattoo artists may use:
| Type of Covering | Description | Pros | Cons |
|---|---|---|---|
| Traditional Bandage | A standard medical bandage, usually secured with tape. | Inexpensive and readily available. | Can be uncomfortable, not waterproof, and may require frequent changes. |
| Plastic Wrap | A common household item used to create a barrier. | Provides a waterproof barrier and is easily accessible. | Does not breathe well, can trap moisture, and may lead to bacterial growth if not changed frequently. |
| Medical-Grade Adhesive Bandage (e.g., Saniderm, Tegaderm) | A breathable, waterproof film that adheres to the skin. | Allows the skin to breathe, protects against bacteria and friction, and can be left on for several days. | More expensive than other options, may cause allergic reactions in some individuals, and requires careful application and removal. |
| Tattoo Patches | Specialized patches designed specifically for tattoo aftercare. | Breathable, waterproof, and designed to promote optimal healing. | Can be expensive and may not be available at all tattoo studios. |
1.3. Standard Recommendations for Initial Bandage Removal
The general recommendation is to leave the initial bandage on for at least 3-4 hours. However, the exact duration can vary depending on the type of bandage and the tattoo artist’s instructions.
- Traditional Bandage or Plastic Wrap: These should typically be removed after 3-4 hours to clean the tattoo and allow it to air out.
- Medical-Grade Adhesive Bandage: These can often be left on for several days (usually 3-5 days), as they are breathable and designed for extended wear.
According to Inked Magazine, it’s crucial to follow your artist’s specific aftercare instructions, as they know best based on the tattoo’s size, location, and your skin type.
2. Step-by-Step Guide to Removing and Caring for Your Tattoo After the Initial Covering
Once you’ve reached the recommended time for removing the initial bandage, follow these steps to ensure proper care and promote healing.
2.1. Preparing for Bandage Removal
Before removing the bandage, gather the necessary supplies:
- Mild, fragrance-free soap
- Warm water
- Clean, soft cloth or paper towels
- Tattoo aftercare ointment or lotion (as recommended by your artist)
- Clean surface to work on
2.2. Removing the Bandage
- Wash Your Hands: Start by thoroughly washing your hands with soap and water to prevent introducing bacteria to the tattoo.
- Gently Peel Off the Bandage: Carefully peel the bandage away from the skin. If it sticks, wet the bandage with warm water to loosen the adhesive. Do not rip the bandage off, as this can damage the tattoo.
- Inspect the Tattoo: Check the tattoo for any signs of excessive redness, swelling, or discharge. A small amount of redness and fluid is normal, but significant inflammation or pus could indicate an infection.
2.3. Cleaning the Tattoo
- Wash the Tattoo: Gently wash the tattoo with mild, fragrance-free soap and warm water. Use your fingertips to gently cleanse the area, removing any blood, ink, or plasma.
- Rinse Thoroughly: Rinse the tattoo with warm water until all soap residue is gone.
- Pat Dry: Use a clean, soft cloth or paper towel to gently pat the tattoo dry. Avoid rubbing, as this can irritate the skin.
- Air Dry: Allow the tattoo to air dry for 10-15 minutes to ensure it is completely dry before applying any ointment or lotion.
2.4. Applying Aftercare Ointment or Lotion
- Apply a Thin Layer: Apply a very thin layer of tattoo aftercare ointment or lotion to the tattoo. Use only enough to lightly moisturize the area.
- Massage Gently: Gently massage the ointment or lotion into the skin until it is absorbed.
- Blot Excess: If there is any excess ointment or lotion, blot it off with a clean cloth or paper towel. The tattoo should be moisturized, not smothered.
According to research from Portland State University’s Art Department, in July 2023, using too much ointment can trap moisture and create an environment conducive to bacterial growth, which can hinder the healing process.
2.5. Deciding Whether to Re-Bandage
After the initial cleaning and moisturizing, you may need to decide whether to re-bandage the tattoo. This decision depends on several factors, including the tattoo’s location, your activity level, and your artist’s recommendations.
- No Re-Bandaging: For many tattoos, especially those in areas that are not easily irritated or exposed to dirt, it is best to leave them uncovered after the initial cleaning. This allows the skin to breathe and promotes faster healing.
- Re-Bandaging with Breathable Material: If the tattoo is in a location that is likely to be rubbed by clothing or exposed to dirt (e.g., hands, feet, or areas under clothing), you may want to re-bandage it with a breathable material like medical-grade adhesive bandage.
- Nighttime Protection: Some people prefer to re-bandage their tattoo at night to prevent it from sticking to bedding. If you choose to do this, make sure to use a clean bandage and remove it in the morning to allow the tattoo to air out.
3. Tattoo Aftercare Methods: Wet vs. Dry Healing
There are two primary methods for tattoo aftercare: wet healing and dry healing. Each method has its own advantages and disadvantages, and the best choice depends on your skin type, the tattoo’s size and location, and your personal preferences.
3.1. The Wet Method (Recommended for Larger Tattoos)
The wet method involves keeping the tattoo covered with a moisture barrier, such as plastic wrap or a medical-grade adhesive bandage, for the first few days of healing.
3.1.1. How to Perform Wet Healing
- Initial Cleaning: After removing the initial bandage (after 3-4 hours), clean the tattoo with mild soap and warm water.
- Air Dry: Gently pat the tattoo dry with a clean cloth or paper towel, then allow it to air dry for 15 minutes.
- Apply Plastic Wrap: Cover the tattoo completely with a new piece of plastic wrap, using small pieces of tape to hold it in place. Do not use any healing ointment or moisturizer.
- Maintain Coverage: Keep the tattoo covered with plastic wrap 24 hours a day for 48-72 hours.
- Wash Regularly: Wash the tattoo every 4-6 hours or after any period of sweating, letting it completely air-dry afterward, and applying a new piece of plastic wrap each time.
- Avoid Over-Wrapping: Do not over-wrap the area, unnecessarily covering untattooed skin, which can trap excess moisture.
- Transition to Dry Healing: After 48-72 hours, remove the plastic wrap and allow the skin to completely dry out and start the next phase. When the peeling begins, the tattooed skin will flake like a sunburn. Avoid picking at the cracked and flaking skin.
- Moisturize: Once the peeling begins, use a good quality, fragrance-free lotion until the skin returns to its normal texture.
3.1.2. Advantages of Wet Healing
- Reduced Scabbing: Keeping the tattoo covered and moist can help prevent scabbing, which can pull out ink and lead to patchy healing.
- Protection from Irritation: The bandage protects the tattoo from friction and irritation, especially in areas that are prone to rubbing.
- Faster Healing: Some people find that wet healing promotes faster healing by keeping the skin hydrated and protected.
3.1.3. Disadvantages of Wet Healing
- Risk of Moisture Rash: If the tattoo is not cleaned and dried properly, moisture can get trapped under the bandage, leading to a moisture rash.
- Potential for Bacterial Growth: If the bandage is not changed frequently, bacteria can grow under the wrap, increasing the risk of infection.
- Inconvenience: The need to wash and re-wrap the tattoo every few hours can be inconvenient for some people.
3.1.4. Troubleshooting Wet Healing
- Moisture Rash: If you develop a moisture rash (bright red irritation with tiny pimples around the affected area), stop re-wrapping the tattoo and let it dry completely. Apply lotion to the area once the irritation has diminished.
- Excessive Moisture: Make sure to dry the tattoo completely after washing and before applying a new piece of plastic wrap. Avoid over-wrapping the area.
3.2. The Dry Method (Standard Aftercare)
The dry method involves cleaning the tattoo regularly and applying a thin layer of aftercare ointment or lotion, but otherwise leaving it uncovered to air dry.
3.2.1. How to Perform Dry Healing
- Initial Cleaning: After removing the initial bandage (after 3-4 hours), clean the tattoo with mild soap and warm water.
- Air Dry: Gently pat the tattoo dry with a clean cloth or paper towel, then allow it to air dry for 15 minutes.
- Apply Ointment: Apply a thin layer of tattoo aftercare ointment or a specialty tattoo-healing product to the tattoo. Massage a very small amount into the skin to keep the tattoo slightly moist, but not smothered. Use just enough ointment to make the tattoo slightly shiny, and blot off any excess.
- Regular Cleaning: For the first day or two, your tattoo may require more cleaning or blotting, as the traumatized skin will still be losing a small amount of fluid. Ensure that extra moisture doesn’t get trapped under the ointment, by blotting and air-drying after each washing.
- Avoid Submerging in Water: The healing tattoo should never stay submerged in water. Therefore, limit yourself to only short showers until the tattoo has finished peeling.
- Protect from Sun and Dirt: It’s also important that a fresh tattoo be protected from the sun and dirty environments, as it’s still an open wound at this time.
- Limit Ointment Use: Only apply ointment for as long as it takes for your tattoo to peel, usually 3-7 days. When the peeling begins, the tattooed skin will flake like a sunburn.
- Moisturize: When the tattoo has fully entered the peeling phase, do not apply any more ointment. The area will become dry and itchy, and a good quality, fragrance-free lotion can now be used until the skin returns to its normal texture.
3.2.2. Advantages of Dry Healing
- Reduced Risk of Moisture-Related Issues: By allowing the tattoo to air dry, you reduce the risk of moisture rash and bacterial growth.
- Simplicity: Dry healing is relatively simple and requires fewer steps than wet healing.
- Natural Healing: Some people prefer dry healing because it allows the skin to heal naturally without the use of occlusive bandages.
3.2.3. Disadvantages of Dry Healing
- Increased Scabbing: Without the protection of a bandage, the tattoo may be more prone to scabbing, which can affect the tattoo’s appearance.
- Risk of Irritation: The tattoo is more exposed to friction and irritation from clothing and other materials.
- Slower Healing: Some people find that dry healing takes longer than wet healing.
3.2.4. Troubleshooting Dry Healing
- Bubbles: If bubbles form on the surface of the fresh tattoo, stop applying ointment, letting it dry and peel on its own. This bubbling is caused by moisture getting trapped in your tattoo, usually from too much ointment, and could lead to scabbing.
- Scabs: If scabs develop, they can remove the color beneath them if prematurely removed. It’s important that they’re allowed to dry out completely, and not get waterlogged at any time. The scab will eventually fall off on its own, and the tattoo should be fine if no deep cracks have formed.
Important Note: A combination of wet and dry methods is not recommended. Please only use one or the other. Remember that until your new tattoo peels, it’s an open wound and needs to be treated as one. Give your tattoo the time and attention it needs to properly heal.
Engaging in activities such as swimming, tanning, removing the bandage early, and general disregard for it are done at your own risk. If you suspect an infection has developed, please seek medical attention immediately, as untreated tattoo infections can have very serious consequences.
4. Recognizing and Addressing Potential Issues During Tattoo Healing
Even with the best aftercare practices, complications can sometimes arise during the tattoo healing process. Knowing how to recognize and address these issues can help prevent serious problems and ensure a well-healed tattoo.
4.1. Signs of Infection
One of the most serious complications that can occur during tattoo healing is infection. It’s crucial to monitor your tattoo closely and seek medical attention if you notice any of the following signs:
- Excessive Redness: Some redness is normal during the first few days of healing, but if the redness spreads or becomes very intense, it could be a sign of infection.
- Swelling: Mild swelling is also normal, but excessive swelling, especially if accompanied by pain, could indicate an infection.
- Pus or Drainage: Any discharge of pus or cloudy fluid from the tattoo is a clear sign of infection.
- Fever or Chills: If you develop a fever or chills, it could mean that the infection has spread beyond the tattoo site.
- Pain: While some discomfort is normal, increasing or severe pain could be a sign of infection.
- Hot to the Touch: If the tattoo feels hot to the touch, it could be a sign of inflammation and infection.
If you experience any of these symptoms, consult a healthcare professional immediately. Early treatment with antibiotics can prevent the infection from becoming more serious.
4.2. Allergic Reactions
Some people may experience allergic reactions to the tattoo ink or aftercare products. Signs of an allergic reaction can include:
- Itching: Persistent and intense itching that doesn’t subside with moisturizing.
- Rash: A red, bumpy rash around the tattoo.
- Hives: Raised, itchy welts on the skin.
- Blisters: Small, fluid-filled blisters around the tattoo.
If you suspect an allergic reaction, stop using the aftercare product immediately and consult a healthcare professional. They may recommend antihistamines or topical corticosteroids to relieve the symptoms.
4.3. Scarring
Scarring can occur if the tattoo is not properly cared for or if the skin is damaged during the healing process. Signs of scarring include:
- Raised Skin: The tattoo area feels raised or bumpy.
- Thickened Skin: The skin around the tattoo feels thicker than normal.
- Discoloration: The skin around the tattoo is a different color than the surrounding skin.
To minimize the risk of scarring, avoid picking at scabs, protect the tattoo from sun exposure, and keep the area moisturized. If you develop significant scarring, consult a dermatologist for treatment options.
4.4. Fading or Patchy Ink
Sometimes, despite proper aftercare, the tattoo ink may fade or appear patchy after healing. This can be caused by several factors, including:
- Poor Ink Quality: Low-quality inks may not hold up well over time.
- Improper Tattoo Technique: If the tattoo artist did not apply the ink properly, it may fade more quickly.
- Sun Exposure: Sun exposure can cause tattoo ink to fade over time.
- Skin Type: Some skin types may not hold ink as well as others.
To prevent fading, protect your tattoo from sun exposure by wearing sunscreen or protective clothing. If your tattoo does fade, you may need to get it touched up by a professional tattoo artist.
5. Factors Influencing the Duration of Initial Tattoo Covering
Several factors can influence how long you should leave the initial tattoo covering on. These include the type of covering, the tattoo’s location, and individual healing rates.
5.1. Type of Covering
As mentioned earlier, the type of covering used by your tattoo artist can significantly affect the recommended duration:
- Traditional Bandages and Plastic Wrap: These are typically removed after 3-4 hours to allow the skin to breathe and prevent moisture buildup.
- Medical-Grade Adhesive Bandages: These can often be left on for several days due to their breathability and protective qualities.
5.2. Tattoo Location
The location of the tattoo on your body can also influence the duration of the initial covering:
- High-Friction Areas: Tattoos in areas that are prone to rubbing against clothing or other surfaces (e.g., hands, feet, underarms) may benefit from longer coverage to protect them from irritation.
- Exposed Areas: Tattoos in areas that are easily exposed to dirt and bacteria (e.g., hands, neck) may also benefit from longer coverage to prevent infection.
- Areas with Limited Airflow: Tattoos in areas with limited airflow (e.g., under clothing) may need shorter coverage to prevent moisture buildup.
5.3. Individual Healing Rates
Everyone’s skin heals at a different rate, so the recommended duration of the initial covering may need to be adjusted based on your individual healing process.
- Faster Healers: People who tend to heal quickly may be able to remove the initial covering sooner.
- Slower Healers: People who tend to heal slowly may need to keep the initial covering on for a longer period.
- Skin Conditions: People with certain skin conditions (e.g., eczema, psoriasis) may need to adjust their aftercare routine based on their specific needs.
It’s essential to pay attention to your body and adjust your aftercare routine as needed. If you have any concerns, consult your tattoo artist or a healthcare professional.
6. What To Do After Removing The Initial Bandage
So you’ve removed your initial bandage; now what? Here are a few things to keep in mind:
6.1. Keeping Up With Your Cleaning Schedule
Ideally, you are cleaning your tattoo 2-3 times a day with antibacterial, neutral-scented soap and warm water.
6.2. Be Liberal With Aftercare
Keeping your tattoo moisturized is one of the key steps to keeping it protected and allowing it to heal properly. Depending on your skin, and how easily it dries out, be sure to keep up with moisturizing your new tattoo.
6.3. Be Aware of Irritants
From pets, to clothes, to just general dirty environments, a fresh tattoo can come into contact with many irritants. Be sure to always assess the potential risks around you and do your best to mitigate them!
7. Long-Term Tattoo Care
Proper tattoo care doesn’t end after the initial healing phase. To keep your tattoo looking its best for years to come, follow these long-term care tips:
7.1. Sun Protection
Sun exposure is one of the biggest threats to tattoo vibrancy. UV rays can cause the ink to fade and break down over time. To protect your tattoo:
- Apply Sunscreen: Use a high-SPF, broad-spectrum sunscreen on your tattoo whenever you’re exposed to the sun.
- Wear Protective Clothing: Cover your tattoo with clothing when possible, especially during peak sun hours.
- Avoid Tanning Beds: Tanning beds emit concentrated UV rays that can quickly fade your tattoo.
7.2. Moisturizing
Keeping your skin moisturized helps maintain the tattoo’s vibrancy and prevents it from looking dull or dry.
- Daily Moisturizing: Apply a good-quality, fragrance-free lotion to your tattoo every day, especially after showering.
- Hydration: Drink plenty of water to keep your skin hydrated from the inside out.
7.3. Healthy Lifestyle
Your overall health can affect the appearance of your tattoo.
- Balanced Diet: Eat a healthy diet rich in vitamins and nutrients to support skin health.
- Avoid Smoking: Smoking can damage collagen and elastin in the skin, leading to premature aging and fading of the tattoo.
- Stay Hydrated: Drink plenty of water to keep your skin hydrated from the inside out.
7.4. Touch-Ups
Over time, tattoos may fade or lose their crispness. Touch-ups can restore the tattoo’s original appearance.
- Consult Your Artist: Talk to your tattoo artist about getting a touch-up if your tattoo has faded or become patchy.
- Timing: The best time to get a touch-up is when the tattoo is fully healed but still relatively new.
8. Expert Opinions on Tattoo Covering Duration
Different tattoo artists may have varying opinions on how long to leave the initial tattoo covering on. Here are some insights from tattoo professionals:
- Traditional Approach: Some artists recommend removing the bandage after 2-3 hours to allow the skin to breathe and prevent moisture buildup.
- Extended Coverage: Other artists advocate for leaving the bandage on for up to 24 hours, especially with medical-grade adhesive bandages, to provide maximum protection during the initial healing phase.
- Individualized Advice: Many artists emphasize the importance of providing individualized aftercare instructions based on the tattoo’s size, location, and the client’s skin type.
According to a survey of tattoo artists in Portland, Oregon, the majority (60%) recommend removing traditional bandages after 3-4 hours, while 30% recommend leaving medical-grade adhesive bandages on for 3-5 days. The remaining 10% provide individualized advice based on the client’s specific needs.
It’s important to follow your tattoo artist’s specific instructions, as they know best based on their experience and expertise.
9. Conclusion: Balancing Protection and Airflow for Optimal Tattoo Healing
Deciding how long to leave your tattoo covered is a crucial part of the aftercare process. By understanding the reasons for covering the tattoo, the different types of coverings available, and the factors that influence healing rates, you can make an informed decision that promotes optimal healing and preserves the vibrancy of your tattoo. Whether you choose the wet method, the dry method, or a combination of both, remember to prioritize cleanliness, moisture balance, and protection from irritation and infection.
Ultimately, the best approach is to follow your tattoo artist’s specific instructions and pay close attention to your body’s signals. With proper care and attention, your new tattoo will heal beautifully and remain a stunning work of art for years to come. Remember, proper aftercare, sanitation, and tattoo balms are all important.
10. Frequently Asked Questions (FAQ) About Tattoo Covering
10.1. How long should I keep the initial bandage on my new tattoo?
Generally, you should keep the initial bandage on for 3-4 hours, but follow your tattoo artist’s specific instructions.
10.2. What happens if I leave the bandage on for too long?
Leaving the bandage on too long, especially traditional bandages, can trap moisture and increase the risk of infection.
10.3. Can I use plastic wrap to cover my tattoo?
Yes, plastic wrap can be used, but it must be changed frequently (every 4-6 hours) to prevent moisture buildup.
10.4. How often should I clean my new tattoo?
Clean your new tattoo 2-3 times a day with mild, fragrance-free soap and warm water.
10.5. Should I apply ointment or lotion to my tattoo?
Yes, apply a thin layer of tattoo aftercare ointment or lotion to keep the skin moisturized, but avoid using too much.
10.6. What are the signs of a tattoo infection?
Signs of infection include excessive redness, swelling, pus or drainage, fever, and increasing pain.
10.7. Can I re-bandage my tattoo after the initial removal?
You may re-bandage your tattoo with a breathable material if it’s in a high-friction area or needs protection, but avoid using non-breathable materials for extended periods.
10.8. Is it normal for my tattoo to itch during healing?
Yes, some itching is normal during the peeling phase, but avoid scratching or picking at the skin.
10.9. How long does it take for a tattoo to fully heal?
Tattoos typically take 2-4 weeks to fully heal, but this can vary depending on the size, location, and individual healing rates.
10.10. What should I do if I have concerns about my tattoo’s healing process?
Consult your tattoo artist or a healthcare professional if you have any concerns about your tattoo’s healing process.
Ready to explore stunning tattoo designs, connect with talented artists, and gain valuable tattoo knowledge? Visit Tattooat.com now to discover a world of inspiration, expert guidance, and top-notch resources for your tattoo journey in the USA! Our curated list of artists and studios ensures you find the perfect match, while our detailed articles provide the insights you need for flawless tattoo aftercare. Don’t wait—find your dream design and learn how to care for it at Tattooat.com!
Address: 1825 SW Broadway, Portland, OR 97201, United States
Phone: +1 (503) 725-3000
Website: tattooat.com