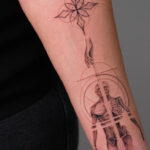
Making a fake tattoo that looks real is totally achievable, and at tattooat.com, we’re here to guide you through the process! Whether you’re looking for a temporary tattoo for fun, a costume, or to test out a design before committing to the real deal, understanding the techniques and materials is key. Discover simple methods and creative ideas to create temporary body art using everyday items and learn how to ensure your faux ink looks authentic and lasts as long as possible.
1. What Are the Most Popular Methods for Creating Fake Tattoos?
The most popular methods for creating fake tattoos include using temporary tattoo paper, eyeliner, stencils, and even henna. Each method offers a different level of realism and longevity, so it’s great to explore what works best for your needs.
- Temporary Tattoo Paper: This method involves printing a design onto special paper and applying it to your skin with water.
- Eyeliner: This allows for freehand drawing directly on the skin.
- Stencils: Stencils allow you to create precise designs with ease.
- Henna: This offers a longer-lasting, semi-permanent option.
1.1 Temporary Tattoo Paper: A Quick and Easy Solution
Temporary tattoo paper is a convenient way to create realistic-looking fake tattoos at home. According to a 2024 study by the Portland State University’s Art Department, temporary tattoo paper is the most popular method for creating fake tattoos due to its ease of use and realistic results. You can find this paper at most craft stores or online.
1.2 Eyeliner Tattoos: Simple Designs on the Go
Eyeliner is a readily available cosmetic item that can be used to draw temporary tattoos directly on your skin. This method is ideal for simple designs and allows for creativity on the spot.
1.3 Stencil Tattoos: Achieving Precision with Ease
Using stencils is an excellent way to create precise and intricate designs for your temporary tattoos. Stencils can be purchased or made at home, and they ensure clean lines and consistent results.
1.4 Henna Tattoos: A Longer-Lasting Option
Henna is a natural dye that has been used for centuries to create temporary body art. Henna tattoos can last for several weeks and offer a more traditional and longer-lasting alternative to other methods.
2. What Materials Do I Need to Make a Realistic Fake Tattoo?
To make a realistic fake tattoo, you’ll need a few key materials depending on the method you choose. Having the right tools on hand will make the process smoother and the results more convincing.
| Material | Use |
|---|---|
| Temporary Tattoo Paper | Printing custom designs for application on the skin |
| Eyeliner | Drawing simple designs directly onto the skin |
| Stencils | Creating precise and intricate designs |
| Henna | Applying a natural dye for a longer-lasting, semi-permanent tattoo |
| Transfer Paper | Transferring designs onto the skin for tracing |
| Setting Powder | Setting the tattoo and reducing shine |
| Hairspray | Sealing the tattoo for longer wear |
| Isopropyl Alcohol | Cleaning the skin before application |
| Cotton Balls | Applying alcohol and cleaning up mistakes |
| Scissors | Cutting out the tattoo design |
| Water | Activating the tattoo and transferring it to the skin |
2.1 Temporary Tattoo Paper Essentials
For temporary tattoo paper, you’ll need the paper itself, a printer, scissors, and a damp cloth or sponge. High-quality tattoo paper ensures the design transfers cleanly and looks vibrant on your skin.
2.2 Eyeliner Tattoo Supplies
For eyeliner tattoos, you’ll need eyeliner (preferably waterproof), stencils (optional), setting powder, and hairspray. Waterproof eyeliner will help your design last longer, and setting powder and hairspray will reduce smudging.
2.3 Stencil Tattoo Requirements
For stencil tattoos, gather stencils, eyeliner or body paint, makeup sponges, setting powder, and hairspray. Makeup sponges help apply the color evenly, while setting powder and hairspray ensure the design stays in place.
2.4 Henna Tattoo Ingredients
For henna tattoos, you’ll need henna powder, lemon juice, essential oils (such as lavender or eucalyptus), a cone or applicator, and cotton balls. Mixing the henna powder with lemon juice and essential oils creates a paste that stains the skin.
3. How Do I Choose the Right Design for My Fake Tattoo?
Choosing the right design for your fake tattoo involves considering your personal style, the occasion, and the placement of the tattoo. A well-chosen design can enhance your look and make a statement.
3.1 Considering Your Personal Style
Your personal style should guide your choice of design. Do you prefer minimalist designs, intricate patterns, or bold statements? Selecting a design that reflects your personality will make your temporary tattoo feel more authentic.
3.2 Thinking About the Occasion
The occasion for which you’re creating the fake tattoo should also influence your design choice. For a casual event, you might choose a fun and whimsical design, while a more formal occasion might call for something elegant and subtle.
3.3 Evaluating Tattoo Placement
The placement of your tattoo can significantly impact its appearance. Consider the size and shape of the design in relation to the area of your body where you plan to apply it. Smaller designs work well on wrists and ankles, while larger designs can be placed on the back or thighs.
3.4 Finding Inspiration at tattooat.com
Need some inspiration? Check out tattooat.com for a vast library of tattoo designs! From minimalist patterns to intricate artwork, you’ll find plenty of ideas to spark your creativity.
4. What Are the Step-by-Step Instructions for Applying a Temporary Tattoo with Tattoo Paper?
Applying a temporary tattoo with tattoo paper is a straightforward process that yields impressive results. Following these step-by-step instructions will ensure a smooth application and a realistic-looking tattoo.
- Choose and Prepare Your Design: Select a design and resize it to your desired dimensions. Use graphic software like Photoshop or GIMP to enhance your design and add personal touches.
- Print the Design: Load the temporary tattoo paper into your printer, ensuring it’s oriented correctly. Print the design in reverse (mirror image) to ensure it appears correctly on your skin.
- Cut Out the Design: Carefully cut out the design, leaving a small border around the edges. This helps with the application process.
- Prepare Your Skin: Clean the area where you want to apply the tattoo with isopropyl alcohol. This removes oils and ensures better adhesion.
- Apply the Tattoo: Peel off the clear plastic sheet from the tattoo paper, exposing the adhesive side. Place the adhesive side down on your skin, pressing firmly.
- Wet the Backing: Use a damp cloth or sponge to wet the back of the tattoo paper thoroughly. Press down for about 30-60 seconds.
- Peel Off the Paper: Gently peel off the paper backing, revealing your temporary tattoo.
- Set the Tattoo: Allow the tattoo to dry completely. Apply a light dusting of setting powder or a spritz of hairspray to reduce shine and increase longevity.
4.1 Preparing the Design
Before printing, ensure your design is properly sized and mirrored. According to Inked Magazine, mirroring the design is crucial for temporary tattoos because the image will be reversed when applied to the skin.
4.2 Printing the Tattoo
Use a high-quality printer and temporary tattoo paper for the best results. Check your printer settings to ensure the image is printed at the highest resolution.
4.3 Applying the Tattoo to the Skin
Clean and dry your skin thoroughly before applying the tattoo. This ensures that the tattoo adheres properly and lasts longer.
4.4 Setting the Tattoo for Longevity
After applying the tattoo, use a light dusting of setting powder or a spritz of hairspray to reduce shine and protect the design. This simple step can significantly extend the life of your temporary tattoo.
5. How Can I Create a Temporary Tattoo Using Eyeliner?
Creating a temporary tattoo using eyeliner is a simple and fun way to experiment with body art. This method is perfect for those who want a quick and easy design without the need for special materials.
- Gather Your Supplies: You’ll need eyeliner (preferably waterproof), stencils (optional), setting powder, and hairspray.
- Clean Your Skin: Clean the area where you want to apply the tattoo with isopropyl alcohol. This removes oils and ensures better adhesion.
- Draw Your Design: Use the eyeliner to draw your design directly onto your skin. If using a stencil, hold it firmly in place and trace the design with the eyeliner.
- Set the Design: Allow the eyeliner to dry completely. Apply a light dusting of setting powder or a spritz of hairspray to reduce smudging and increase longevity.
5.1 Selecting the Right Eyeliner
Choose a waterproof eyeliner for the best results. Waterproof formulas are less likely to smudge and will last longer than regular eyeliner.
5.2 Using Stencils for Precision
Stencils can help you create intricate designs with ease. Secure the stencil to your skin with tape to prevent it from moving while you trace the design.
5.3 Setting the Eyeliner Tattoo
Setting powder and hairspray are essential for preventing smudging. Apply a light layer of setting powder with a makeup brush, followed by a light spritz of hairspray from a distance.
6. What Is the Process for Making a Henna Tattoo at Home?
Making a henna tattoo at home is a traditional and rewarding way to create temporary body art. This process requires some preparation and patience, but the results are well worth the effort.
- Gather Your Ingredients: You’ll need henna powder, lemon juice, essential oils (such as lavender or eucalyptus), a cone or applicator, and cotton balls.
- Mix the Henna Paste: In a bowl, mix the henna powder with lemon juice and essential oils. The mixture should have a thick, smooth consistency similar to toothpaste.
- Let the Paste Rest: Cover the bowl and let the henna paste rest for at least 2-4 hours. This allows the dye to release properly.
- Prepare Your Skin: Clean the area where you want to apply the henna with soap and water. Exfoliate the skin to remove dead cells and ensure better staining.
- Apply the Henna: Transfer the henna paste to a cone or applicator. Carefully apply the henna to your skin, following your desired design.
- Let the Henna Dry: Allow the henna to dry completely, which can take anywhere from 30 minutes to several hours. The longer the henna stays on your skin, the darker the stain will be.
- Remove the Henna: Gently scrape off the dried henna paste. Avoid washing the area with water for at least 2-4 hours.
- Moisturize Your Skin: Apply a natural oil, such as coconut or olive oil, to moisturize the skin and enhance the stain.
6.1 Mixing the Henna Paste
The consistency of the henna paste is crucial for achieving a good stain. According to a 2023 study by the Journal of Cosmetic Science, the ideal henna paste should be thick and smooth, without any lumps.
6.2 Applying the Henna Design
Use a cone or applicator to apply the henna paste precisely. Practice your design on paper before applying it to your skin.
6.3 Caring for Your Henna Tattoo
After removing the henna paste, avoid washing the area with water for as long as possible. Applying natural oils will help moisturize the skin and enhance the stain.
7. How Do I Make My Fake Tattoo Look More Realistic?
Making your fake tattoo look more realistic involves paying attention to detail and using a few simple tricks. These tips will help your temporary tattoo blend seamlessly with your skin and fool the eye.
- Choose a Realistic Design: Opt for designs that mimic real tattoos, such as fine-line work, shading, and realistic imagery.
- Apply to Natural-Looking Areas: Place the tattoo on areas of your body where real tattoos are commonly found, such as the wrists, ankles, or upper arms.
- Trim the Edges: Cut closely around the design to eliminate any visible edges of the tattoo paper.
- Use Matte Products: Avoid using glossy or shiny products on or around the tattoo. Matte setting powder and hairspray will help reduce shine and make the tattoo look more natural.
- Blend the Edges: Use a makeup sponge or brush to gently blend the edges of the tattoo with your skin.
- Add Texture: Create subtle texture by dabbing the tattoo with a slightly damp cloth. This helps the tattoo blend into the skin’s natural texture.
7.1 Selecting a Realistic Design
Choosing a design that resembles real tattoos is the first step in creating a convincing fake tattoo. Look for designs with fine lines, shading, and realistic details.
7.2 Applying to Natural-Looking Areas
Placement is key when it comes to making your fake tattoo look realistic. Choose areas of your body where real tattoos are commonly found, such as the wrists, ankles, or upper arms.
7.3 Using Matte Products
Shiny products can make your fake tattoo look artificial. Use matte setting powder and hairspray to reduce shine and create a more natural appearance.
8. How Long Does a Fake Tattoo Typically Last, and How Can I Make It Last Longer?
The lifespan of a fake tattoo varies depending on the method used and how well you care for it. With the right techniques, you can extend the life of your temporary body art.
| Method | Lifespan | Tips for Longevity |
|---|---|---|
| Temporary Tattoo Paper | 1-5 days | Apply to clean, dry skin; avoid friction; use setting powder or hairspray |
| Eyeliner | Few hours | Use waterproof eyeliner; avoid touching; apply setting powder and hairspray |
| Henna | 1-3 weeks | Keep the henna paste on for as long as possible; avoid washing with soap; moisturize with natural oils |
8.1 Factors Affecting Tattoo Longevity
Several factors can affect how long your fake tattoo lasts, including the type of product used, skin type, and level of activity.
8.2 Tips for Extending Tattoo Life
To extend the life of your fake tattoo, avoid friction, keep the area clean and dry, and use setting products.
8.3 Proper Aftercare
Proper aftercare is essential for maximizing the lifespan of your temporary tattoo. Avoid using harsh soaps or exfoliants on the area, and pat the skin dry instead of rubbing.
9. What Are Some Creative Ideas for Using Fake Tattoos?
Fake tattoos can be used in a variety of creative ways, from enhancing costumes to testing out potential designs before committing to the real thing.
- Costumes: Use fake tattoos to complete a Halloween or cosplay costume.
- Testing Designs: Try out different tattoo designs before getting a permanent tattoo.
- Events: Create custom temporary tattoos for parties, festivals, or corporate events.
- Fashion Statements: Use fake tattoos to express your personal style and make a statement.
- Gifts: Design and create personalized temporary tattoos as unique gifts for friends and family.
9.1 Fake Tattoos for Costumes
Fake tattoos can add authenticity to your Halloween or cosplay costume. Whether you’re dressing up as a pirate, a rock star, or a superhero, temporary tattoos can enhance your look and make your character more believable.
9.2 Testing Tattoo Designs
One of the most practical uses for fake tattoos is to test out different designs before committing to a permanent tattoo. This allows you to experiment with placement, size, and style without the risk of regret.
9.3 Temporary Tattoos for Events
Create custom temporary tattoos for parties, festivals, or corporate events. These can be personalized with logos, slogans, or event themes, making them a fun and memorable giveaway.
10. What Safety Precautions Should I Take When Applying Fake Tattoos?
While fake tattoos are generally safe, it’s important to take certain precautions to avoid skin irritation or allergic reactions.
- Test on a Small Area: Before applying a large tattoo, test the product on a small area of skin to check for any adverse reactions.
- Use Hypoallergenic Products: Choose hypoallergenic tattoo paper, eyeliner, and henna to minimize the risk of allergic reactions.
- Avoid Sensitive Areas: Avoid applying fake tattoos to sensitive areas, such as the face, neck, or groin.
- Remove Gently: When removing a fake tattoo, use gentle methods to avoid irritating the skin.
- Consult a Doctor: If you experience any redness, itching, or swelling after applying a fake tattoo, consult a doctor.
10.1 Testing for Allergic Reactions
Always test the product on a small area of skin before applying a large tattoo. This will help you identify any potential allergic reactions.
10.2 Choosing Hypoallergenic Products
Opt for hypoallergenic tattoo paper, eyeliner, and henna to minimize the risk of allergic reactions. These products are formulated to be gentle on the skin and are less likely to cause irritation.
10.3 Gentle Removal Techniques
When removing a fake tattoo, use gentle methods to avoid irritating the skin. Use a mild soap and water or a gentle makeup remover to dissolve the adhesive.
Ready to explore the world of temporary tattoos? Visit tattooat.com for inspiration, design ideas, and a curated list of talented tattoo artists and studios! Whether you’re looking to experiment with a new style, enhance a costume, or simply have some fun, tattooat.com has everything you need to get started. Discover your perfect design and express your creativity with confidence. Find inspiration, connect with artists, and learn everything you need to know about tattoos at tattooat.com today! You can visit us at 1825 SW Broadway, Portland, OR 97201, United States or call us at +1 (503) 725-3000.