How Do Tattoo Artists Print Stencils? Tattoo artists print stencils using thermal printers or thermal copiers to transfer designs onto stencil paper. At tattooat.com, we offer expert guidance on creating and applying tattoo stencils, ensuring your ink turns out exactly as envisioned. Mastering the art of stencil creation, including techniques and tools, is essential for success in tattooing.
1. Why is Stencil Printing Important in Tattooing?
Stencil printing is paramount in tattooing for several reasons. Stencils allow clients to approve the design and placement before the actual tattooing begins, ensuring their satisfaction. More importantly, stencils significantly minimize errors, helping tattoo artists achieve perfect and precise results. As Inked Magazine highlights, the use of stencils demonstrates a commitment to precision and client satisfaction, essential elements in the tattooing process.
- Ensuring Client Satisfaction: Stencils offer a preview of the final design, allowing clients to make necessary adjustments before the tattoo becomes permanent.
- Reducing Errors: By providing a clear outline, stencils guide the artist and help prevent mistakes during the tattooing process.
- Achieving Precision: Stencils enable artists to create intricate and detailed designs with accuracy.
2. What Types of Tattoo Stencil Paper Are Available?
There are three primary types of tattoo stencil paper, each catering to different stencil creation methods. Knowing the differences is essential for selecting the right material.
- Hectograph Paper: Also known as freehand paper, hectograph paper is designed for artists who prefer to draw stencils by hand. It typically consists of three layers: a top sheet for drawing, a middle sheet to prevent sticking, and a bottom sheet that becomes the stencil.
- Thermal Paper: Thermal paper is used with thermal printers or copiers and is ideal for transferring digitally created designs. It has four layers: a top layer for printing or drawing, a middle brown layer (onion layer) that is removed before printing, a carbon ink sheet, and a bottom protective sheet.
- Tracing Paper: Tracing paper is a single translucent layer used for creating freehand drafts of designs. It allows artists to refine their artwork before transferring it to hectograph or thermal paper.
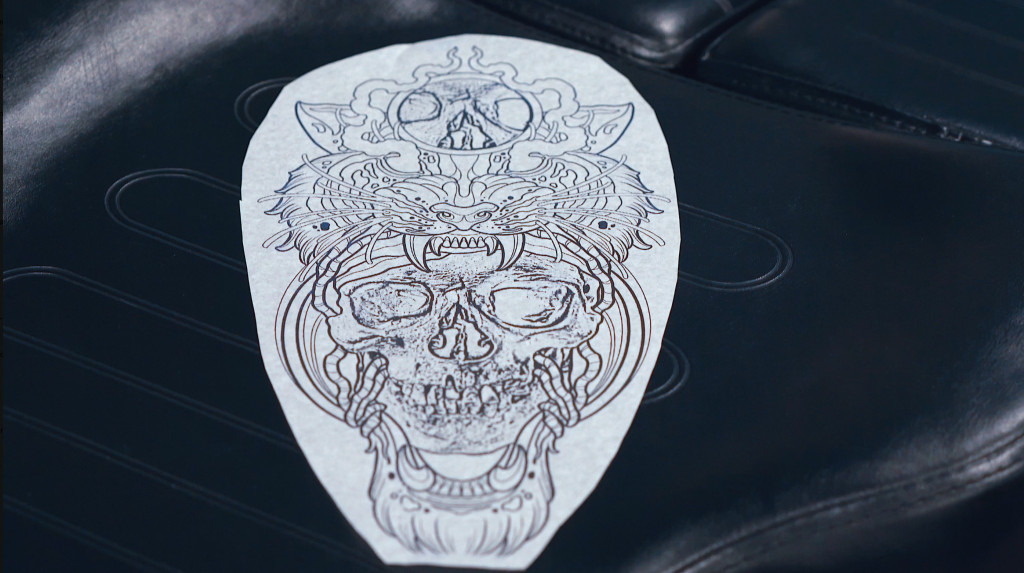 Different types of tattoo stencil paper, including hectograph, thermal, and tracing paper, showcasing their unique characteristics and uses in the tattoo stencil creation process
3. How Do You Create a Tattoo Stencil Using Hectograph Paper?
Creating a tattoo stencil with hectograph paper involves a straightforward process of manual drawing and transfer. This method is ideal for artists who prefer a hands-on approach.
- Prepare the Paper: Begin by removing the middle “onion” sheet from the hectograph paper. This prevents the sheets from sticking together and ensures a clean transfer.
- Draw the Design: Use a hectograph pencil or a regular pencil with firm pressure to draw your design on the top sheet. Ensure that you apply enough pressure for the image to transfer cleanly to the bottom sheet.
- Trace the Image: Many artists prefer to sketch the design on tracing paper first and then trace it onto the hectograph paper. This allows for greater precision and refinement of the design.
- Check the Transfer: Lift the top sheet to check if the image has transferred completely to the bottom sheet. If necessary, go over the lines again to ensure a clear and crisp stencil.
- Finalize the Stencil: Once the image is fully transferred, the bottom sheet is your stencil, ready to be applied to the skin.
4. What is the Process for Using Thermal Paper to Create Tattoo Stencils?
Thermal paper is a popular choice for creating tattoo stencils because it works with both hand-drawn and digitally created designs. The process involves using a thermal copier or printer to transfer the image onto the stencil paper.
- Prepare the Design: Create your design digitally using graphic software on a tablet or computer. Ensure that the image is reversed horizontally, so it appears correctly when applied to the skin.
- Thermal Copier Method:
- Open the thermal copier and insert the thermal paper packet, removing the brown “onion” sheet.
- Feed the yellow sheet through the copier, ensuring the purple carbon is facing down.
- Place your printed design face down into the input slot.
- Press the “Copy” button to transfer the image onto the thermal paper.
- Thermal Printer Method:
- Connect the thermal printer to your computer via USB cable.
- Fold the yellow sheet of the thermal paper backward along the perforated line and remove it.
- Remove the protective cover from the purple carbon sheet.
- Feed the carbon paper sheet into the thermal tattoo printer face down.
- Send the reversed tattoo design to the printer from your computer.
- Separate the Sheets: After printing, remove the carbon sheet from the white sheet containing your tattoo design. The resulting sheet is your stencil.
5. How Do Thermal Copiers Work for Tattoo Stencil Printing?
Thermal copiers are specialized devices designed to transfer images onto thermal paper, making them an essential tool for tattoo artists. They use heat to create a precise copy of the original design.
- Preparation: The process begins by preparing the thermal paper and the original design. The thermal paper, which consists of several layers, is inserted into the copier. The “onion” sheet is removed to allow for proper heat transfer.
- Image Placement: The original design, typically printed on regular paper, is placed face down on the input tray of the thermal copier.
- Heat Transfer: When the “Copy” button is pressed, the machine feeds the design and thermal paper through a heated element. The heat activates the carbon layer on the thermal paper, transferring the image onto the top sheet.
- Stencil Creation: The result is a precise duplicate of the original design on the thermal paper, ready for application to the client’s skin. The accuracy of the thermal copier ensures that the tattoo artist has a reliable guide for their work.
6. What Are the Steps for Applying a Tattoo Stencil to the Skin?
Applying a tattoo stencil to the skin requires careful preparation and technique to ensure a clean and lasting transfer.
- Determine Placement: Have the client stand to ensure the stencil is placed accurately and looks correct from all angles.
- Prep the Skin: Clean the area with green soap, shave if necessary, and disinfect to create a smooth and sanitary surface.
- Apply Transfer Solution: Use a stencil transfer solution like Recovery Stencil Lock, Stencil Stuff, or Spirit Stencil Transfer Cream. Apply a thin, even layer over the prepared skin.
- Place the Stencil: Position the stencil carefully on the skin, ensuring it is smooth and properly aligned.
- Dry the Stencil: Leave the stencil in place until it is completely dry. Some artists use a towel to gently press the stencil and speed up the drying process.
- Peel and Wait: Carefully peel off the stencil and allow the ink to dry for an additional 15-20 minutes before beginning the tattoo.
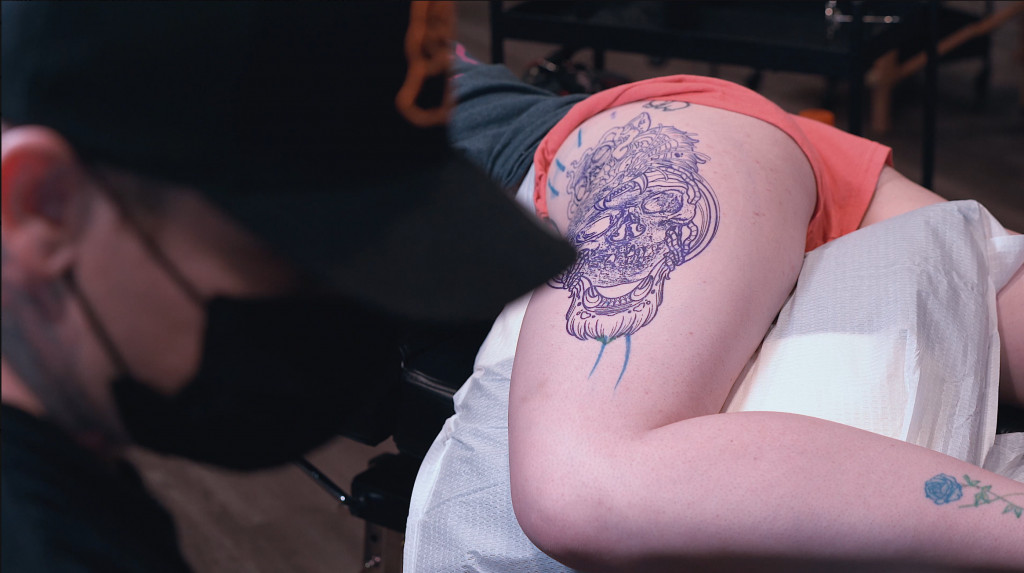 The process of applying a tattoo stencil to the skin, demonstrating the use of a transfer solution and proper alignment to ensure a clear and accurate outline for tattooing
7. What Transfer Solutions Should Be Used?
Choosing the right transfer solution is critical for achieving a crisp, clear, and long-lasting stencil on the skin. While some DIY methods suggest using deodorant, professional tattoo artists rely on specialized products designed for this purpose.
- Recovery Stencil Lock: Known for its reliability, Recovery Stencil Lock ensures the stencil stays in place during the tattoo process.
- Stencil Stuff: This popular product is easy to apply and provides excellent transfer results, minimizing smudging.
- Spirit Stencil Transfer Cream: Spirit Stencil Transfer Cream is a trusted option that promotes a clean and precise transfer, ensuring the design adheres well to the skin.
8. Can You Create a Tattoo Stencil Without Transfer Paper?
While it is technically possible to create a tattoo stencil without transfer paper, it is not recommended for professional use. Such methods often involve drawing a design and then transferring it to the skin using graphite and deodorant, which can result in imprecise and easily smudged stencils.
- Lack of Precision: Graphite does not transfer as cleanly as carbon ink, making it difficult to achieve crisp, accurate lines.
- Poor Adhesion: Regular paper does not conform to the skin as well as transfer paper, leading to distorted stencils.
- Risk of Smudging: Graphite smudges easily, which can compromise the clarity of the stencil and the final tattoo design.
For professional and reliable results, always use tracing or transfer paper specifically designed for tattoo stencils.
9. What Equipment Is Necessary for Printing Tattoo Stencils?
Printing tattoo stencils efficiently and accurately requires specific equipment.
- Thermal Copier or Printer: A thermal copier or printer is essential for transferring designs onto stencil paper.
- Thermal Paper: High-quality thermal paper ensures clear and precise stencil transfers.
- Computer or Tablet: For digital designs, a computer or tablet is needed to create and edit the images.
- Software: Graphic design software helps in creating detailed and accurate stencil designs.
- USB Cable: A USB cable is used to connect the thermal printer to the computer.
- AC Adapter: An AC adapter provides power to the thermal printer.
10. How Can Digital Technology Improve Stencil Printing?
Digital technology has revolutionized the stencil printing process, offering numerous advantages over traditional methods.
- Precision and Detail: Digital design software allows artists to create intricate and highly detailed stencils with ease.
- Easy Adjustments: Digital designs can be quickly adjusted and modified, ensuring the stencil perfectly matches the client’s vision.
- Repeatability: Digital stencils can be easily reprinted, making it simple to create multiple copies or replace damaged stencils.
- Efficiency: Digital technology streamlines the stencil creation process, saving time and improving overall efficiency.
- Storage: Digital designs can be stored electronically, reducing the need for physical storage space and ensuring easy access.
11. What Are the Best Practices for Maintaining a Clean Stencil?
Maintaining a clean stencil is crucial for achieving a high-quality tattoo. Contaminated or smudged stencils can lead to inaccurate and unprofessional results.
- Handle with Care: Always handle stencils with clean gloves to prevent the transfer of oils and dirt.
- Store Properly: Store stencils in a clean, dry place away from direct sunlight and potential contaminants.
- Avoid Creasing: Be careful not to crease or fold the stencil, as this can distort the design.
- Use Transfer Solution Sparingly: Apply transfer solution in a thin, even layer to avoid saturating the stencil and causing it to smudge.
- Allow Adequate Drying Time: Ensure the stencil is completely dry before removing it from the skin to prevent smudging.
12. How Does Proper Skin Preparation Affect Stencil Quality?
Proper skin preparation is essential for ensuring a clean and lasting stencil transfer. Neglecting this step can lead to poor adhesion and smudged designs.
- Cleaning: Washing the skin with green soap removes oils, dirt, and other contaminants that can interfere with stencil adhesion.
- Shaving: Shaving the area removes hair, creating a smooth surface for the stencil to adhere to.
- Disinfecting: Disinfecting the skin kills bacteria and reduces the risk of infection during the tattooing process.
- Drying: Ensuring the skin is completely dry before applying the stencil helps the transfer solution adhere properly.
13. How Do You Troubleshoot Common Stencil Problems?
Even with careful preparation, stencil problems can arise. Knowing how to troubleshoot these issues is essential for ensuring a successful tattoo.
- Smudged Stencil:
- Cause: Applying too much transfer solution or not allowing enough drying time.
- Solution: Use transfer solution sparingly, ensure the skin is clean and dry, and allow ample drying time before removing the stencil.
- Faded Stencil:
- Cause: Insufficient transfer solution or poor skin preparation.
- Solution: Apply a thin, even layer of transfer solution and ensure the skin is properly cleaned, shaved, and disinfected.
- Incomplete Transfer:
- Cause: Uneven pressure when applying the stencil or using low-quality transfer paper.
- Solution: Apply even pressure when placing the stencil and use high-quality transfer paper.
- Stencil Won’t Stick:
- Cause: Oily skin or using the wrong transfer solution.
- Solution: Clean the skin thoroughly with green soap and use a recommended stencil transfer solution.
14. What Are Some Advanced Techniques for Stencil Placement?
Advanced stencil placement techniques can help ensure the tattoo is perfectly positioned and aligned on the body.
- Using a Mirror: Have the client look in a mirror to provide feedback on the stencil placement. This ensures they are happy with the position and orientation of the design.
- Marking Key Points: Use a skin-safe marker to mark key points on the stencil, such as the center and edges. This helps ensure the stencil is aligned correctly.
- Creating Templates: For complex designs, create a paper template to help guide the placement of the stencil.
- Adjusting for Movement: Consider how the skin moves and stretches in different positions. Apply the stencil with the client in a position that mimics their natural posture.
15. How Do Different Skin Types Affect Stencil Application?
Different skin types can affect how well a stencil adheres and transfers. Understanding these differences can help you adjust your technique accordingly.
- Oily Skin: Oily skin can make it difficult for the stencil to adhere properly. Clean the skin thoroughly with green soap and use a transfer solution specifically designed for oily skin.
- Dry Skin: Dry skin can absorb transfer solution quickly, leading to a faded stencil. Apply a slightly thicker layer of transfer solution and ensure the skin is well-hydrated.
- Sensitive Skin: Sensitive skin may react to certain transfer solutions. Use a hypoallergenic transfer solution and test a small area of skin before applying the stencil.
- Aged Skin: Aged skin may be less elastic and more prone to wrinkles, making it difficult to achieve a smooth stencil transfer. Stretch the skin gently and apply the stencil carefully to avoid distortion.
16. How Can You Ensure the Stencil is Accurate Before Tattooing?
Before beginning the tattoo, take several steps to ensure the stencil is accurate and meets the client’s expectations.
- Double-Check the Design: Compare the stencil to the original design to ensure there are no discrepancies.
- Verify Placement: Have the client confirm they are happy with the placement and orientation of the stencil.
- Check for Smudging: Inspect the stencil for any smudging or imperfections that may affect the final tattoo.
- Adjust as Needed: If necessary, make small adjustments to the stencil before beginning the tattoo.
- Photograph the Stencil: Take a photograph of the stencil on the skin as a reference point during the tattooing process.
17. What Safety Precautions Should Be Taken During Stencil Application?
Safety should always be a top priority during stencil application. Follow these precautions to minimize the risk of infection and other complications.
- Wear Gloves: Always wear clean, disposable gloves when handling stencils and applying transfer solution.
- Use Sterile Equipment: Ensure all equipment, including razors and cleaning supplies, is sterile.
- Disinfect the Skin: Properly disinfect the skin before applying the stencil to kill bacteria.
- Avoid Cross-Contamination: Do not touch the stencil or skin with unsterilized hands or equipment.
- Dispose of Waste Properly: Dispose of used stencils, gloves, and other waste materials in a biohazard container.
18. How Do You Remove a Stencil if It’s Incorrectly Placed?
If a stencil is incorrectly placed, it’s important to remove it carefully without damaging the skin.
- Use a Stencil Remover: Apply a stencil remover solution to the area. These solutions are designed to break down the stencil ink without irritating the skin.
- Gently Wipe: Use a clean, sterile cloth to gently wipe away the stencil ink. Avoid scrubbing, as this can irritate the skin.
- Clean the Area: Once the stencil is removed, clean the area with green soap and water to remove any remaining residue.
- Allow the Skin to Rest: Allow the skin to rest for a few minutes before applying a new stencil.
19. What Are Common Mistakes to Avoid When Printing Stencils?
Avoiding common mistakes can significantly improve the quality of your stencils and the final tattoo.
- Using Low-Quality Paper: Always use high-quality thermal paper for clear and precise transfers.
- Applying Too Much Transfer Solution: Use transfer solution sparingly to prevent smudging.
- Not Allowing Enough Drying Time: Ensure the stencil is completely dry before removing it from the skin.
- Failing to Prepare the Skin Properly: Clean, shave, and disinfect the skin thoroughly before applying the stencil.
- Ignoring Client Feedback: Always listen to the client’s feedback and make adjustments as needed.
20. What are the Latest Innovations in Tattoo Stencil Technology?
The tattoo industry is constantly evolving, with new innovations emerging regularly. Recent advancements in stencil technology include:
- Wireless Thermal Printers: Wireless thermal printers offer greater flexibility and convenience, allowing artists to print stencils from anywhere in the studio.
- High-Resolution Printing: High-resolution thermal printers produce stencils with exceptional detail and clarity, improving the accuracy of the final tattoo.
- Eco-Friendly Stencil Paper: Eco-friendly stencil paper is made from sustainable materials, reducing the environmental impact of the tattooing process.
- Digital Stencil Apps: Digital stencil apps allow artists to create and edit stencils directly on their tablets or smartphones, streamlining the design process.
- 3D Stencil Printing: 3D stencil printing technology enables artists to create stencils with intricate textures and patterns, adding depth and dimension to their tattoos.
Staying up-to-date with these innovations can help tattoo artists enhance their skills and provide their clients with the best possible results.
| Innovation | Description | Benefits |
|---|---|---|
| Wireless Printers | Thermal printers that connect wirelessly to devices. | Greater flexibility, convenience in printing from various locations. |
| High-Resolution | Printers offering enhanced detail and clarity. | Improved stencil accuracy, leading to better tattoo precision. |
| Eco-Friendly Paper | Stencil paper made from sustainable materials. | Reduced environmental impact. |
| Digital Stencil Apps | Applications for tablets/smartphones to create/edit stencils. | Streamlined design process, increased efficiency. |
| 3D Stencil Printing | Technology to create textured/patterned stencils. | Adds depth and dimension to tattoos. |
The stencil is a critical step in tattooing. Are you ready to elevate your tattooing skills? Visit tattooat.com for a vast array of tattoo designs, a curated list of talented artists and studios, and in-depth articles to guide you through every step of the tattooing process. Discover the perfect design, find a skilled artist, and gain the knowledge you need to create stunning tattoos. Contact us at 1825 SW Broadway, Portland, OR 97201, United States, or call +1 (503) 725-3000.
FAQ: Tattoo Stencil Printing
1. What is the best way to clean skin before applying a tattoo stencil?
The best way to clean skin before applying a tattoo stencil is to use green soap, shave the area if necessary, and then disinfect it. This ensures a smooth, clean surface for the stencil to adhere to.
2. Can I use regular paper instead of thermal paper for tattoo stencils?
No, it is not recommended to use regular paper for tattoo stencils. Thermal paper is specifically designed to transfer the design clearly and accurately, while regular paper can lead to smudging and imprecise lines.
3. How long should I leave a tattoo stencil on the skin?
You should leave a tattoo stencil on the skin until it is completely dry, typically around 15-20 minutes. Some artists use a towel to gently press the stencil and speed up the drying process.
4. What is the purpose of the onion sheet in thermal paper?
The onion sheet in thermal paper is a middle layer that prevents the sheets from sticking together during the transfer process. It should be removed before printing or copying the design.
5. What should I do if my tattoo stencil smudges during application?
If your tattoo stencil smudges during application, gently wipe away the smudge with a stencil remover solution and a clean cloth. Allow the skin to rest before reapplying a new stencil.
6. How can I prevent my tattoo stencil from fading quickly?
To prevent your tattoo stencil from fading quickly, use a high-quality transfer solution, prepare the skin properly, and allow the stencil to dry completely before removing it.
7. Is it necessary to reverse the image before printing a tattoo stencil?
Yes, it is necessary to reverse the image horizontally before printing a tattoo stencil. This ensures that the design appears correctly when applied to the skin.
8. Can I reuse a tattoo stencil?
No, tattoo stencils are designed for single-use only. Reusing a stencil can lead to cross-contamination and compromise the accuracy of the design.
9. What are the benefits of using a thermal printer over a thermal copier for tattoo stencils?
Thermal printers offer greater convenience and control over the printing process compared to thermal copiers. They allow you to print directly from your computer and easily adjust the design as needed.
10. How do I store thermal paper to prevent it from being damaged?
Store thermal paper in a cool, dry place away from direct sunlight and heat. This will prevent the paper from yellowing or becoming damaged, ensuring optimal performance.