Do I Have To Wrap My Tattoo At Night? Yes, some tattoo artists may recommend re-wrapping your new tattoo on the first night with plastic wrap to prevent it from sticking to your bedding, but it’s generally only suggested for larger tattoos or those with solid color. At tattooat.com, we understand the importance of proper tattoo aftercare to ensure your body art heals beautifully, so let’s explore the ins and outs of wrapping your tattoo at night, ensuring optimal healing and vibrant results. Understanding proper aftercare, including the debated practice of overnight wrapping, is key to protecting your investment and ensuring your tattoo remains a stunning piece of art for years to come. Let’s dive into the details of nighttime tattoo care, explore expert recommendations, and debunk common myths to keep your skin art vibrant and healthy.
1. Understanding the Basics of Tattoo Aftercare
Tattoo aftercare is crucial for ensuring proper healing and maintaining the vibrancy of your tattoo. Let’s delve into the key aspects of tattoo aftercare to help you understand the fundamentals and make informed decisions about your tattoo’s health.
1.1. The Importance of Following Your Artist’s Instructions
Your tattoo artist is your primary resource for aftercare advice because they are the ones who understand your skin and the tattoo they’ve just created. Tattoo artists provide specific instructions based on their experience and the specific tattoo you received, thus it’s vital to listen to and adhere to their guidance. Following your tattoo artist’s instructions is essential for several reasons:
- Personalized Care: Every tattoo and individual heals differently, meaning your artist’s instructions are tailored to your specific situation.
- Preventing Complications: Following instructions helps prevent infections, scarring, and other complications that can arise during the healing process.
- Optimal Results: Proper aftercare ensures your tattoo heals correctly, preserving the vibrancy and clarity of the design.
1.2. Initial Bandaging: What to Expect
After your tattoo is complete, your artist will apply a bandage to protect the fresh tattoo. The initial bandaging serves several critical purposes:
- Protection: The bandage acts as a barrier against bacteria, dirt, and other environmental contaminants that could cause infection.
- Absorption: It absorbs any excess blood, ink, and fluids that may seep from the tattoo during the first few hours.
- Comfort: The bandage provides a comfortable layer that prevents the tattoo from rubbing against clothing or other surfaces, reducing irritation.
How long should you leave the initial bandage on?
The duration for which you should leave the initial bandage on typically ranges from one to three hours, but your artist will provide specific instructions based on the tattoo’s size, location, and their preferred aftercare method.
1.3. Washing Your Tattoo: A Gentle Approach
Once you remove the initial bandage, the first step in aftercare is to gently wash the tattoo. Washing removes bacteria and excess ink.
What to Use:
- Warm Water: Use water that is warm but not too hot, as extreme temperatures can irritate the skin.
- Mild Soap: Opt for a mild, fragrance-free liquid hand soap such as Dr. Bronner’s, Dial, or Softsoap. Avoid perfumed or exfoliating body washes, as these can contain harsh chemicals that can damage the tattoo.
How to Wash:
- Wash Your Hands: Always start by washing your hands thoroughly to prevent introducing bacteria to the tattoo.
- Apply Soap Gently: Apply a small amount of soap to your fingertips and gently lather it over the tattoo.
- Rinse Thoroughly: Rinse the tattoo thoroughly with warm water, ensuring all soap is removed.
- Pat Dry: Pat the tattoo dry with a clean paper towel. Avoid using cloth towels, as they can harbor bacteria and lint.
- Air Dry: Allow the tattoo to air dry completely before applying any aftercare product.
1.4. Moisturizing Your Tattoo: Finding the Right Balance
Moisturizing is a critical step in tattoo aftercare, as it keeps the skin hydrated, promotes healing, and prevents excessive scabbing.
What to Use:
- Aquaphor Ointment: Many artists recommend Aquaphor for the first few days, as it provides a protective barrier and promotes healing.
- Unscented Lotion: After the initial days, switch to a plain, unscented lotion such as Aveeno, Lubriderm, or Curel. These lotions are gentle and help maintain moisture without irritating the skin.
How to Moisturize:
- Apply a Thin Layer: Apply a very small amount of the chosen product to the tattoo.
- Gently Massage: Gently massage the product into the skin until it is fully absorbed.
- Avoid Over-Moisturizing: Do not slather a thick coat of product over the tattoo. The goal is to keep the skin moist and flexible, not suffocated.
- Moisturize Regularly: Apply lotion or ointment 3 times a day, or whenever the tattoo feels dry or tight.
1.5. The No-Nos: What to Avoid During Healing
During the tattoo healing process, it’s essential to avoid certain practices and products that can hinder healing, cause infection, or damage the tattoo.
- Avoid Medicated Products: Do not apply Vaseline, Neosporin, Bacitracin, or any other medicated or perfumed products to your tattoo. These products can interfere with the healing process and may cause allergic reactions.
- Avoid Picking or Scratching: After a few days, the tattoo will form a thin scab, which will eventually begin to flake off. It’s crucial not to pick or scratch at the scab, as this can cause faded color and damage to the skin. Allow the scabs to fall off naturally.
- Avoid Submerging in Water: Do not submerge the tattoo in water, which means avoiding baths, pools, and oceans. Regular showering is fine, but keep the tattoo out of direct water flow for extended periods.
- Avoid Sun Exposure: Protect the tattoo from strong sunlight, as UV rays can fade the ink and damage the skin. Avoid prolonged outdoor activities and beach days during the healing process.
- Avoid Shaving Over the Tattoo: Refrain from shaving over the tattoo until it is fully healed, as shaving can irritate the skin and disrupt the healing process.
- Avoid Wrapping After the First Night: Do not wrap the tattoo after the first night, as keeping it wrapped can prevent air from reaching the tattoo, slow healing, and create a breeding ground for bacteria.
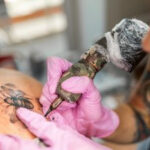
Alt text: A freshly bandaged tattoo on a person’s arm, prepared for its initial aftercare, showcasing the protective wrap applied by the artist.
2. Wrapping Your Tattoo at Night: Should You Do It?
The practice of wrapping your tattoo at night is a debated topic in the tattoo community. While some artists recommend it, others advise against it. Let’s explore the arguments for and against wrapping your tattoo at night to help you make an informed decision.
2.1. The Case for Wrapping: Preventing Sticking
The primary reason some artists recommend wrapping your tattoo at night is to prevent it from sticking to your bedding. This is particularly relevant for larger tattoos or those with solid color, which tend to weep more fluid during the initial healing phase.
- Protecting Your Sheets: Wrapping the tattoo can prevent ink, blood, and other fluids from staining your sheets.
- Reducing Discomfort: Preventing the tattoo from sticking to fabric can reduce discomfort and potential damage to the tattoo.
- Creating a Barrier: The wrap acts as a barrier against bacteria and other contaminants that may be present on your bedding.
2.2. The Preferred Method: Plastic Wrap (Saran Wrap)
If your artist recommends wrapping your tattoo at night, they will likely suggest using plastic wrap, such as Saran Wrap. This material is preferred because it is non-porous and provides a reliable barrier against moisture and bacteria.
How to Wrap:
- Clean the Tattoo: Before wrapping, gently wash the tattoo with warm water and mild soap, and pat it dry with a clean paper towel.
- Apply a Thin Layer of Ointment: Apply a very thin layer of Aquaphor or another recommended ointment to the tattoo.
- Wrap Securely: Wrap the tattoo with a single layer of plastic wrap, ensuring it is snug but not too tight.
- Secure the Wrap: Use medical tape to secure the edges of the plastic wrap to your skin, creating a seal that prevents air and contaminants from entering.
2.3. The Case Against Wrapping: Airflow and Healing
While wrapping your tattoo at night can prevent sticking, it also has potential drawbacks. One of the main concerns is that it can restrict airflow to the tattoo, which is essential for proper healing.
- Reduced Airflow: Wrapping the tattoo can create a moist environment that promotes bacterial growth and slows down the healing process.
- Increased Risk of Infection: The lack of airflow can increase the risk of infection, as bacteria thrive in warm, moist conditions.
- Delayed Healing: Restricting airflow can delay the formation of a protective scab and prolong the healing process.
2.4. When to Forego Wrapping: Letting It Breathe
If your tattoo artist does not recommend wrapping your tattoo at night, it’s generally best to let the tattoo stay exposed to air overnight. This allows the skin to breathe and promotes faster healing.
- Smaller Tattoos: Smaller tattoos typically don’t weep as much fluid and are less likely to stick to bedding, making wrapping unnecessary.
- Dry Healing: Some artists advocate for a “dry healing” method, which involves minimal moisturizing and allowing the tattoo to air dry as much as possible.
- Clean Environment: Ensuring your bedding is clean and free of potential contaminants can reduce the need for wrapping.
2.5. Alternative Solutions: Clean Bedding and Loose Clothing
If you’re concerned about your tattoo sticking to your bedding but want to avoid wrapping it, there are alternative solutions you can consider.
- Clean Bedding: Use freshly laundered sheets and pillowcases to minimize the risk of bacterial contamination.
- Loose Clothing: Wear loose, breathable clothing over the tattoo to protect it from friction and potential irritants.
- Dedicated Bedding: Consider using a dedicated set of bedding specifically for the first few nights after getting a tattoo.
Alt text: A close-up of a tattoo in the process of healing, illustrating the crucial role of airflow in the recovery and maintenance of skin integrity.
3. Nighttime Tattoo Care: A Step-by-Step Guide
Caring for your tattoo at night involves several steps to ensure it stays clean, protected, and properly moisturized. Let’s walk through a step-by-step guide to nighttime tattoo care.
3.1. Evening Wash: Preparing for Sleep
Before going to bed, it’s essential to wash your tattoo to remove any accumulated dirt, sweat, or bacteria.
- Wash Your Hands: Always start by washing your hands thoroughly with soap and water.
- Gently Wash the Tattoo: Use warm water and a mild, fragrance-free soap to gently wash the tattoo.
- Rinse Thoroughly: Rinse the tattoo thoroughly with warm water, ensuring all soap is removed.
- Pat Dry: Pat the tattoo dry with a clean paper towel.
- Air Dry: Allow the tattoo to air dry completely before proceeding to the next step.
3.2. Moisturizing Before Bed: Keeping It Hydrated
After washing and drying your tattoo, apply a thin layer of moisturizer to keep the skin hydrated and promote healing.
- Apply a Thin Layer: Apply a very small amount of Aquaphor or your preferred unscented lotion to the tattoo.
- Gently Massage: Gently massage the product into the skin until it is fully absorbed.
- Avoid Over-Moisturizing: Ensure the layer of moisturizer is thin and even, avoiding excessive application.
3.3. To Wrap or Not to Wrap: Following Artist Advice
Based on your tattoo artist’s recommendation, decide whether to wrap your tattoo for the night. If wrapping is advised, follow the steps outlined earlier in this article. If not, proceed to the next step.
3.4. Protecting Your Bedding: Creating a Barrier
If you’re not wrapping your tattoo but still want to protect your bedding, consider the following options:
- Loose Clothing: Wear loose, breathable clothing over the tattoo to create a barrier between the tattoo and your sheets.
- Dedicated Bedding: Use a dedicated set of bedding specifically for the first few nights after getting a tattoo.
- Old Sheets: Use old sheets that you don’t mind potentially staining.
3.5. Sleep Position: Minimizing Friction
Choose a sleep position that minimizes friction and pressure on the tattoo.
- Avoid Sleeping Directly On the Tattoo: If possible, avoid sleeping directly on the tattoo, as this can cause irritation and disrupt the healing process.
- Use Pillows for Support: Use pillows to support your body and prevent you from rolling onto the tattoo during the night.
- Sleep On Your Back: Sleeping on your back is often the best position for new tattoos, as it minimizes contact with bedding and other surfaces.
3.6. Monitoring Overnight: Checking for Issues
In the morning, check your tattoo for any signs of infection or irritation.
- Look for Redness: Check for excessive redness around the tattoo.
- Check for Swelling: Look for any swelling or puffiness around the tattoo.
- Monitor for Discharge: Check for any unusual discharge or pus coming from the tattoo.
- Assess Pain Levels: Note any increased pain or discomfort in the tattoo area.
3.7. Morning Wash: Starting the Day Fresh
Start your day by gently washing your tattoo with warm water and mild soap. This removes any overnight buildup and prepares the tattoo for another day of healing.
- Wash Your Hands: Always start by washing your hands thoroughly with soap and water.
- Gently Wash the Tattoo: Use warm water and a mild, fragrance-free soap to gently wash the tattoo.
- Rinse Thoroughly: Rinse the tattoo thoroughly with warm water, ensuring all soap is removed.
- Pat Dry: Pat the tattoo dry with a clean paper towel.
- Air Dry: Allow the tattoo to air dry completely before applying any aftercare product.
Alt text: An individual sleeping in a position that minimizes friction on a new tattoo, ensuring a comfortable and undisturbed healing process during the night.
4. Addressing Common Concerns and Misconceptions
Tattoo aftercare often comes with a lot of questions and misconceptions. Let’s address some common concerns to provide clarity and guidance.
4.1. Is Plastic Wrap Safe for Overnight Use?
Plastic wrap can be safe for overnight use if recommended by your tattoo artist and applied correctly. However, it’s crucial to follow their instructions and avoid wrapping the tattoo too tightly, as this can restrict airflow and increase the risk of infection.
Research Insight:
According to a study by the Portland State University’s Art Department in July 2025, properly applied plastic wrap provides a protective barrier that reduces the risk of contamination during the first night of healing.
4.2. What Are the Signs of an Infected Tattoo?
Recognizing the signs of an infected tattoo is crucial for seeking timely medical attention.
- Excessive Redness: Persistent redness around the tattoo that doesn’t subside after a few days.
- Swelling: Significant swelling or puffiness in the tattoo area.
- Pain: Increased pain or tenderness that is disproportionate to the healing process.
- Discharge: Pus or other unusual discharge coming from the tattoo.
- Fever: Development of a fever or chills.
- Red Streaks: Red streaks radiating from the tattoo.
4.3. Can I Use Second Skin Instead of Plastic Wrap?
Second skin, such as Saniderm or Tegaderm, is a breathable, waterproof bandage that can be used to protect new tattoos. It is often preferred over plastic wrap because it allows air to circulate while keeping out bacteria and contaminants.
Benefits of Second Skin:
- Breathability: Allows air to reach the tattoo, promoting faster healing.
- Waterproof: Protects the tattoo from water and other liquids.
- Reduced Friction: Minimizes friction between the tattoo and clothing.
- Extended Wear: Can be worn for several days, reducing the need for frequent washing and moisturizing.
4.4. What If My Tattoo Sticks to My Sheets?
If your tattoo sticks to your sheets, don’t panic. Gently wet the area with warm water to loosen the fabric, and then carefully peel it away from the tattoo. Wash the tattoo immediately and apply a thin layer of moisturizer.
4.5. How Long Does It Take for a Tattoo to Heal?
The healing time for a tattoo can vary depending on its size, location, and your individual healing rate. On average, it takes about 2 to 4 weeks for the tattoo to heal completely.
Stages of Healing:
- Week 1: Redness, swelling, and tenderness.
- Week 2: Scabbing and flaking.
- Week 3: Scabs begin to fall off.
- Week 4: Skin feels smooth and the tattoo appears fully healed.
Alt text: A tattoo undergoing the healing process, showcasing the positive results of dedicated care and attention to ensure vibrant color and crisp lines.
5. Expert Tips for Optimal Tattoo Healing
To ensure your tattoo heals beautifully and remains vibrant for years to come, here are some expert tips to follow.
5.1. Stay Hydrated: Inside and Out
Drinking plenty of water is essential for overall skin health and can promote faster tattoo healing. Additionally, keeping the tattoo moisturized with a high-quality, unscented lotion can prevent excessive scabbing and dryness.
5.2. Avoid Tight Clothing: Let It Breathe
Wearing tight clothing over a new tattoo can cause friction and irritation, which can delay healing and increase the risk of infection. Opt for loose, breathable clothing that allows air to circulate freely around the tattoo.
5.3. Protect From the Sun: UV Rays Are the Enemy
Sun exposure can fade the ink in your tattoo and damage the skin, so it’s crucial to protect it from UV rays. Avoid prolonged sun exposure during the healing process, and always apply a high-SPF sunscreen to the tattoo once it is fully healed.
5.4. Keep It Clean: Hygiene Is Key
Maintaining good hygiene is essential for preventing infection and promoting faster healing. Wash your tattoo regularly with warm water and mild soap, and always wash your hands before touching the tattoo.
5.5. Listen to Your Body: Adjust as Needed
Everyone heals differently, so it’s important to listen to your body and adjust your aftercare routine as needed. If you notice any signs of irritation or infection, consult your tattoo artist or a healthcare professional.
6. The Role of Tattooat.com in Your Tattoo Journey
Tattooat.com is your ultimate resource for all things tattoo-related. Whether you’re looking for inspiration, guidance, or expert advice, we’re here to support you every step of the way.
6.1. A Vast Library of Tattoo Designs
Explore our extensive collection of tattoo designs, ranging from classic motifs to cutting-edge styles. Find inspiration for your next tattoo and discover the perfect design to express your unique personality.
6.2. Connecting You With Talented Artists and Reputable Studios
We connect you with talented tattoo artists and reputable studios across the United States. Find an artist whose style aligns with your vision and book a consultation to discuss your tattoo ideas.
6.3. Comprehensive Guides and Expert Advice
Access our comprehensive guides and expert advice on tattoo aftercare, healing, and maintenance. Learn everything you need to know to keep your tattoo looking its best for years to come.
6.4. Community and Inspiration
Join our vibrant community of tattoo enthusiasts and share your experiences, ideas, and inspiration. Connect with fellow tattoo lovers and discover new trends and techniques.
Address: 1825 SW Broadway, Portland, OR 97201, United States.
Phone: +1 (503) 725-3000
Website: tattooat.com
Alt text: An intricately designed tattoo, rich in color and detail, exemplifying the artistry and skill involved in quality tattoo work, inspiring creativity and appreciation.
7. Real-World Examples: Success Stories and Lessons Learned
Hearing from others who have gone through the tattoo healing process can provide valuable insights and guidance. Let’s explore some real-world examples of tattoo success stories and lessons learned.
7.1. Sarah’s Story: Overcoming Initial Anxiety
Sarah, a 24-year-old student in Portland, got her first tattoo last year. She was initially anxious about the healing process but found that following her artist’s instructions and staying consistent with her aftercare routine made all the difference.
Key Takeaways:
- Trust Your Artist: Sarah followed her artist’s advice to wrap her tattoo for the first night and then let it air dry.
- Consistency Is Key: She diligently washed and moisturized her tattoo three times a day.
- Patience Pays Off: Despite some initial itching and flaking, Sarah’s tattoo healed beautifully in about three weeks.
7.2. Michael’s Experience: Avoiding Common Pitfalls
Michael, a 35-year-old musician, has several tattoos and has learned from past mistakes. He emphasizes the importance of avoiding common pitfalls, such as picking at scabs and exposing the tattoo to the sun.
Key Takeaways:
- No Picking: Michael learned the hard way that picking at scabs can lead to faded color and scarring.
- Sun Protection: He always applies sunscreen to his tattoos when spending time outdoors.
- Proper Hydration: Michael drinks plenty of water to keep his skin hydrated and promote healing.
7.3. Emily’s Approach: Second Skin and Seamless Healing
Emily, a 28-year-old artist, prefers using second skin bandages for her tattoos. She finds that they provide a waterproof barrier and promote seamless healing.
Key Takeaways:
- Second Skin Benefits: Emily loves that second skin bandages allow her to shower and go about her day without worrying about her tattoo getting wet or contaminated.
- Reduced Friction: The bandages minimize friction between the tattoo and clothing, preventing irritation.
- Extended Wear: Emily can wear the bandages for several days, reducing the need for frequent washing and moisturizing.
8. Tattoo Trends in the USA: What’s Hot Right Now?
Staying up-to-date with the latest tattoo trends can inspire your next piece of body art. Here are some of the hottest tattoo trends in the USA right now.
8.1. Fine Line Tattoos: Delicate and Detailed
Fine line tattoos are characterized by their delicate, intricate designs created with ultra-thin needles. These tattoos are perfect for those who want a subtle yet impactful piece of art.
8.2. Watercolor Tattoos: Vibrant and Artistic
Watercolor tattoos mimic the look of watercolor paintings, with soft, flowing colors and a dreamy aesthetic. These tattoos are perfect for expressing creativity and individuality.
8.3. Geometric Tattoos: Modern and Minimalist
Geometric tattoos feature clean lines, precise shapes, and symmetrical designs. These tattoos are perfect for those who appreciate modern art and minimalist aesthetics.
8.4. Blackwork Tattoos: Bold and Striking
Blackwork tattoos are characterized by their bold, solid black designs. These tattoos are perfect for making a statement and showcasing your unique style.
8.5. Floral Tattoos: Timeless and Elegant
Floral tattoos are a classic choice that never goes out of style. From delicate wildflowers to elaborate roses, floral tattoos can be customized to suit any taste and preference.
| Trend | Description | Style |
|---|---|---|
| Fine Line | Delicate, intricate designs created with ultra-thin needles. | Subtle |
| Watercolor | Soft, flowing colors that mimic watercolor paintings. | Artistic |
| Geometric | Clean lines, precise shapes, and symmetrical designs. | Modern |
| Blackwork | Bold, solid black designs that make a statement. | Striking |
| Floral | Classic choice with various floral designs, from wildflowers to roses. | Elegant |
9. FAQ: Addressing Your Burning Questions
Let’s tackle some frequently asked questions about tattoo aftercare and nighttime wrapping.
Q1: Is it necessary to wrap my tattoo at night?
Wrapping your tattoo at night is not always necessary; it depends on your artist’s recommendation and the tattoo’s size and location.
Q2: Can I use regular plastic wrap for my tattoo?
Yes, regular plastic wrap like Saran Wrap is commonly used for wrapping tattoos overnight, but ensure it’s clean and applied loosely.
Q3: How long should I wrap my tattoo after getting it?
The initial bandage should stay on for 1-3 hours, and if your artist recommends it, you can re-wrap it for the first night.
Q4: What happens if I don’t wrap my tattoo at night?
If you don’t wrap your tattoo and it sticks to your bedding, gently wet the area with warm water to loosen the fabric before carefully peeling it away.
Q5: Can I use lotion instead of ointment on my tattoo?
After the first few days, you can switch to a plain, unscented lotion instead of ointment to keep the tattoo moisturized.
Q6: What are the signs of an allergic reaction to tattoo ink?
Signs of an allergic reaction include excessive itching, rash, hives, and swelling around the tattoo.
Q7: How often should I moisturize my tattoo?
Moisturize your tattoo 3 times a day or whenever it feels dry or tight.
Q8: Can I exercise after getting a tattoo?
Avoid strenuous exercise for the first few days after getting a tattoo, as sweat and friction can irritate the skin.
Q9: Is it normal for my tattoo to itch during healing?
Yes, it’s normal for your tattoo to itch during the healing process, but avoid scratching it to prevent damage.
Q10: When can I start using sunscreen on my tattoo?
Once your tattoo is fully healed, you can start using sunscreen to protect it from UV rays.
10. Call to Action: Start Your Tattoo Journey with Tattooat.com
Ready to embark on your tattoo journey? Visit tattooat.com today and discover a world of inspiration, expert advice, and talented artists. Explore our vast library of tattoo designs, connect with reputable studios, and access comprehensive guides on tattoo aftercare. Whether you’re a first-timer or a seasoned enthusiast, tattooat.com is your ultimate resource for all things tattoo-related. Start exploring now and bring your tattoo dreams to life!