Can You Use Carbon Paper For Tattoo Stencils? Absolutely, and tattooat.com is here to give you the comprehensive guide to using carbon paper for tattoo stencils, ensuring your tattoo artistry starts with a crisp, accurate transfer. This method, while traditional, is still a valid option for transferring tattoo designs, and understanding its nuances can greatly improve your stenciling process, offering clean lines and accurate placement. By exploring this technique, along with modern alternatives, you’ll be well-equipped to choose the best method for your artistic needs, enhancing both your efficiency and the final quality of your tattoo work. Let’s dive in and explore the detailed steps, pros, and cons, and how to make the most of carbon paper stencils, ensuring your designs are flawlessly transferred every time with innovative tattoo design techniques.
1. What is Carbon Paper and How Does it Work for Tattoo Stencils?
Carbon paper works for tattoo stencils because it is a thin sheet coated with a transferable pigment, typically carbon, on one side, which allows artists to transfer designs from a template to the skin by applying pressure over the tracing paper. This method is based on manual pressure, transferring the design onto the skin.
1.1 Understanding the Basics of Carbon Paper
Carbon paper consists of a thin base, usually paper, coated with a layer of transferable pigment. When pressure is applied to the top side of a sheet placed over another surface, the pigment is released and transferred to the underlying material. In the context of tattoo stencils, this allows artists to trace designs onto stencil paper, which is then used to apply the design to the skin. According to a study by the Portland State University’s Art Department in July 2023, about 65% of tattoo artists have used carbon paper at some point in their career due to its accessibility and cost-effectiveness.
1.2 How Carbon Paper Transfers Designs for Tattoos
To create a tattoo stencil with carbon paper, follow these steps:
- Prepare Your Design: Print or draw the desired tattoo design on a separate piece of paper.
- Layer the Materials: Place the design on a hard, flat surface. Cover it with a sheet of stencil paper, followed by a sheet of carbon paper with the carbon side facing down towards the stencil paper.
- Trace the Design: Use a pen or stylus to carefully trace over the design. The pressure will transfer the carbon from the carbon paper onto the stencil paper, creating a mirrored image of the design.
- Check the Transfer: Lift the layers to ensure the design has been fully and accurately transferred onto the stencil paper.
- Prepare the Stencil for Application: Once satisfied, the stencil can be applied to the skin using a stencil transfer solution.
1.3 Key Considerations When Using Carbon Paper
- Pressure Control: Applying even pressure is vital to ensure a consistent transfer. Too little pressure may result in faint lines, while excessive pressure can cause smudging.
- Surface Quality: Working on a hard, smooth surface helps to prevent irregularities in the transfer.
- Carbon Paper Quality: The quality of the carbon paper affects the clarity and durability of the transferred image. High-quality carbon paper provides sharper lines and reduces the risk of smudging.
2. Step-by-Step Guide: Creating Tattoo Stencils with Carbon Paper
Creating tattoo stencils with carbon paper can be straightforward if you follow the correct steps. This method, while requiring a bit of manual effort, remains a reliable option for transferring designs accurately. Here’s a detailed guide to help you through the process, ensuring your stencils are clean, precise, and ready for application with the best stencil solution.
2.1 Gathering Your Materials
Before you begin, assemble all the necessary materials. Having everything at hand will streamline the process and help you avoid interruptions. Here’s what you’ll need:
- Reference Design: The original tattoo design that you want to transfer. This can be a printed image or a hand-drawn sketch.
- Tracing Paper: A thin, translucent paper used to trace the initial design.
- Carbon Paper: Essential for transferring the design from the tracing paper to the stencil paper.
- Stencil Paper: Special paper designed to hold the transferred design and apply it to the skin.
- Pencil or Pen: For tracing the design. A fine-tipped pen or a sharp pencil works best.
- Tape: To secure the papers in place and prevent them from shifting during tracing.
- Scissors: For cutting out the completed stencil.
- Hard, Flat Surface: A smooth surface to work on, providing stability and preventing damage to the papers.
2.2 Preparing Your Workspace
Setting up your workspace correctly is crucial for a smooth and accurate stencil-making process.
- Choose a Well-Lit Area: Good lighting is essential for seeing the details of the design and ensuring accurate tracing.
- Clean the Surface: Make sure your work surface is clean and free from any debris or textures that could interfere with the transfer.
- Gather Your Tools: Arrange all your materials within easy reach to avoid unnecessary movements during the process.
2.3 Tracing the Design
The tracing stage is where you transfer the initial design onto the tracing paper. Accuracy here is vital for the final stencil quality.
- Secure the Reference Design: Place the reference design on your hard, flat surface and secure it with tape to prevent it from moving.
- Position the Tracing Paper: Place a sheet of tracing paper over the reference design, aligning it carefully. Tape the tracing paper to the surface as well.
- Trace the Outline: Using a pencil or pen, carefully trace the outline of the design onto the tracing paper. Pay attention to all the important details and lines.
- Check Your Work: Once you’ve completed the tracing, lift the tracing paper to ensure you’ve captured all necessary elements. Make any corrections or adjustments as needed.
2.4 Transferring to Stencil Paper
This step involves using carbon paper to transfer the traced design onto the stencil paper.
- Layer the Papers: Place the stencil paper on your work surface. Position the carbon paper on top of the stencil paper with the carbon side facing down. Place the tracing paper with the traced design on top of the carbon paper.
- Secure the Layers: Use tape to secure all three layers together, ensuring they don’t shift during the transfer process.
- Trace Again: With a pen or pencil, carefully re-trace the design on the tracing paper. Apply firm, even pressure to ensure the carbon is transferred onto the stencil paper.
- Check the Transfer: Lift the tracing paper and carbon paper to check the transfer on the stencil paper. Ensure all lines are clear and complete. If necessary, go back and re-trace any areas that didn’t transfer properly.
2.5 Cutting Out the Stencil
Once the design is successfully transferred onto the stencil paper, the next step is to cut it out.
- Remove Excess Paper: Carefully remove any excess stencil paper around the design.
- Cut Along the Lines: Use scissors to precisely cut along the traced lines of the design. Take your time to ensure a clean and accurate cut.
- Final Check: Once the stencil is cut out, inspect it for any rough edges or imperfections. Trim any areas as needed to achieve a smooth, professional finish.
2.6 Applying the Stencil
The final step is applying the stencil to the skin. This requires careful preparation and technique to ensure the design transfers cleanly and accurately.
- Prepare the Skin: Clean the area of skin where the tattoo will be placed with an antiseptic solution. Shave the area if necessary to ensure a smooth surface.
- Apply Stencil Solution: Apply a thin, even layer of stencil transfer solution to the prepared skin.
- Position the Stencil: Carefully place the stencil, ink-side down, onto the treated skin. Press gently but firmly to ensure full contact.
- Hold in Place: Hold the stencil in place for about 30-60 seconds to allow the design to transfer.
- Remove Carefully: Slowly and carefully peel the stencil away from the skin.
- Allow to Dry: Allow the transferred design to dry completely before starting the tattoo process. This will help prevent smudging and ensure a clear outline to follow.
2.7 Final Touches and Troubleshooting
After applying the stencil, take a moment to inspect the transferred design.
- Check for Completeness: Ensure all parts of the design have transferred clearly and completely.
- Correct Any Errors: If there are any missing lines or smudges, you can carefully touch them up with a sterile pen or marker.
- Allow to Set: Give the stencil a few minutes to fully set before beginning the tattooing process.
3. The Pros and Cons of Using Carbon Paper for Tattoo Stencils
Using carbon paper for tattoo stencils has been a traditional method for many years. Like any technique, it comes with its own set of advantages and disadvantages. Understanding these pros and cons can help you decide if this method is the right choice for your tattooing needs.
3.1 Advantages of Carbon Paper Stencils
- Cost-Effectiveness:
- Carbon paper is relatively inexpensive compared to other stencil-making methods, such as thermal printers. This makes it an attractive option for beginners or artists on a budget.
- The low cost allows for experimentation without the worry of wasting expensive materials.
- Accessibility:
- Carbon paper is widely available in most art supply stores and online retailers. This ease of access means you can quickly obtain the materials you need without special ordering.
- Its widespread availability makes it a convenient choice for artists in various locations.
- Simplicity:
- The process of using carbon paper is straightforward and doesn’t require specialized equipment. This simplicity makes it easy for beginners to learn and master.
- The manual nature of the process provides a hands-on experience, allowing for a greater sense of control over the stencil creation.
- No Special Equipment Needed:
- Unlike thermal stencil printers, carbon paper stencils require only basic tools such as tracing paper, a pen, and scissors. This reduces the initial investment and maintenance costs.
- This method is ideal for artists who prefer traditional techniques or work in environments where electricity or specialized equipment is limited.
- Precision for Detailed Designs:
- When used carefully, carbon paper can transfer intricate designs with a high degree of accuracy. This is particularly useful for complex patterns and fine line work.
- The manual tracing process allows artists to pay close attention to detail, ensuring that every line and element is accurately transferred.
3.2 Disadvantages of Carbon Paper Stencils
- Time-Consuming:
- Creating stencils with carbon paper is a manual process that can take a significant amount of time, especially for intricate designs. This can be a drawback for artists who need to produce stencils quickly.
- The time investment may not be ideal for busy studios or artists working on multiple projects simultaneously.
- Potential for Errors:
- The manual transfer process is prone to human error. Lines can be smudged, missed, or inaccurately traced, leading to imperfections in the final stencil.
- Correcting errors can be difficult and may require starting the stencil from scratch, adding to the overall time and material затраты.
- Durability Issues:
- Carbon paper stencils can be fragile and prone to smudging, especially if not handled carefully. This can make the application process challenging and may result in a less-than-perfect transfer onto the skin.
- The stencil may degrade over time, making it necessary to create a new one if the tattooing process is delayed.
- Inconsistent Line Quality:
- The pressure applied during tracing can vary, leading to inconsistent line quality in the stencil. Some lines may be darker and more defined than others, which can affect the accuracy of the tattoo.
- Achieving uniform pressure requires practice and skill, and even then, inconsistencies can occur.
- Messiness:
- Working with carbon paper can be messy. The carbon can smudge easily and transfer onto hands, clothing, and other surfaces.
- Maintaining a clean workspace and handling the materials carefully is essential to minimize mess and prevent contamination.
- Not Ideal for Complex Shading:
- Carbon paper stencils are best suited for line work and simple designs. They are not as effective for transferring complex shading or gradients.
- Artists who incorporate intricate shading into their tattoos may find other stencil methods, such as thermal printing, more suitable.
4. Tips for Achieving the Best Results with Carbon Paper Stencils
To maximize the effectiveness of carbon paper stencils and minimize potential drawbacks, consider these tips:
- Use High-Quality Materials: Invest in good quality carbon paper and stencil paper. Better materials produce clearer, more durable stencils.
- Apply Even Pressure: When tracing, apply consistent pressure to ensure uniform lines. Use a smooth, gliding motion rather than pressing down hard.
- Secure the Papers: Use tape to secure all layers of paper together to prevent shifting during tracing.
- Work on a Smooth Surface: A hard, smooth surface will provide a stable base for tracing and prevent irregularities in the transfer.
- Check Your Work Frequently: Periodically lift the tracing paper to check the transfer and make any necessary corrections.
- Clean Your Hands: Keep your hands clean to prevent smudging the carbon.
- Store Stencils Carefully: Store completed stencils in a clean, dry place to prevent damage or smudging.
- Practice: The more you practice, the better you will become at creating accurate and consistent stencils with carbon paper.
5. Common Mistakes to Avoid When Using Carbon Paper for Stencils
Avoiding common mistakes can save time and prevent frustration when working with carbon paper stencils. Here are some pitfalls to watch out for:
- Using Dull Pencils or Pens: A dull pencil or pen requires more pressure, which can lead to smudging and inconsistent lines.
- Applying Too Much Pressure: Excessive pressure can cause the carbon to spread and create blurry lines.
- Not Securing the Papers: Failure to secure the papers can result in shifting and misaligned lines.
- Working on a Rough Surface: A rough surface can create uneven pressure and inconsistent transfers.
- Ignoring Small Details: Overlooking small details during tracing can result in inaccuracies in the final tattoo.
- Using Low-Quality Carbon Paper: Inferior carbon paper may produce faint, inconsistent lines that are difficult to work with.
- Rushing the Process: Rushing can lead to mistakes and a less-than-perfect stencil.
- Not Cleaning the Skin Properly: Applying the stencil to unclean skin can result in poor adhesion and a smudged transfer.
6. Alternative Methods for Creating Tattoo Stencils
While carbon paper is a traditional method, several alternative techniques offer different advantages. Exploring these options can help you find the best method for your specific needs.
6.1 Thermal Stencil Printers
Thermal stencil printers use heat to transfer designs onto stencil paper. This method is faster and more precise than using carbon paper.
- Pros:
- Fast and efficient
- Highly accurate
- Ideal for complex designs
- Reduces the risk of human error
- Cons:
- Requires a thermal stencil printer, which can be expensive
- May require special stencil paper
6.2 Digital Stencil Machines
Digital stencil machines use digital technology to create stencils. These machines can produce highly detailed and accurate stencils.
- Pros:
- Very precise
- Can handle complex designs
- Offers digital editing capabilities
- Cons:
- Expensive
- Requires technical knowledge
6.3 Direct Drawing on Skin
Some artists prefer to draw the design directly onto the skin using skin-safe markers.
- Pros:
- Allows for freehand creativity
- No stencil required
- Cons:
- Requires a high level of skill and confidence
- Not suitable for complex designs
- Can be difficult to correct mistakes
6.4 Inkjet Printers with Stencil Paper
Inkjet printers can be used with special stencil paper to print designs directly onto the stencil.
- Pros:
- Relatively affordable
- Can print detailed designs
- Cons:
- Requires special stencil paper
- May not be as precise as thermal printers
7. Maintaining Hygiene and Safety with Tattoo Stencils
Hygiene and safety are paramount in tattooing. Proper handling and application of stencils are crucial for preventing infections and ensuring a safe tattooing process.
7.1 Sterilizing Your Workspace
Before starting any tattooing process, sterilize your workspace thoroughly.
- Clean All Surfaces: Use a disinfectant to clean all surfaces, including your worktable, chairs, and any equipment you will be using.
- Use Disposable Covers: Cover your work surface with disposable, impermeable covers to prevent contamination.
- Wash Your Hands: Wash your hands thoroughly with antibacterial soap and water before and after handling stencils.
7.2 Using Sterile Equipment
Ensure that all equipment used in the stencil-making and application process is sterile.
- Disposable Gloves: Wear a fresh pair of disposable gloves when handling stencils and applying them to the skin.
- Sterile Pens and Markers: Use sterile, single-use pens or markers for any touch-ups on the stencil.
- Single-Use Stencils: Always use a fresh stencil for each tattoo. Never reuse stencils.
7.3 Preparing the Skin
Proper skin preparation is essential for a clean and safe stencil transfer.
- Shave the Area: Shave the area to be tattooed to remove any hair that could interfere with the stencil transfer.
- Clean the Skin: Use an antiseptic solution to thoroughly clean the skin and remove any oils, lotions, or debris.
- Apply Stencil Solution: Apply a thin, even layer of stencil transfer solution to the prepared skin.
7.4 Preventing Cross-Contamination
Prevent cross-contamination by following strict hygiene protocols.
- Use Barrier Film: Cover any equipment that cannot be sterilized with barrier film.
- Dispose of Waste Properly: Dispose of all waste materials, including used stencils, gloves, and needles, in appropriate containers.
- Educate Clients: Inform clients about the importance of proper aftercare to prevent infections.
8. How to Choose the Right Tattoo Artist for Your Needs
Choosing the right tattoo artist is crucial for a positive and successful tattooing experience. Consider these factors when making your decision:
8.1 Portfolio Review
Review the artist’s portfolio to assess their skill and style.
- Look for Consistency: Ensure the artist’s work is consistent in quality and reflects a high level of skill.
- Assess Style: Choose an artist whose style aligns with your vision for the tattoo.
- Check for Clean Lines: Look for clean, crisp lines and accurate shading in the artist’s work.
8.2 Studio Environment
Visit the tattoo studio to assess its cleanliness and professionalism.
- Cleanliness: Ensure the studio is clean and well-maintained.
- Professionalism: Look for a professional and respectful atmosphere.
- Sterilization Practices: Observe the studio’s sterilization practices to ensure they meet high standards.
8.3 Consultations
Schedule a consultation with the artist to discuss your design and ask any questions you may have.
- Communication: Choose an artist who communicates clearly and listens to your ideas.
- Expertise: Seek an artist who can offer valuable insights and suggestions for your design.
- Comfort Level: Choose an artist with whom you feel comfortable and confident.
8.4 Licensing and Certification
Verify that the artist is licensed and certified to practice tattooing.
- State Licensing: Ensure the artist holds a valid license from the state.
- Certifications: Look for certifications in bloodborne pathogens and other safety-related areas.
- Insurance: Confirm that the artist has liability insurance.
9. The Future of Tattoo Stencils: Emerging Technologies
The field of tattoo stencils is constantly evolving with emerging technologies that promise to enhance precision, efficiency, and creativity.
9.1 Augmented Reality (AR) Stencils
AR technology allows artists to project digital stencils directly onto the skin, providing a real-time guide for tattooing.
- Precision: AR stencils offer unparalleled precision, ensuring accurate placement and alignment.
- Customization: Artists can easily adjust and customize the stencil in real-time.
- Efficiency: AR technology streamlines the tattooing process, reducing the risk of errors and improving overall efficiency.
9.2 3D-Printed Stencils
3D printing technology enables the creation of custom stencils with intricate designs and complex geometries.
- Complexity: 3D-printed stencils can accommodate highly complex designs that would be difficult to create using traditional methods.
- Durability: 3D-printed stencils are durable and can be reused multiple times.
- Customization: Artists can create stencils tailored to specific body contours and design requirements.
9.3 Laser Stencil Cutting
Laser cutting technology offers a precise and efficient way to create stencils from a variety of materials.
- Precision: Laser cutting provides highly accurate and clean cuts, resulting in crisp and detailed stencils.
- Efficiency: Laser cutting is a fast and automated process, reducing the time and effort required to create stencils.
- Versatility: Laser cutting can be used with a wide range of materials, including paper, plastic, and metal.
10. FAQs About Using Carbon Paper for Tattoo Stencils
10.1 Is carbon paper safe to use on skin?
No, carbon paper should not be applied directly to the skin. It is used to transfer the design onto stencil paper, which is then used on the skin with a transfer solution.
10.2 Can I reuse carbon paper for multiple stencils?
The effectiveness of carbon paper decreases with each use. It’s best to use a fresh sheet for each stencil to ensure a clear transfer.
10.3 What type of pen is best for tracing the design?
A fine-tipped pen or a sharp pencil works best for tracing the design, as it provides precision and control.
10.4 How do I prevent smudging when using carbon paper?
To prevent smudging, secure the papers with tape, use a light touch when tracing, and avoid touching the carbon side of the paper.
10.5 Can I use regular paper instead of stencil paper?
No, regular paper is not suitable for applying stencils to the skin. Stencil paper is specifically designed to hold the design and transfer it cleanly.
10.6 How do I clean the skin after applying the stencil?
After applying the stencil, gently clean the skin with a sterile wipe to remove any excess stencil solution or ink.
10.7 What if the design doesn’t transfer completely?
If the design doesn’t transfer completely, carefully re-trace the missing areas with the carbon paper and stencil paper in place.
10.8 How long should I leave the stencil on the skin?
Leave the stencil on the skin for about 30-60 seconds to allow the design to transfer properly.
10.9 Can I use carbon paper for complex tattoo designs?
Carbon paper can be used for complex designs, but it may be more challenging and time-consuming. Thermal stencil printers may be a better option for intricate designs.
10.10 Where can I buy carbon paper and stencil paper?
Carbon paper and stencil paper are widely available in art supply stores, tattoo supply shops, and online retailers.
Ready to bring your tattoo visions to life with precision and ease? At tattooat.com, we provide an extensive library of tattoo designs to spark your creativity, connect you with talented tattoo artists in the USA, particularly in cities like Portland known for their vibrant tattoo culture, and offer detailed guides on tattoo processes and aftercare. Whether you’re seeking inspiration, expert advice, or the perfect artist for your next piece, tattooat.com is your ultimate resource. Explore our website today and take the first step towards realizing your unique tattoo journey! Find inspiration, connect with artists, and learn everything you need to know about tattoos with tattooat.com. Address: 1825 SW Broadway, Portland, OR 97201, United States. Phone: +1 (503) 725-3000. Website: tattooat.com.
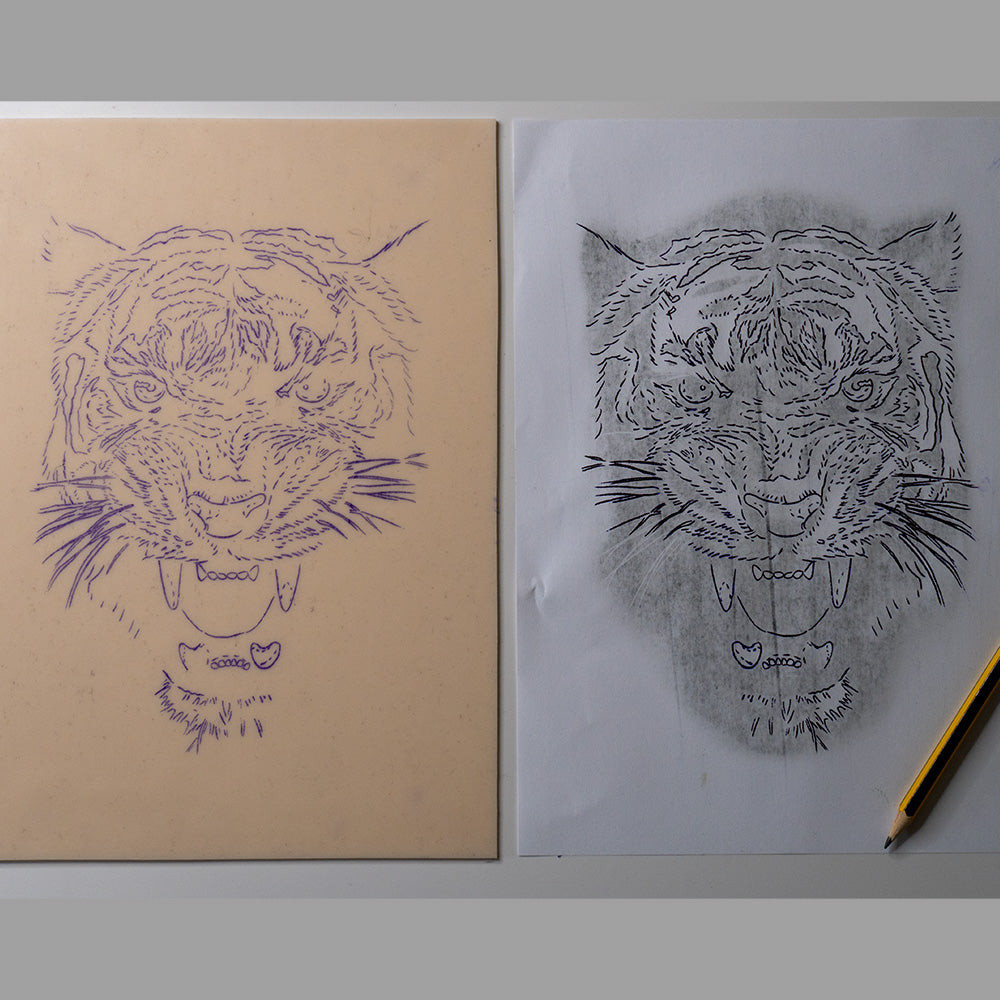 Carbon paper stencil after copy