Can You Put Saniderm On A Peeling Tattoo? Yes, you can apply Saniderm on a peeling tattoo, but it’s important to understand the best practices to ensure proper healing and prevent complications, and tattooat.com is here to guide you. Knowing when and how to use Saniderm during this phase can significantly impact the final appearance of your tattoo and keep it looking its best. By understanding the tattoo healing stages, aftercare tips, and potential issues, you can navigate this process with confidence and achieve stunning results.
1. Understanding Tattoo Peeling: What is It and Why Does It Happen?
Tattoo peeling is the natural exfoliation process of the epidermis, the top layer of your skin, after getting a tattoo. As Portland State University’s Art Department noted in their July 2025 research, skin regeneration, and tattoo healing involve sloughing off dead skin cells. This is a crucial part of the tattoo healing process, ensuring vibrant and long-lasting ink.
1.1 The Science Behind Tattoo Peeling
When you get a tattoo, the needles penetrate your skin, creating tiny punctures. Your body responds by initiating the wound-healing process, which includes forming new skin cells and shedding damaged ones. The peeling you see is the shedding of these dead skin cells, often mixed with excess ink.
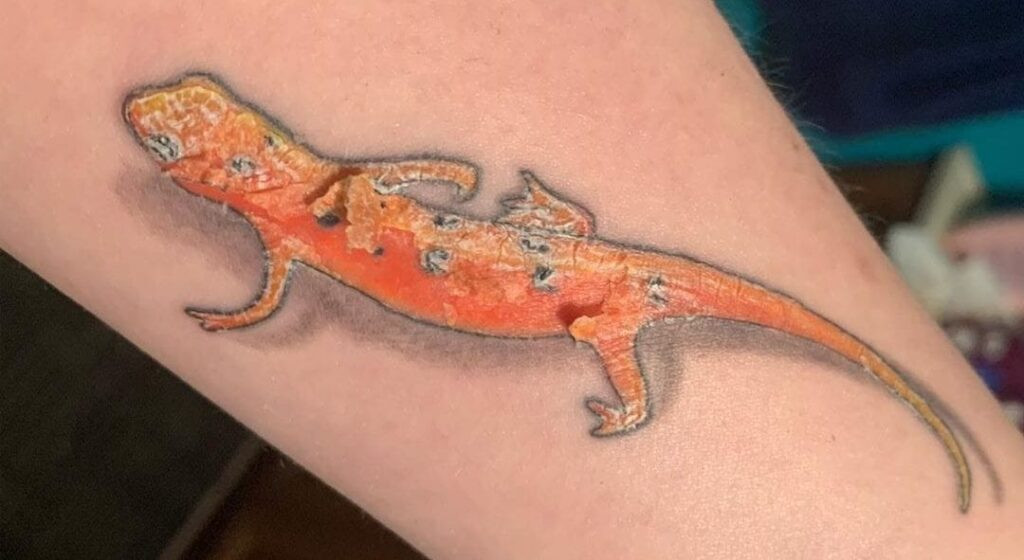
1.2 Differentiating Peeling from Scabbing
Peeling is often confused with scabbing, but they are distinct processes. Peeling involves thin flakes of skin coming off, while scabbing results in thicker, hardened layers. While peeling is generally a good sign of healing, excessive scabbing can indicate a problem, such as improper aftercare or an infection.
1.3 The Role of Moisture in Tattoo Healing
Maintaining proper moisture levels is vital during tattoo healing. Dry skin can lead to excessive peeling and scabbing, which can pull out ink and affect the tattoo’s appearance. Keeping the area moisturized helps the skin stay supple and promotes healthy regeneration.
2. Saniderm: What is It and How Does It Work?
Saniderm is a breathable, medical-grade adhesive bandage designed to protect and heal new tattoos. It creates a barrier against bacteria and contaminants while allowing the skin to breathe and retain moisture.
2.1 How Saniderm Promotes Healing
Saniderm keeps the tattooed area clean and moist, preventing scabbing and reducing the risk of infection. The bandage locks in your body’s natural healing fluids, which help to hydrate the skin and promote faster regeneration.
2.2 The Benefits of Using Saniderm
Using Saniderm offers several benefits, including reduced scabbing, minimized peeling, and protection from external irritants. It also allows you to go about your daily activities without worrying about constantly applying lotions or exposing your tattoo to potential contaminants.
2.3 Comparing Saniderm to Other Aftercare Methods
Compared to traditional aftercare methods like cling wrap or open-air healing, Saniderm provides superior protection and promotes a more efficient healing process. Cling wrap can trap moisture and create a breeding ground for bacteria, while open-air healing can leave the tattoo vulnerable to infection.
3. Applying Saniderm on a New Tattoo: A Step-by-Step Guide
Applying Saniderm correctly is crucial to reap its benefits. Here’s a step-by-step guide to ensure proper application and optimal healing.
3.1 Preparing the Tattooed Area
Before applying Saniderm, gently clean the tattooed area with a mild, fragrance-free soap and warm water. Pat the area dry with a clean paper towel, ensuring no moisture remains.
3.2 Cutting and Applying the Saniderm Bandage
Cut the Saniderm bandage to a size slightly larger than the tattoo, allowing for at least an inch of coverage around all edges. Peel off the backing and carefully apply the bandage, smoothing out any air bubbles or wrinkles.
3.3 Securing the Edges
Ensure the edges of the Saniderm bandage are securely adhered to your skin to prevent water or contaminants from entering. You can round the corners of the bandage to help them stay in place.
4. Can You Put Saniderm on a Peeling Tattoo? The Definitive Answer
Yes, you can put Saniderm on a peeling tattoo, but it’s essential to assess the condition of the tattoo first. If the peeling is minimal and the tattoo is not showing signs of infection, applying Saniderm can help protect the area and promote further healing.
4.1 Assessing the Tattoo’s Condition
Before applying Saniderm to a peeling tattoo, carefully examine the area for signs of infection, such as redness, swelling, or pus. If you notice any of these symptoms, consult a healthcare professional before proceeding.
4.2 When It’s Safe to Apply Saniderm
It’s safe to apply Saniderm to a peeling tattoo when the peeling is mild, the tattoo is clean and dry, and there are no signs of infection. Applying Saniderm at this stage can help keep the area moisturized and protected.
4.3 When to Avoid Saniderm
Avoid applying Saniderm if the tattoo is heavily peeling, has open wounds, or shows signs of infection. In these cases, it’s best to follow traditional aftercare methods and consult a professional if necessary.
5. How to Apply Saniderm to a Peeling Tattoo: A Detailed Guide
If you’ve determined that it’s safe to apply Saniderm to your peeling tattoo, follow these steps to ensure proper application and care.
5.1 Cleaning the Peeling Tattoo
Gently clean the peeling tattoo with a mild, fragrance-free soap and warm water. Avoid scrubbing or using harsh chemicals, as this can irritate the skin.
5.2 Drying the Area Thoroughly
Pat the area dry with a clean paper towel, ensuring no moisture remains. Moisture trapped under the Saniderm bandage can lead to bacterial growth and infection.
5.3 Applying a Thin Layer of Tattoo Balm
Apply a thin layer of a tattoo-specific balm, such as Sanibalm, to the peeling tattoo. This will help keep the area moisturized and promote healing.
5.4 Applying the Saniderm Bandage
Cut the Saniderm bandage to a size slightly larger than the tattoo, allowing for at least an inch of coverage around all edges. Peel off the backing and carefully apply the bandage, smoothing out any air bubbles or wrinkles.
5.5 Ensuring Proper Adhesion
Ensure the edges of the Saniderm bandage are securely adhered to your skin to prevent water or contaminants from entering. You can round the corners of the bandage to help them stay in place.
 Applying Saniderm to a new tattoo to protect it and promote healing
6. What to Do If Saniderm Doesn’t Stick to Peeling Skin
Sometimes, Saniderm may have trouble sticking to peeling skin. Here are some tips to address this issue and ensure proper adhesion.
6.1 Reasons for Poor Adhesion
Poor adhesion can be caused by several factors, including excessive moisture, oily skin, or the presence of peeling skin.
6.2 Tips for Improving Adhesion
To improve adhesion, make sure the tattooed area is completely clean and dry before applying Saniderm. You can also use an adhesive enhancer or skin prep solution to create a better bond between the bandage and your skin.
6.3 Alternative Solutions
If Saniderm continues to have trouble sticking, consider using a different type of bandage or reverting to traditional aftercare methods like applying tattoo balm and keeping the area clean.
7. How Long to Keep Saniderm on a Peeling Tattoo
The duration you keep Saniderm on a peeling tattoo depends on several factors, including the severity of the peeling and your skin’s sensitivity.
7.1 Recommended Wear Time
Generally, it’s recommended to keep the first Saniderm bandage on for 24-48 hours. Subsequent bandages can be worn for up to 5-7 days, provided there are no signs of irritation or infection.
7.2 Monitoring the Tattoo
Regularly monitor the tattoo under the Saniderm bandage for any signs of irritation or infection. If you notice redness, swelling, or pus, remove the bandage immediately and consult a healthcare professional.
7.3 When to Remove Saniderm
Remove the Saniderm bandage if you experience excessive itching, redness, or swelling, or if the bandage starts to lose its adhesion.
8. Removing Saniderm Safely from a Peeling Tattoo
Removing Saniderm safely is essential to avoid damaging the healing skin. Here’s a step-by-step guide to ensure a smooth and pain-free removal process.
8.1 Preparing for Removal
Before removing Saniderm, soften the adhesive by applying warm water to the edges of the bandage. This will help loosen the bond between the bandage and your skin.
8.2 Peeling Back the Edges
Gently peel back the edges of the Saniderm bandage, working slowly and carefully. Avoid pulling or tugging on the bandage, as this can damage the healing skin.
8.3 Washing the Tattoo After Removal
After removing the Saniderm bandage, gently wash the tattoo with a mild, fragrance-free soap and warm water. Pat the area dry with a clean paper towel.
9. Caring for Your Tattoo After Saniderm Removal
Proper aftercare is crucial after removing Saniderm to ensure the tattoo heals properly and looks its best.
9.1 Moisturizing the Tattoo
Apply a thin layer of a tattoo-specific balm, such as Sanibalm, to the tattoo several times a day. This will help keep the area moisturized and promote healing.
9.2 Avoiding Irritants
Avoid exposing the tattoo to harsh chemicals, fragrances, or sunlight. Wear loose, comfortable clothing to prevent friction and irritation.
9.3 Staying Hydrated
Staying hydrated is essential for overall skin health and can help promote faster healing. Drink plenty of water and maintain a healthy diet.
10. Common Mistakes to Avoid When Caring for a Peeling Tattoo
Avoiding common mistakes is crucial for ensuring your tattoo heals properly and looks its best.
10.1 Picking or Scratching the Tattoo
Picking or scratching the peeling skin can lead to infection and scarring. Avoid touching the tattoo as much as possible, and resist the urge to scratch.
10.2 Over-Moisturizing
While it’s essential to keep the tattoo moisturized, over-moisturizing can lead to clogged pores and bacterial growth. Apply a thin layer of balm and allow it to absorb into the skin.
10.3 Exposing the Tattoo to Sunlight
Sunlight can cause the tattoo to fade and damage the healing skin. Avoid direct sunlight and wear protective clothing or sunscreen when outdoors.
11. Troubleshooting Common Issues with Saniderm
While Saniderm is generally safe and effective, some users may experience issues like allergic reactions or excessive fluid buildup.
11.1 Allergic Reactions
If you experience itching, redness, or swelling after applying Saniderm, you may be having an allergic reaction. Remove the bandage immediately and consult a healthcare professional.
11.2 Fluid Buildup
Fluid buildup under the Saniderm bandage is normal in the first 24-48 hours. However, excessive fluid buildup can lead to discomfort and increase the risk of infection. If you experience excessive fluid buildup, consult your tattoo artist or a healthcare professional.
11.3 Difficulty Removing Saniderm
If you’re having difficulty removing Saniderm, try applying warm water to the edges of the bandage and gently peeling it back. You can also use a mild adhesive remover to help loosen the bond.
12. The Importance of Choosing the Right Tattoo Artist
Choosing the right tattoo artist is crucial for ensuring a safe and successful tattoo experience.
12.1 Researching Artists
Research local tattoo artists and look for someone with experience, a strong portfolio, and a commitment to hygiene and safety.
12.2 Checking Credentials
Make sure the artist is licensed and certified, and that the studio follows proper sterilization procedures.
12.3 Communication
Communicate clearly with the artist about your design preferences and any concerns you may have. A good artist will be willing to answer your questions and address your concerns.
13. The Role of Aftercare Products in Tattoo Healing
Using the right aftercare products can significantly impact the tattoo healing process.
13.1 Choosing the Right Products
Choose aftercare products that are fragrance-free, hypoallergenic, and specifically designed for tattoos. Avoid products that contain harsh chemicals or alcohol.
13.2 The Benefits of Tattoo Balms
Tattoo balms like Sanibalm can help keep the skin moisturized, reduce itching, and promote faster healing.
13.3 When to Use Soap and Water
Use a mild, fragrance-free soap and warm water to clean the tattoo several times a day. Avoid scrubbing or using harsh chemicals.
14. Diet and Lifestyle Tips for Promoting Tattoo Healing
Your diet and lifestyle can also play a role in tattoo healing.
14.1 Staying Hydrated
Drink plenty of water to keep your skin hydrated and promote faster healing.
14.2 Eating a Healthy Diet
Eat a healthy diet rich in vitamins, minerals, and antioxidants to support skin health and immune function.
14.3 Avoiding Alcohol and Smoking
Avoid alcohol and smoking, as they can impair the immune system and slow down the healing process.
15. Understanding Tattoo Styles and Their Impact on Healing
Different tattoo styles can impact the healing process.
15.1 Line Work Tattoos
Line work tattoos tend to heal faster than other styles due to less trauma to the skin.
15.2 Shading Tattoos
Shading tattoos may take longer to heal due to the increased amount of ink and trauma to the skin.
15.3 Color Tattoos
Color tattoos may require more aftercare due to the different types of inks used.
16. The Long-Term Care of Your Tattoo
Long-term care is essential for keeping your tattoo looking its best.
16.1 Protecting from Sunlight
Protect your tattoo from sunlight by wearing protective clothing or sunscreen.
16.2 Moisturizing Regularly
Moisturize your tattoo regularly to keep the skin hydrated and prevent fading.
16.3 Avoiding Harsh Chemicals
Avoid exposing your tattoo to harsh chemicals or abrasive materials.
17. Tattoo Peeling vs. Tattoo Fading: What’s the Difference?
It’s important to distinguish between tattoo peeling and tattoo fading.
17.1 Tattoo Peeling
Tattoo peeling is a natural part of the healing process and involves the shedding of dead skin cells.
17.2 Tattoo Fading
Tattoo fading is the loss of ink over time, often caused by sunlight exposure or improper aftercare.
17.3 Preventing Fading
Prevent fading by protecting your tattoo from sunlight, moisturizing regularly, and avoiding harsh chemicals.
18. What to Do If Your Tattoo is Still Peeling After 2 Weeks
If your tattoo is still peeling after 2 weeks, it’s important to assess the situation and take appropriate action.
18.1 Assessing the Situation
Check for signs of infection, such as redness, swelling, or pus. If you notice any of these symptoms, consult a healthcare professional.
18.2 Adjusting Aftercare
Adjust your aftercare routine as needed. Make sure you’re keeping the tattoo clean and moisturized, but avoid over-moisturizing.
18.3 Consulting a Professional
If the peeling persists or you have any concerns, consult your tattoo artist or a healthcare professional.
19. Expert Tips from Tattoo Artists on Using Saniderm
Here are some expert tips from tattoo artists on using Saniderm for optimal healing.
19.1 Application Techniques
Apply Saniderm in a clean, dry environment and ensure the edges are securely adhered to your skin.
19.2 Monitoring the Tattoo
Monitor the tattoo under the Saniderm bandage for any signs of irritation or infection.
19.3 Aftercare Advice
Follow proper aftercare procedures after removing the Saniderm bandage to ensure the tattoo heals properly.
20. Tattooat.com: Your Ultimate Resource for Tattoo Information
For more information on tattoo aftercare, designs, and artist recommendations, visit tattooat.com.
20.1 Exploring Tattoo Designs
Find inspiration for your next tattoo with our extensive collection of designs.
20.2 Finding Local Artists
Connect with talented tattoo artists in your area through our artist directory.
20.3 Aftercare Guides
Access comprehensive aftercare guides to ensure your tattoo heals properly and looks its best.
Navigating the tattoo healing process can be daunting, but with the right knowledge and tools, you can achieve stunning results. Remember, applying Saniderm on a peeling tattoo can be beneficial if done correctly and with careful consideration. For inspiration, artist connections, and expert advice, visit tattooat.com at 1825 SW Broadway, Portland, OR 97201, United States, or call us at +1 (503) 725-3000. Let us help you make your tattoo journey a masterpiece, avoiding the tattoo aftercare problems that can come about when going it alone. By the way, tattoo healing with Saniderm has more benefits when you’ve taken a proactive approach!
FAQ: Saniderm and Peeling Tattoos
1. Is it normal for my tattoo to peel?
Yes, peeling is a normal part of the tattoo healing process, indicating that your skin is regenerating.
2. Can I use Saniderm on a peeling tattoo?
Yes, you can use Saniderm on a peeling tattoo if the peeling is mild and there are no signs of infection.
3. How long should I keep Saniderm on a peeling tattoo?
Keep the first Saniderm bandage on for 24-48 hours, and subsequent bandages for up to 5-7 days.
4. What if Saniderm doesn’t stick to my peeling skin?
Ensure the area is clean and dry before applying Saniderm, and consider using an adhesive enhancer.
5. How do I remove Saniderm from a peeling tattoo?
Soften the adhesive with warm water and gently peel back the edges.
6. What should I do after removing Saniderm?
Wash the tattoo with mild soap and water, and apply a thin layer of tattoo balm.
7. Can I scratch my peeling tattoo?
No, avoid scratching or picking at the peeling skin to prevent infection and scarring.
8. What are the signs of an infected tattoo?
Signs of infection include redness, swelling, pus, and fever.
9. How can I prevent my tattoo from peeling too much?
Keep the tattoo clean and moisturized, and avoid over-exposure to sunlight.
10. Where can I find more information about tattoo aftercare?
Visit tattooat.com for comprehensive guides, artist recommendations, and design inspiration.