Fall is approaching, and while summer’s warmth is still lingering, the pumpkin spice latte craze signals it’s time to embrace autumn! If you’re eager to decorate for the season but prefer decor that’s easy to store and quick to create, these Temporary Tattoo pumpkins are the perfect solution. Transform mini pumpkins into charming fall decorations in minutes using beautiful temporary tattoos. This simple craft is a fantastic way to add a unique, artistic touch to your fall home decor.
 Mini pumpkins decorated with watercolor floral temporary tattoos, displayed on a bookshelf.
Temporary tattoos are incredibly versatile and come in countless designs, making them ideal for crafting. Applying them to mini pumpkins is a breeze, instantly creating eye-catching fall accents. Whether you choose floral, abstract, or geometric patterns, temporary tattoos offer a no-fuss way to personalize your pumpkin decor.
 Close-up of a mini pumpkin adorned with a watercolor floral temporary tattoo, showcasing the detail of the design.
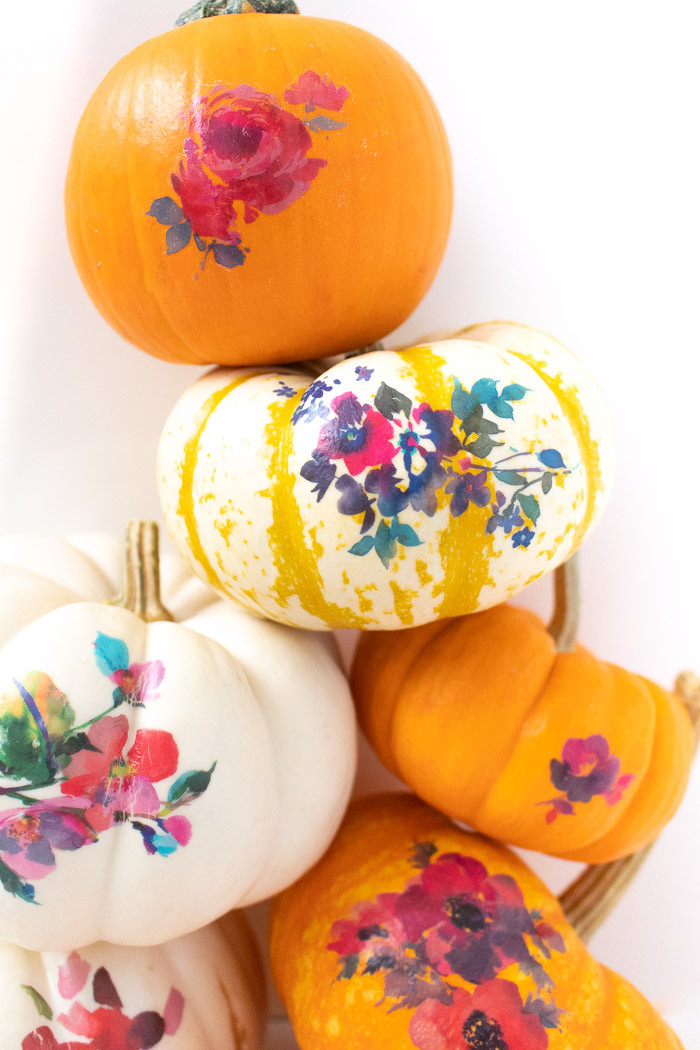
 A collection of mini pumpkins decorated with various watercolor temporary tattoos, arranged together to show a variety of designs and colors.
Inspired by the success of temporary tattoo mugs, this pumpkin decorating idea is a natural extension of using these fun designs in home crafts. If you’re looking for fresh and innovative ways to decorate pumpkins beyond traditional carving, temporary tattoos offer a stylish and effortless alternative. This project is perfect for those who appreciate watercolor-inspired aesthetics and want to incorporate them into their fall decorations. Here’s how you can make your own temporary tattoo pumpkins in just minutes.
 Step-by-step process of applying a temporary tattoo to a mini pumpkin, showing the damp cloth and application technique.
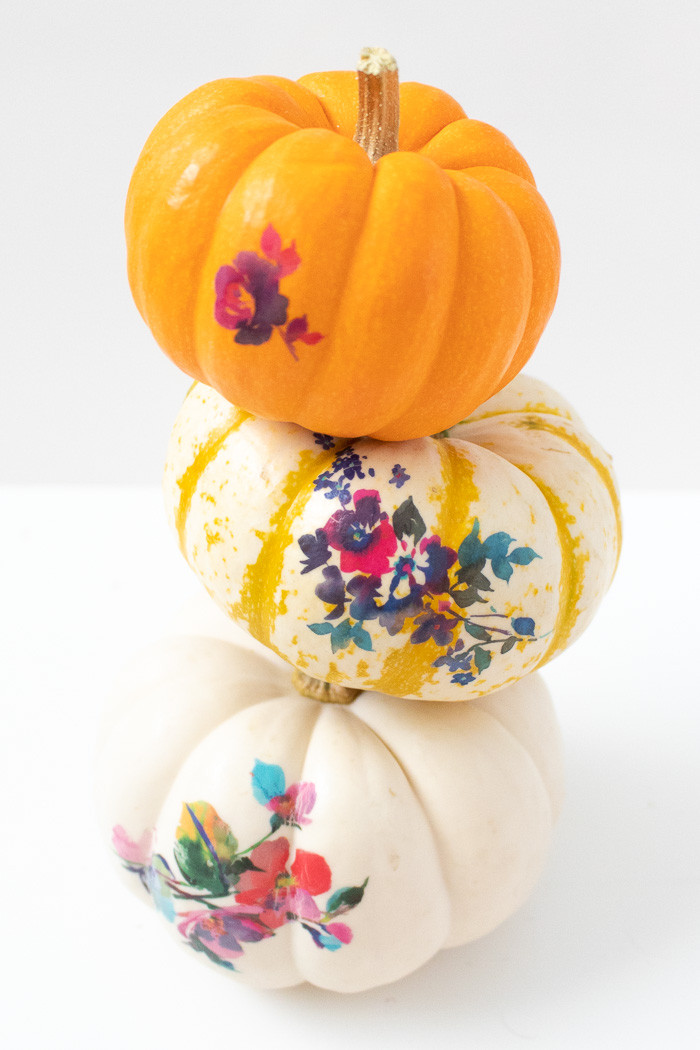
 Finished temporary tattoo pumpkins in various colors and designs, displayed together to showcase the final decorative effect.
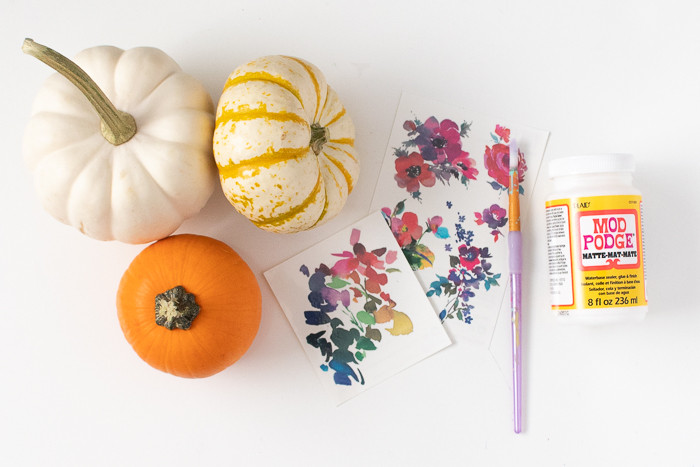
Materials You’ll Need:
- Mini pumpkins
- Temporary tattoos (choose your favorite designs – watercolor and floral designs work beautifully)
- Mod Podge or a similar sealant
- Paint brush
- Damp cloth or sponge
Step-by-Step Guide:
Step 1: Prepare Your Pumpkins
Begin by cleaning your mini pumpkins to remove any dirt or debris. Ensure they are completely dry before proceeding. Select the temporary tattoos you want to use and carefully cut them out, separating them from the sheet.
Tip: Before applying the tattoo, consider the pumpkin’s shape and how it sits to ensure the design will be positioned correctly. Some pumpkins may lean or be slightly uneven.
 Preparing a mini pumpkin for temporary tattoos, showing wiping the pumpkin clean with a cloth.
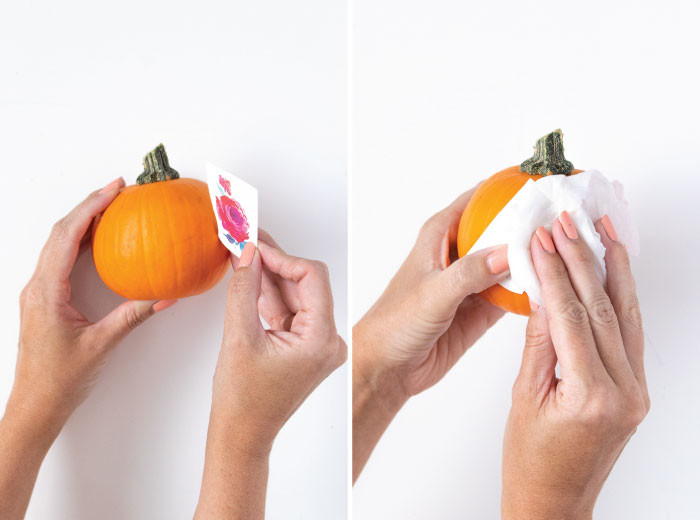
Step 2: Apply the Temporary Tattoos
Remove the clear plastic film from the temporary tattoo. Place the tattoo face-down onto the pumpkin in your desired location. Press firmly and hold it in place. Using a damp cloth or sponge, gently dab the back of the tattoo paper for 20-30 seconds, ensuring the entire paper is moistened. Carefully peel away the paper backing, checking to make sure the tattoo has fully transferred onto the pumpkin surface.
Note: For pumpkins with more curves or indentations, work patiently. Press the tattoo and damp cloth into these areas to ensure good contact. Be aware that tattoos may be more prone to cracking on highly uneven surfaces.
 Applying a temporary tattoo to a mini pumpkin using a damp sponge, demonstrating the transfer process.
Step 3: Seal the Design
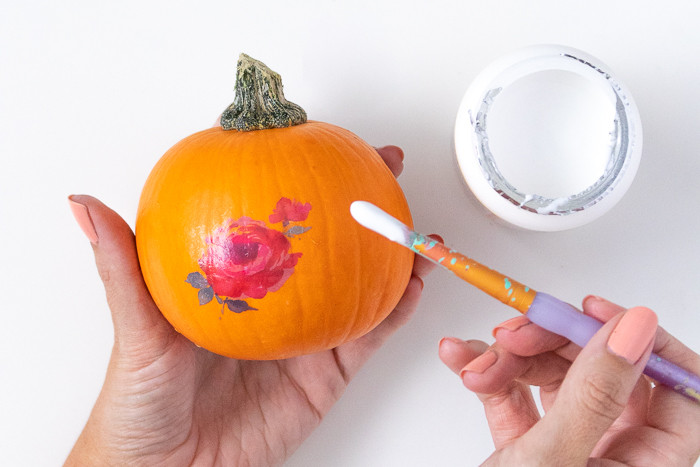
Once the temporary tattoo application is complete and the pumpkin is thoroughly dry, use a paintbrush to apply a thin coat of Mod Podge over the tattoo. This sealant will protect the tattoo and give it a subtle sheen. Allow the Mod Podge to dry completely.
 Sealing a temporary tattoo on a mini pumpkin with Mod Podge using a paintbrush.
Display Your Temporary Tattoo Pumpkins
Now your adorable mini temporary tattoo pumpkins are ready to be displayed! Arrange them throughout your home – on bookshelves, mantels, or as part of a fall centerpiece. These charming pumpkins are sure to enhance your fall decor and bring a touch of seasonal spirit to any space. Get creative with different temporary tattoo styles to match your personal fall aesthetic!