Getting a tattoo is an exciting experience, marking your skin with art that can last a lifetime. As the tattoo needle works its magic, puncturing your skin between 50 and 3,000 times per minute to deposit ink into the dermis layer, it’s crucial to remember that this beautiful new piece is also an open wound. Treating it as such is paramount for optimal healing and preserving the vibrancy of your tattoo.
Proper tattoo aftercare is not just about aesthetics; it’s essential to prevent complications like scabbing, scarring, infection, and loss of pigment or intricate details. While every tattoo artist aims for the best healing outcome for their clients and offers aftercare advice, these instructions can vary widely. This is why a comprehensive understanding of tattoo aftercare is so important.
This guide provides a holistic approach to tattoo healing, drawing on extensive industry experience and innovation to offer best practices. We’ll delve into common problems with traditional methods, explore effective solutions, and highlight the advantages of using Saniderm for tattoo aftercare, ensuring your healed tattoo looks just as stunning as it did on day one.
Traditional Tattoo Healing: Plastic Wrap and Petroleum Jelly – Why It’s Outdated
Historically, the initial step in tattoo aftercare involved wrapping the fresh tattoo with household plastic wrap, such as Saran Wrap. This plastic covering typically remained in place for a few hours post-session.
Following this, the tattoo would be washed, dried, and then coated with a thin layer of a petroleum-based ointment like Aquaphor or Vaseline. This routine was generally repeated 3 to 4 times daily until the tattoo was fully healed.
However, we strongly advise against using this traditional method for new tattoo aftercare due to several significant drawbacks:
- Prolonged Healing Time: This method often leads to an extended healing process, potentially taking anywhere from 2 to 4 weeks for the tattooed skin to fully recover.
- Skin Suffocation: Despite their widespread use in tattoo aftercare, petroleum-based products can impede skin pores. When skin pores are blocked and cannot breathe, it can result in skin irritations, rashes, and inflamed hair follicles, potentially causing more harm than good to your new tattoo.
- Increased Infection Risk: Petroleum jelly can trap dirt and bacteria against the skin, significantly elevating the risk of infection in the newly tattooed area.
- Oxygen Deprivation: Oxygen plays a vital role in effective skin healing. Covering a fresh tattoo with plastic wrap or thick petroleum-based ointments restricts oxygen supply, hindering the natural healing process.
- Scabbing and Ink Loss: Neither plastic wrap nor petroleum-based ointments effectively manage the blood and plasma discharge from the tattoo as it heals. This leads to scabbing. Picking or even accidentally scratching at scabs can result in pigment and detail loss, and may cause bleeding, irritation, infection, or scarring, ultimately compromising the tattoo’s appearance.
The primary goal in tattoo aftercare is to minimize or eliminate scabbing while providing the tattoo with the necessary oxygen for efficient healing. However, leaving a fresh tattoo uncovered exposes it to environmental contaminants like bacteria, germs, dirt, and pet dander, whether you’re at work or at home.
Products designed specifically for tattoo aftercare are crucial for overcoming the limitations of traditional methods. This is where Saniderm revolutionized the industry by introducing occlusive wound healing to tattoo aftercare. This innovative approach prevents scabbing, accelerates healing, and leverages the body’s natural healing mechanisms to optimize recovery.
Saniderm: How It Works and Its Advantages
Saniderm stands out from conventional plastic wrap as a sterile, medical-grade, breathable, and waterproof tattoo bandage specifically engineered to be permeable to oxygen. Saniderm bandages effectively address many of the issues associated with plastic wrap and petroleum-based products.
By securely containing the body’s natural blood and plasma exudate during the critical first 24-48 hours, Saniderm actively prevents scab formation, thereby significantly speeding up the healing process. Moreover, Saniderm dramatically lowers the risk of tattoo contamination by providing a robust protective barrier, preventing potential infections. It also simplifies aftercare by eliminating the need for frequent washing and ointment reapplication. The result is a tattoo healing experience that is not only safer and smoother but also considerably more efficient.
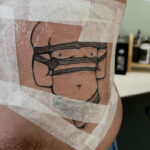
 Saniderm bandage on arm, showcasing a vibrant, healed tattoo underneath
Preparing Your New Tattoo for Saniderm Application
Congratulations on getting inked! To ensure Saniderm adheres properly and works effectively, follow these preparation steps:
- Hair Removal: Typically, your tattoo artist will have already shaved the area around your new tattoo by a 1-2 inch radius. This is crucial for Saniderm application, as it prevents bandage removal from pulling out hair, which can be painful and irritating.
- Thorough Cleaning: After your tattoo session, gently cleanse the tattooed area with a mild, antibacterial soap. Rinse thoroughly to remove all soap and excess ink.
- Complete Drying: Pat the area completely dry using a clean paper towel. Avoid using cloth towels, as they can harbor bacteria.
 Close-up of a person cleaning a fresh tattoo with foam soap before applying Saniderm
Applying Saniderm Bandage: Step-by-Step
Once your skin is properly prepared, you are ready to apply Saniderm to your new tattoo:
- Cut to Size: Cut the Saniderm bandage to be slightly larger than your tattoo, ensuring an extra 1-2 inches of overlap on all sides onto the surrounding skin.
- Remove Backing: Peel off the white paper backing to expose the adhesive side of the Saniderm bandage.
- Apply Centrally: Carefully center the bandage over your tattoo and gently apply it to the skin, smoothing it outward from the center to the edges.
- Remove Patterned Layer: After the bandage is securely in place, remove the clear, patterned top layer. Saniderm includes a “wavy” crease in the backing to make separating this layer easier.
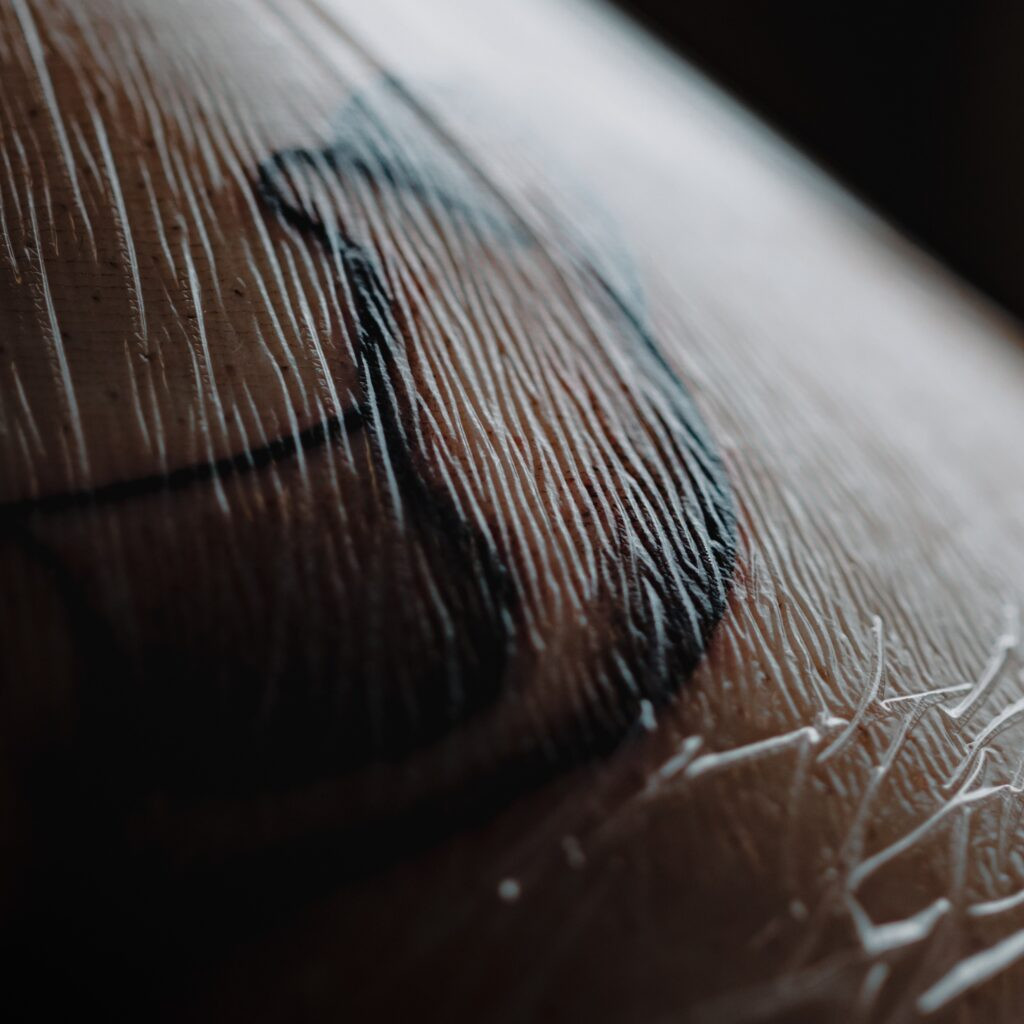
- First Bandage Duration: Leave the initial Saniderm bandage on for up to 24 hours. The duration depends on the amount of weeping (blood, plasma, and excess ink) from the tattoo site. It’s normal for fluid to accumulate under the bandage, forming an “ink sac.” However, if fluid buildup becomes excessive or starts to compromise the bandage’s adhesion, remove and reapply a fresh bandage.
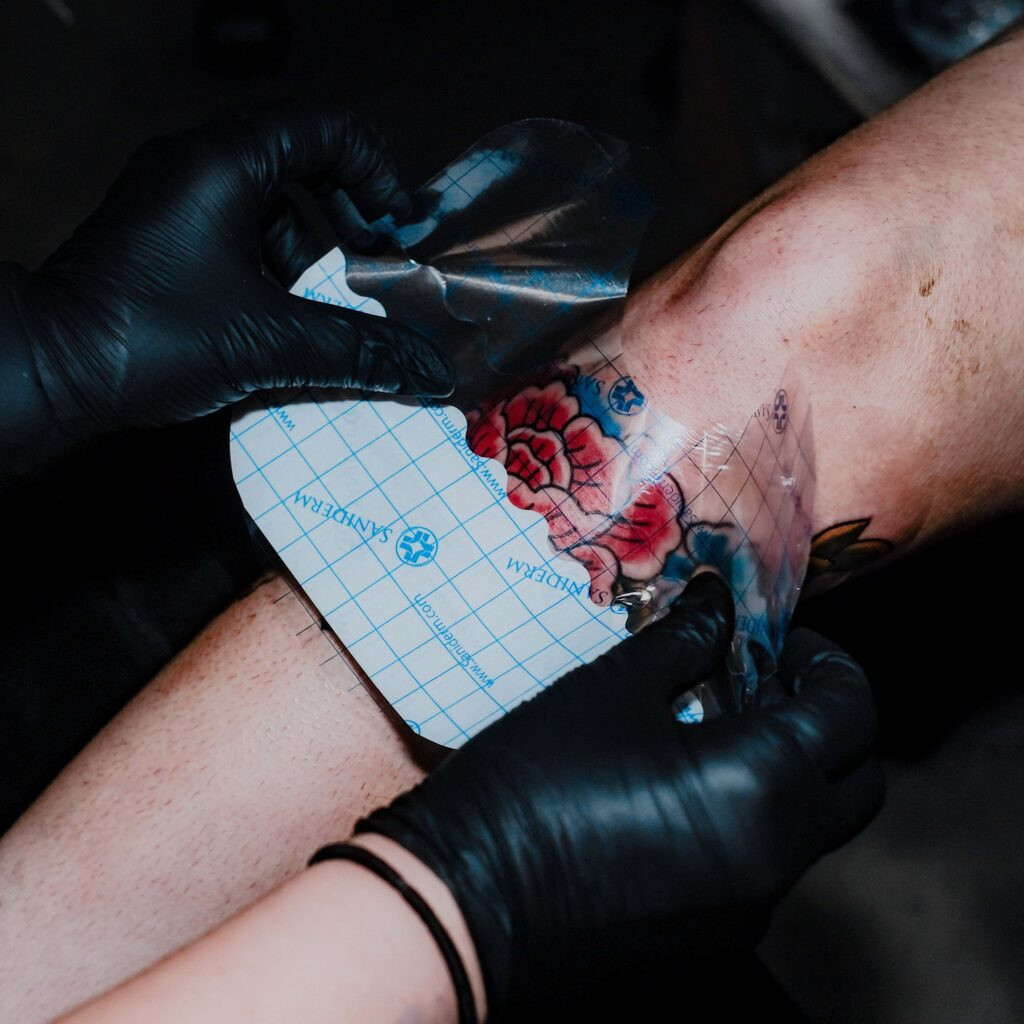
 Hands applying a Saniderm bandage to a fresh tattoo on an arm, showing the application process
Removing and Reapplying Saniderm for Continued Healing
After the initial 24-hour period, it’s time to remove the first bandage and apply a second Saniderm for continued protection:
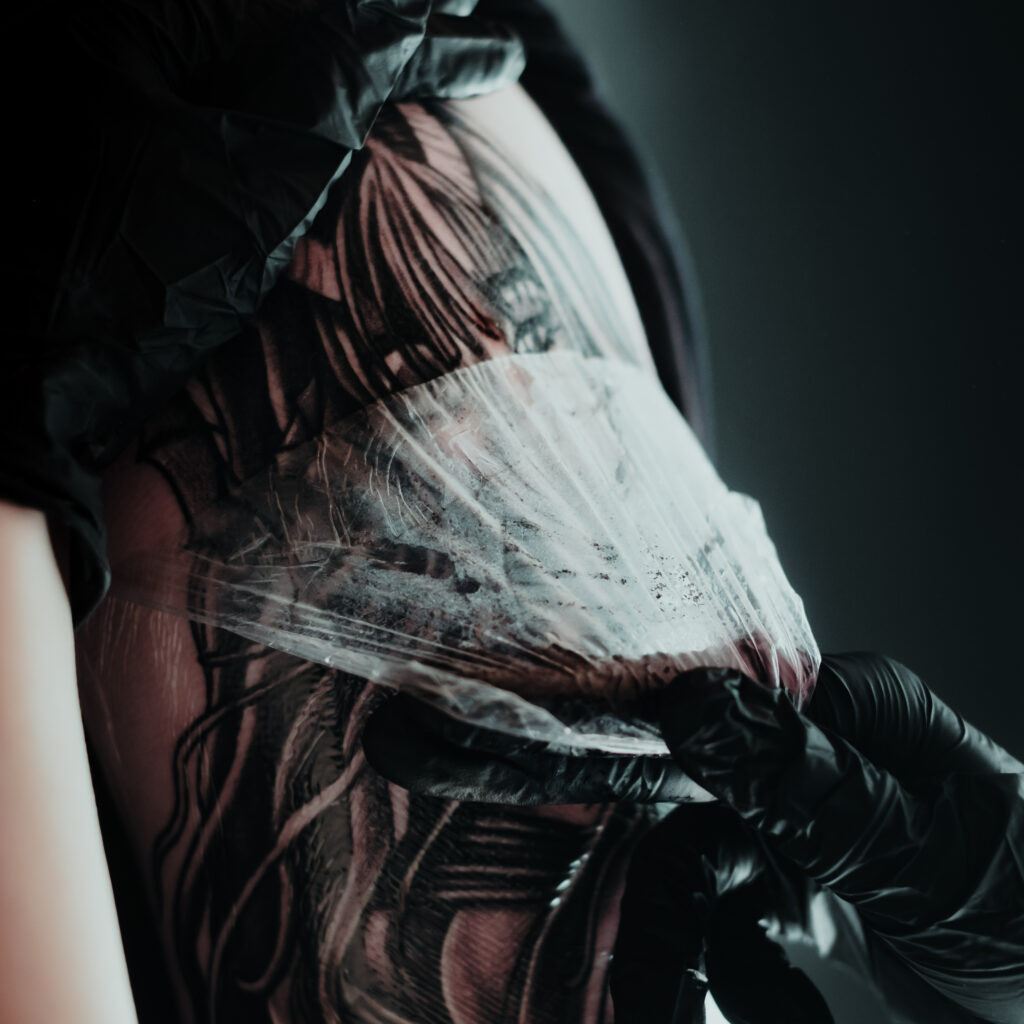
- Shower Removal: The best way to remove Saniderm is under warm running water, ideally in the shower. Locate a corner of the bandage and slowly peel it back, folding it over itself, similar to peeling a banana from top to bottom. The warm water helps to loosen the adhesive and minimize discomfort.
- Cleanse Gently: Clean the tattoo with warm water and a mild, fragrance-free cleanser, such as Saniderm Foam Soap.
- Pat Dry and Air Dry: Gently pat the tattoo dry with a clean paper towel. Allow the tattoo to air dry completely for 5-10 minutes before applying the next bandage.
- Second Application: Apply the second Saniderm bandage using the same application steps as the first.
- Second Bandage Duration: Keep the second bandage on for an additional 3-5 days. If you experience any discomfort or irritation, remove the bandage and switch to open healing, using Saniderm Tattoo Aftercare Balm for topical care.
Post-Saniderm Tattoo Care: What Happens Next?
Even after removing the final Saniderm bandage, typically within a week, your tattoo aftercare routine isn’t over. While your tattoo may appear healed on the surface, the deeper layers of skin continue to heal for up to 6 months. Consistent moisturizing is crucial during this extended healing phase. Saniderm offers all-natural topicals, including Tattoo Aftercare Balm and Daily Tattoo Lotion, to support your skin throughout this period.
Following Saniderm removal, continue to care for your tattoo by washing it gently twice daily (morning and night) with a mild antibacterial soap. Pat it dry with a clean paper towel and let it air dry for 5-10 minutes. Then, apply a thin layer of aftercare balm, gently massaging it into the skin in small, circular motions. Maintain this routine for 1-2 weeks, or until the tattoo is no longer peeling, dry, or sensitive to the touch.
SANIDERM TATTOO AFTERCARE BALMS
Avoiding Over-Moisturization: Finding the Right Balance
While moisturizing is vital, applying too much balm or lotion can be detrimental to your healing tattoo. Over-moisturizing can lead to several issues:
- Delayed Healing: Excessive moisture can hinder the skin’s natural healing processes.
- Bacterial Growth: A moist environment can promote unwanted bacterial growth.
- Inflammation and Infection Risk: Trapped moisture can increase the risk of inflammation and infection.
- Clogged Pores: Over-moisturizing can clog pores, suffocating the skin.
- Acne Breakouts: You might experience acne around the tattooed area due to clogged pores.
Conversely, under-moisturizing can lead to dryness, cracking, itching, and potentially scabbing, which can also damage your tattoo’s appearance.
The key is to apply a thin, even layer of moisturizer. Less is often more. Start with a small amount of product and spread it thinly across the tattoo surface. The skin should quickly absorb the moisturizer. After application, gently wipe away any excess to ensure the skin can still breathe and heal efficiently without being suffocated.
Saniderm for Showers, Swimming, and Exercise: Staying Active
Saniderm bandages are waterproof, allowing you to shower normally during the tattoo healing process. However, avoid excessively hot water, as it can weaken the bandage adhesive, potentially allowing contaminants to seep underneath and increasing infection risk. It’s also crucial to avoid submerging your new tattoo in baths, pools, or hot tubs for 2-4 weeks post-tattoo, whether it’s bandaged or not. If water does get under the bandage, remove it immediately, clean the area thoroughly, and apply a new bandage or switch to open healing methods.
Saniderm’s polyurethane construction is durable, allowing for light exercise routines without compromising your new tattoo. However, excessive sweating, prolonged movement, or friction around the tattooed area can weaken the bandage’s seal. If necessary, remove and reapply a new bandage or transition to open healing.
READ MORE // CAN I EXERCISE AND WORKOUT WITH SANIDERM?
The Saniderm Difference: Superior Tattoo Healing Results
Saniderm has facilitated smoother, faster healing for countless tattoos, resulting in vibrant, stunning ink. Its ease of use and effectiveness make it a superior choice for tattoo aftercare. Ask your tattoo artist or local tattoo shop if they use and carry Saniderm products to experience the benefits firsthand!
For further details and tips on Saniderm application and usage, explore the Saniderm Product Usage section in our comprehensive Knowledge Base.