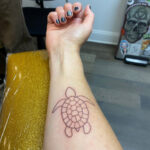
Getting a tattoo is a significant decision, and for many, the allure lies in having a piece of art that is entirely unique to them. This is where the beauty of Custom Tattoo Design comes in. As a tattoo artist, crafting custom pieces is a deeply rewarding part of the process. This article will walk you through my approach to creating custom tattoo designs, offering insight into what you can expect when collaborating on your personalized body art. Please remember that this is my personal process, and other artists may have different methods.
Step 1: Initial Consultation and Design Request Confirmation
Before any sketching begins, it’s crucial to ensure we are both on the same page. Typically, by the time you’re ready to start the design process, I’ll already have a solid understanding of your vision from your project request form – which you can read about here. However, a week or so before your appointment, I like to revisit your request. I’ll send a confirmation email outlining your ideas and ask any clarifying questions I might have. This step is vital because there’s often a considerable gap between booking and the actual tattoo appointment. Confirming details prevents misunderstandings and ensures your custom tattoo design accurately reflects your desires.
It’s also important to note my policy: major design changes after booking are treated as a new project request. This is simply to manage expectations and workload. Imagine booking a delicate floral piece and then deciding you want a full back piece dragon – that requires a significant shift in design and time. Small tweaks are always welcome as long as they are communicated beforehand. This initial check-in ensures a smooth and collaborative custom tattoo design process.
Step 2: Sketching the Vision – Initial Layout
Once we’ve confirmed the core concept, the exciting part begins: initial sketches. Don’t expect polished perfection at this stage! My initial sketches are often very rough and focus purely on layout, composition, and placement on the body. Think of it as a visual brainstorming session. I’m exploring how the elements will fit together and flow with your anatomy. At this stage, details are minimal. Sometimes, I might even send you a couple of different rough sketch options to explore various possibilities for your custom tattoo design. The goal here is to establish the foundational structure of your tattoo.
Step 3: Refining the Design – Adding Detail
After you’ve reviewed the initial sketch (or sketches) and provided feedback, I move on to refining the chosen direction. This stage involves developing a more detailed sketch. If I presented multiple options initially, we’ll now focus on just one. This refined sketch will have more defined lines and a clearer representation of the final tattoo. This step might be repeated if adjustments are needed or if I’m still exploring a few details, ensuring your custom tattoo design is precisely as envisioned. Client feedback is crucial here to ensure the design evolves to meet your expectations.
Step 4: Outlining and Preparation for Tattooing
Once the refined sketch gets your approval, I create a clean, crisp outline of the design. This outline serves as the stencil for the tattoo. For some custom tattoo designs, particularly those incorporating organic elements like florals or flowing fillers, I may incorporate freehand tattooing directly on the skin on the day of your appointment. Freehand allows for a more natural flow and adaptation to your unique body contours. In these cases, only the stencil-dependent elements of the design will be outlined beforehand, while the freehand components remain as part of the sketch, to be finalized directly on your skin.
Step 5: Finalizing Details – Ready for Ink
The penultimate step involves adding final details to the design. Sometimes this stage isn’t necessary for simpler designs, but for more intricate custom tattoo designs, I’ll often add shading suggestions or further refine smaller elements. I typically do this the night before or the morning of your appointment to ensure it’s fresh in my mind. These details might be slightly less refined than the example below, but they provide a clear indication of how the finished tattoo will look, ensuring you’re completely happy before we proceed.
Step 6: From Design to Tattoo – The Final Step
Finally, the most exciting part – transforming the custom tattoo design into a permanent piece of art on your skin! All the steps before lead to this moment. Seeing the design come to life as a beautiful tattoo is incredibly rewarding for both the artist and the client. This collaborative custom tattoo design process ensures that you receive a piece of art that is not only visually stunning but also deeply personal and meaningful.
Thank you for taking the time to learn about my custom tattoo design process. If you’re interested in getting your own unique piece, please reach out!
To stay updated on my latest work and available appointments, subscribe to my newsletter or follow me on Instagram.
Have a wonderful day!
Lu

