Traditional tattoo flash art is iconic, characterized by bold lines and impactful shading. Creating this style with Copic markers requires a specific approach to blending, particularly when working with black and grayscale tones. This tutorial dives into the technique of “backwards blending” to achieve smooth gradations and depth in your Black Traditional Tattoo Flash designs. We’ll explore how to utilize a limited palette of grayscale Copic markers to create stunning visual effects reminiscent of classic tattoo artistry.
Understanding Backwards Blending for Tattoo Flash
Many Copic marker tutorials recommend blending from light to dark. This is sound advice because Copic markers are alcohol-based, and layering a lighter color over a darker one can lift and lighten the underlying color. However, when aiming for the strong contrasts and deep blacks typical of traditional tattoo flash, blending dark to light—or “backwards blending”—becomes a valuable technique.
Backwards blending is especially useful when working with a limited range of grayscale markers. By layering lighter grays over black, we leverage the lifting effect of the marker solvent to create seamless transitions and soften the starkness of pure black. This method allows us to build dimension and visual interest even with a restricted color palette.
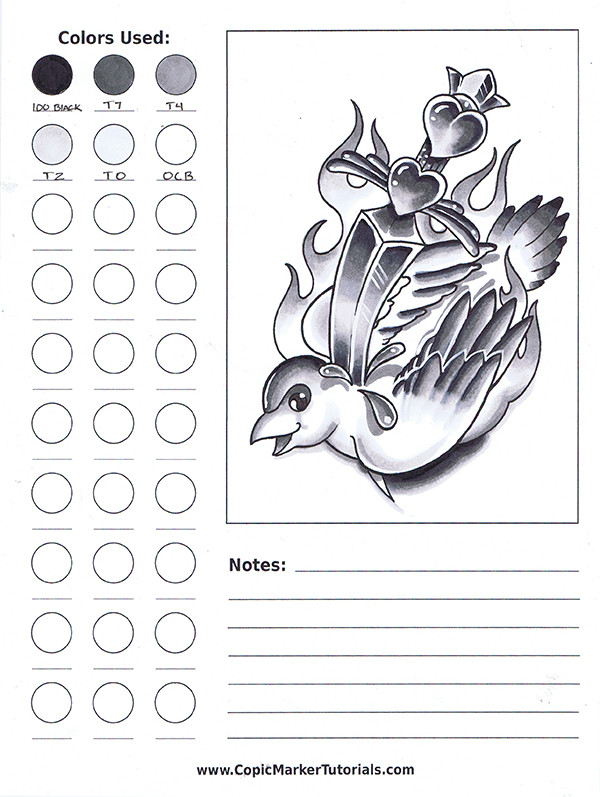
For this tutorial, we’ll focus on creating a classic dove and flame tattoo flash design using the following Copic markers from the Toner Gray family:
- 100 Black
- T7
- T4
- T2
- T0
- 0CB (Colorless Blender)
Notice the subtle value difference between each marker, generally three values or less. This close range is ideal for smooth blending. Larger value gaps can make blending more challenging and require more layers to achieve a seamless transition.
Let’s break down the process step-by-step to master backwards blending for your black traditional tattoo flash.
Step 1: Laying Down Your Black Ink
 Black ink base layer for tattoo flash art
The foundation of any strong black traditional tattoo flash piece is, of course, black ink. In this step, we establish our darkest values using the 100 Black marker. Consider your light source – in this example, we’re imagining the flame as the light source, positioned behind and below the dove.
While a realistic light source would illuminate the dove evenly, for a more dynamic and visually engaging image, we’ll emphasize the light from below. This means placing our black ink strategically at the top edges of the forms, creating shadow and depth.
Technical Tip: For precise control when working near outlines or edges, always point the marker tip towards the line as you apply the ink. This technique ensures clean lines and prevents color from bleeding outside the intended area.
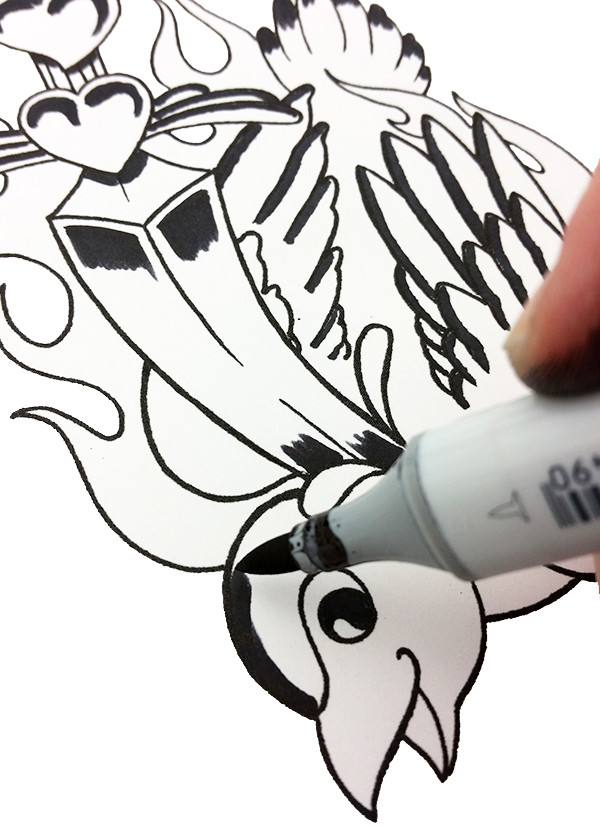 Close-up of black ink application with Copic marker
Observe the slightly uneven, textured edge created by the brush nib. This seemingly imperfect edge is actually beneficial for blending. A rough edge is much easier to blend smoothly than a hard, crisp line, as it provides more surface area for the blending markers to interact with.
 Detailed view of uneven black ink edge for blending
Step 2: Introducing the Next Darkest Gray (T7)
 Layering T7 gray over black in tattoo flash artwork
Next, we introduce our next darkest value, T7. Apply this marker, slightly overlapping the edge of the black ink. Notice how seamlessly the T7 blends with the black almost instantly, without extensive manipulation. This demonstrates the natural blending capability of Copic markers when using values that are closely related. The subtle value difference of three or less between 100 Black and T7 facilitates this smooth transition.
This near-effortless blending is a key advantage of working with a closely valued grayscale palette for black traditional tattoo flash.
Step 3: Building Mid-tones with T4
 Adding mid-tones with T4 marker for depth
Now we move to our mid-tone, T4. As you apply the T4 over the T7, the alcohol solvent in the T4 marker will begin to lift and lighten the edge of the T7. At this stage, the blend may not be perfectly smooth, and that’s intentional. Leaving the initial layers slightly rough allows you to see the distinct values and how they interact before we fully soften the transitions. Think of this stage as building blocks of value.
We are intentionally keeping the blending somewhat rough in these progression photos so you can clearly see how the values appear adjacent to each other before we refine and soften the overall blend.
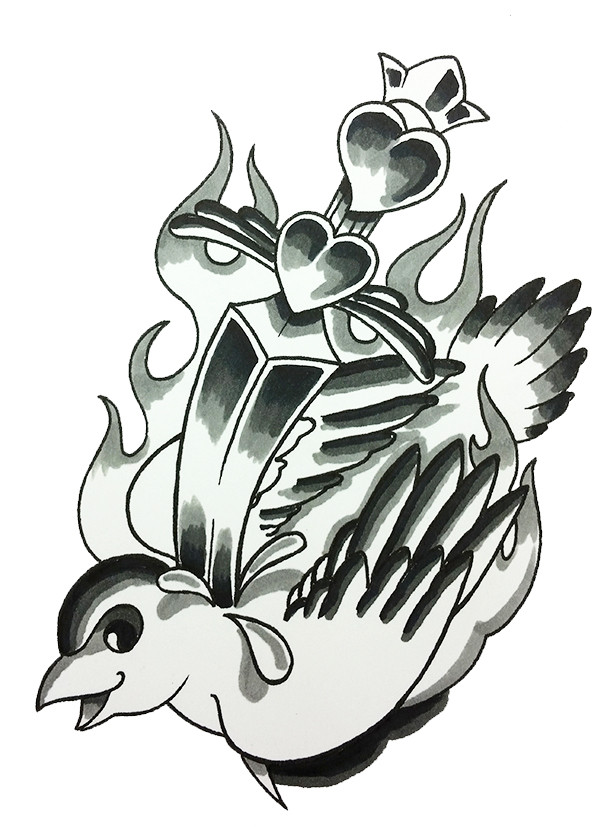
Step 4: Lightest Grays and Final Blending (T2, T0, 0CB)
 Applying lightest grays and colorless blender for final smooth blend
To complete the value gradation and achieve a smooth, finished look, we introduce our lightest grays, T2 and T0. Apply T2 to further soften the transition from T4, and then use T0 to blend all the values together seamlessly. The 0CB Colorless Blender can be used sparingly to further refine edges and push the blend if needed, but with these closely valued grays, it should require minimal use.
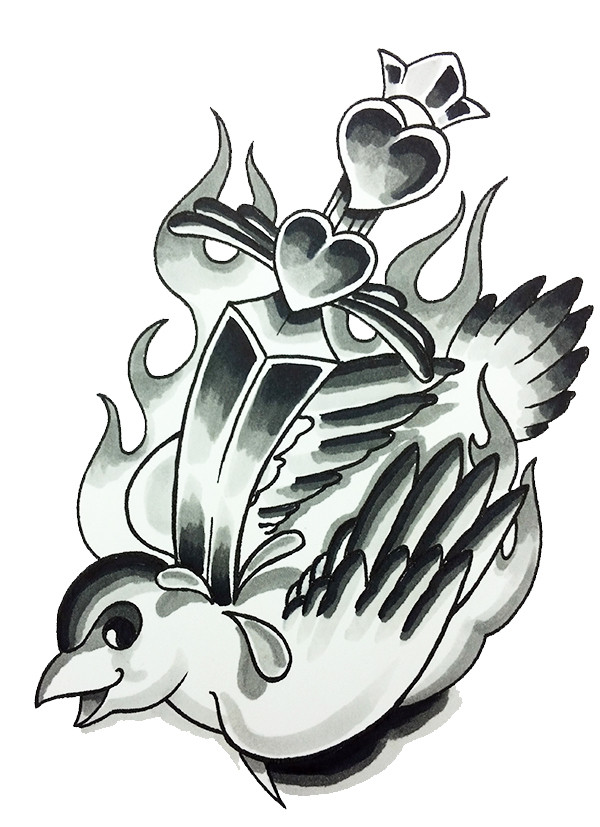
Here is the final blended grayscale drawing, ready for potential color overlays if desired:
 Finished grayscale tattoo flash art with smooth blending
The values are intentionally kept slightly pronounced in this example to ensure they remain visible beneath any subsequent transparent color layers, a technique often used in traditional tattoo art to create depth and vibrancy.
For those interested in adding color to grayscale underpaintings, exploring the Grisaille technique can be highly beneficial. What the Hell is Grisaille? offers a deeper dive into this method.
The paper used for this demonstration is 100 lb. smooth Bristol board, a preferred surface for Copic markers due to its smoothness and bleed-resistance. Utilizing practice templates, like the one partially visible in the final image, is an excellent strategy for experimenting with color schemes and techniques before committing to a final piece. These templates become valuable records of successful (and unsuccessful) approaches, aiding in future projects.
Final Thoughts on Mastering Blending
Achieving exceptional blends is a combination of mindful technique and consistent practice. The adage “practice makes perfect” holds true, especially when learning new artistic skills. However, it’s crucial to separate practice from performance. Avoid experimenting on important drawings. Instead, dedicate time to practice and refine your blending techniques separately. This ensures that when you work on a final piece of black traditional tattoo flash, you can confidently apply your skills and create impactful, smoothly shaded artwork.