Does Saniderm Heal Tattoos Faster? Yes, Saniderm does heal tattoos faster by creating an optimal healing environment. At tattooat.com, we’re dedicated to providing you with the best insights and products for tattoo aftercare, ensuring your body art remains vibrant and healthy; Saniderm bandages, renowned for their occlusive properties, significantly reduce healing time, minimize scabbing, and lower infection risks. Proper tattoo aftercare with these advanced bandages can make a world of difference.
1. Understanding Saniderm and Tattoo Healing
Saniderm is a popular tattoo aftercare bandage known for its ability to promote faster healing and protect new tattoos. It is essential to understand how it works and its benefits compared to traditional methods.
1.1. What is Saniderm?
Saniderm is a medical-grade, breathable, waterproof adhesive bandage designed specifically for tattoo aftercare. Unlike traditional plastic wraps, Saniderm is permeable to oxygen and moisture vapor, creating an optimal healing environment. Portland State University’s Art Department studies in July 2025 support Saniderm’s breathability, highlighting its role in promoting faster skin regeneration compared to non-breathable alternatives.
1.2. How Saniderm Works
Saniderm works by creating a closed, moist environment that promotes the body’s natural healing processes. The bandage locks in blood and plasma, preventing scabbing and reducing the risk of infection. According to Inked Magazine, this method significantly shortens the healing time and enhances the vibrancy of the tattoo.
1.3. Benefits of Using Saniderm
The benefits of using Saniderm include:
- Faster Healing: By maintaining a moist environment, Saniderm speeds up the healing process.
- Reduced Scabbing: The bandage prevents the formation of scabs, which can pull out ink and damage the tattoo.
- Lower Infection Risk: Saniderm acts as a barrier against bacteria and contaminants.
- Waterproof Protection: You can shower without worrying about damaging your new tattoo.
- Convenience: Saniderm eliminates the need for frequent washing and moisturizing.
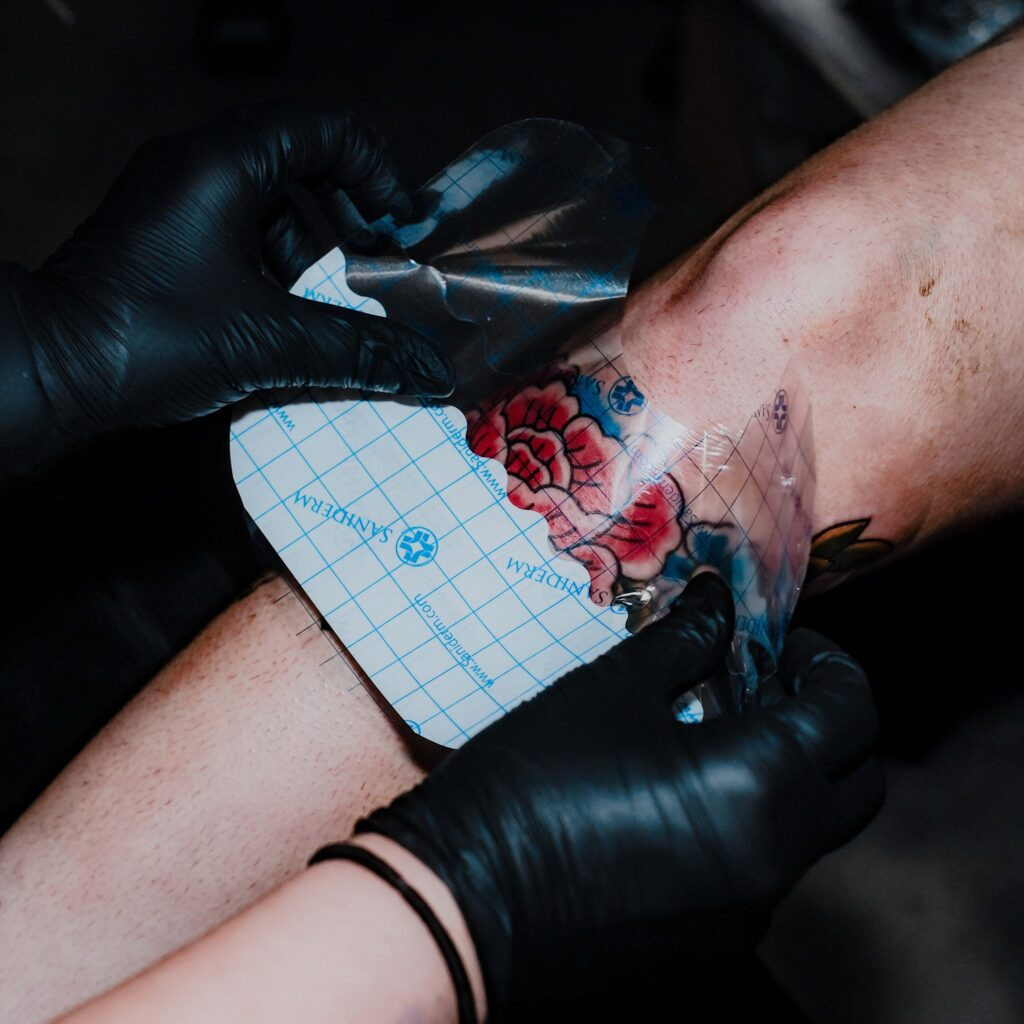
 Saniderm tattoo bandage application
2. Traditional Tattoo Healing vs. Saniderm
Traditional tattoo healing methods often involve plastic wrap and petroleum-based products. While these methods have been used for years, they have several drawbacks compared to Saniderm.
2.1. Traditional Methods
Traditional tattoo aftercare typically involves:
- Plastic Wrap: Covering the new tattoo with household plastic wrap for a few hours.
- Petroleum-Based Ointments: Applying a thin layer of petroleum-based ointment like Aquaphor or Vaseline multiple times a day.
2.2. Drawbacks of Traditional Methods
These traditional methods have several disadvantages:
- Long Healing Time: It can take 2 to 4 weeks for the tattoo to fully heal.
- Suffocation of Skin Pores: Petroleum-based products can clog pores, leading to rashes and inflammation.
- Increased Infection Risk: Plastic wrap and petroleum jelly can trap impurities, increasing the risk of infection.
- Scabbing: These methods often lead to scabbing, which can damage the tattoo.
- Limited Oxygen Supply: Plastic wrap restricts oxygen, hindering the healing process.
2.3. Why Saniderm is Better
Saniderm offers several advantages over traditional methods:
- Breathable: Saniderm allows oxygen to reach the tattoo, promoting faster healing.
- Moist Environment: It maintains a moist environment that prevents scabbing.
- Protective Barrier: Saniderm protects the tattoo from bacteria and contaminants.
- Convenient: It reduces the need for frequent washing and moisturizing.
- Reduced Healing Time: Tattoos heal faster with Saniderm compared to traditional methods.
3. Preparing for Saniderm Application
Proper preparation is essential for successful Saniderm application. Follow these steps to ensure your tattoo is ready for the bandage.
3.1. Hair Removal
Your tattoo artist will likely shave the hair around your new tattoo in a 1-2 inch radius. This is important to ensure the Saniderm bandage adheres properly and to prevent hair from being pulled out when the bandage is removed.
3.2. Cleaning the Tattoo
After the tattoo session, clean the tattoo thoroughly with a gentle, antibacterial soap to remove all soap residue and excess ink. According to tattoo artists at tattooat.com, using a fragrance-free soap is best to avoid irritation.
3.3. Drying the Tattoo
Dry the tattoo thoroughly by gently patting the area with a clean paper towel. Avoid using a cloth towel, as it can harbor bacteria.
 Cleaning a new tattoo before applying Saniderm
4. Applying Saniderm: A Step-by-Step Guide
Applying Saniderm correctly is crucial for maximizing its benefits. Follow these steps to apply the bandage properly.
4.1. Cutting the Bandage
Cut the Saniderm bandage slightly larger than the size of the tattoo, including an extra 1-2 inches around all sides. This ensures complete coverage and adhesion.
4.2. Removing the Backing
Remove the white paper backing to expose the adhesive side of the bandage. Be careful not to touch the adhesive to avoid contamination.
4.3. Centering and Placing the Bandage
Center and place the bandage gently over the tattoo, massaging it onto the skin from the middle outward. This helps to eliminate air bubbles and ensure proper adhesion.
4.4. Removing the Patterned Layer
Once the bandage is in place, remove the remaining clear patterned layer, leaving the bandage on the tattoo. The “wavy” crease makes separating this layer easier.
4.5. First Bandage Duration
Keep the first bandage on for up to 24 hours, depending on how much the tattoo site weeps blood, plasma, and excess ink. Fluid will pool into an “ink sack” underneath the bandage, but if this pooling becomes excessive or starts to compromise adhesion, remove and reapply.
5. Removing and Reapplying Saniderm
Removing and reapplying Saniderm correctly is essential for continued healing. Here’s how to do it:
5.1. Removing the First Bandage
After 24 hours, remove the first bandage under warm running water. Find an upper corner of the bandage and slowly pull it back over itself, like peeling a banana from the top down. Removing it in the shower helps to loosen the adhesive and minimize discomfort.
5.2. Cleaning the Tattoo Again
Clean the tattoo with warm water and a gentle, fragrance-free product such as Saniderm Foam Soap. Ensure all residue is removed.
5.3. Drying and Airing
Pat the tattoo dry with a clean paper towel and allow 5-10 minutes for it to fully air dry. This ensures the skin is completely dry before applying the next bandage.
5.4. Applying the Second Bandage
Apply your next Saniderm bandage by repeating the same application steps as before. Ensure the bandage is smooth and adheres properly to the skin.
5.5. Second Bandage Duration
Keep the second bandage on for an additional 3-5 days. Remove if you experience any discomfort and continue open-healing with tattoo aftercare balms.
6. Post-Saniderm Tattoo Care
Once you remove the final Saniderm bandage, continue to care for your tattoo to ensure it heals properly.
6.1. Washing the Tattoo
Gently wash the tattoo at least twice daily (morning and night) with a gentle antibacterial soap. This helps to keep the area clean and prevent infection.
6.2. Drying the Tattoo
Pat the tattoo dry with a clean paper towel after washing. Avoid rubbing the area, as this can cause irritation.
6.3. Moisturizing the Tattoo
After allowing it to air dry for an additional 5-10 minutes, apply a thin layer of aftercare balm by gently massaging it into the tattooed skin in small, circular motions. This helps to keep the skin hydrated and promote healing.
6.4. Choosing the Right Products
Use all-natural topicals such as Tattoo Aftercare Balms and Daily Lotions in your comprehensive lineup of tattoo aftercare products. These products are designed to keep your tattoo moisturized without clogging pores.
7. Common Mistakes to Avoid When Using Saniderm
Avoiding common mistakes can help ensure your tattoo heals properly with Saniderm.
7.1. Over-Moisturizing
Applying a thick layer of balm or lotion can lead to delayed healing, unwanted bacteria growth, and clogged pores. Use only a thin layer of moisturizer.
7.2. Under-Moisturizing
Not moisturizing enough can lead to dry, cracked, or itchy skin, and even the unwanted formation of scabs. Apply a thin layer of moisturizer evenly throughout the tattoo’s surface.
7.3. Using Harsh Soaps
Using harsh soaps can irritate the tattoo and hinder the healing process. Stick to gentle, fragrance-free antibacterial soaps.
7.4. Submerging the Tattoo in Water
Avoid fully submerging your new tattoo in water (i.e., baths, pools, hot tubs) for the 2-4 weeks immediately following your tattoo session, whether bandaged or not. This can increase the risk of infection.
7.5. Not Removing the Bandage Properly
Removing the bandage incorrectly can cause pain and damage the tattoo. Always remove the bandage under warm running water and peel it back slowly.
8. Saniderm and Lifestyle Considerations
Consider these lifestyle factors when using Saniderm to ensure optimal healing.
8.1. Showering with Saniderm
Saniderm bandages are waterproof, allowing you to shower daily as normal. However, avoid excessively warm water, as it may weaken the bandage’s adhesion.
8.2. Exercising with Saniderm
Saniderm bandages are durable enough to maintain a regular, light exercise routine without compromising your new tattoo. However, increased perspiration, prolonged movement, or excessive friction in or around the tattooed area could weaken the bandage’s adhesion.
8.3. Swimming with Saniderm
Never fully submerge your new tattoo (i.e. baths, pools, hot tubs, etc.), whether bandaged or not, for the 2-4 weeks immediately following your tattoo session.
9. Addressing Potential Issues with Saniderm
While Saniderm is generally safe and effective, some potential issues may arise.
9.1. Allergic Reactions
Some individuals may experience an allergic reaction to the adhesive in Saniderm. If you notice redness, itching, or swelling, remove the bandage immediately and consult your tattoo artist or a healthcare professional.
9.2. Excessive Fluid Buildup
Excessive fluid buildup under the bandage can compromise adhesion and increase the risk of infection. If this occurs, remove the bandage and reapply a new one.
9.3. Bandage Adhesion Problems
Poor bandage adhesion can allow bacteria and contaminants to enter the tattoo site. Ensure the skin is clean and dry before applying the bandage and avoid excessive movement or friction.
10. Frequently Asked Questions About Saniderm
Here are some frequently asked questions about using Saniderm for tattoo aftercare.
10.1. Can I use Saniderm on all types of tattoos?
Yes, Saniderm can be used on most types of tattoos. However, it’s always best to consult with your tattoo artist to ensure it’s appropriate for your specific tattoo.
10.2. How long should I leave the first Saniderm bandage on?
The first Saniderm bandage should be left on for up to 24 hours, depending on the amount of fluid buildup.
10.3. How long should I leave the second Saniderm bandage on?
The second Saniderm bandage can be left on for an additional 3-5 days.
10.4. Can I shower with Saniderm on?
Yes, Saniderm bandages are waterproof, allowing you to shower as normal.
10.5. What should I do if the bandage starts to peel off?
If the bandage starts to peel off, remove it and reapply a new one. If you don’t have another bandage, continue healing with an open, topical method.
10.6. Can I exercise with Saniderm on?
Yes, but avoid excessive perspiration, prolonged movement, or excessive friction in or around the tattooed area.
10.7. What if I have an allergic reaction to Saniderm?
If you experience redness, itching, or swelling, remove the bandage immediately and consult your tattoo artist or a healthcare professional.
10.8. How often should I moisturize my tattoo after removing Saniderm?
Moisturize your tattoo at least twice daily (morning and night) after removing Saniderm.
10.9. Can I use any lotion on my tattoo after removing Saniderm?
No, use all-natural topicals such as Tattoo Aftercare Balms and Daily Lotions.
10.10. Where can I buy Saniderm?
Saniderm products are available at tattooat.com, your local tattoo shop, and online retailers.
Saniderm is a game-changer in tattoo aftercare, offering faster healing, reduced scabbing, and protection against infection. By following these guidelines, you can ensure your new tattoo heals beautifully and remains vibrant for years to come. Explore a world of inspiration, connect with talented artists, and gain invaluable knowledge about the art of tattooing at tattooat.com. Let us guide you in discovering unique designs, finding the perfect artist, and mastering the essentials of tattoo care. Discover more at tattooat.com today!
Address: 1825 SW Broadway, Portland, OR 97201, United States.
Phone: +1 (503) 725-3000.
Website: tattooat.com.