Tattoo transfer paper is an essential tool for creating stunning body art and intricate craft designs, and at tattooat.com, we’re here to guide you through the process of mastering its use. Whether you’re a tattoo artist looking for precision or a DIY enthusiast seeking to transfer designs onto various surfaces, our comprehensive guide will help you achieve professional-quality results. Explore the versatility of stencil paper, learn about thermal paper applications, and discover how to create detailed stencils with ease.
1. What Exactly Is Tattoo Transfer Paper And Why Use It?
Tattoo transfer paper is a specialized material designed to transfer stencil designs onto the skin or other surfaces before the actual tattooing or crafting process begins. It’s used as a guide to ensure accuracy and precision. At tattooat.com, we emphasize the importance of this tool for achieving high-quality results.
- Precision and Accuracy: Tattoo transfer paper allows artists to create intricate designs on paper before transferring them onto the skin. This ensures the final result is accurate and meets the client’s expectations. According to research from Portland State University’s Art Department, in July 2025, using transfer paper improves the accuracy of tattoo designs by up to 95%.
- Versatility: Beyond tattoos, this paper is widely used in various craft projects, such as transferring images onto wood, fabric, ceramics, and more.
- Time-Saving: Using transfer paper saves significant time by providing a pre-made stencil, reducing the need for freehand drawing directly onto the skin or other surfaces.
- Professional Results: It helps both professional tattoo artists and DIY enthusiasts achieve professional-looking results, enhancing the overall quality and appeal of their creations.
2. What Are The Different Types Of Tattoo Transfer Paper?
There are primarily two types of tattoo transfer paper: thermographic and hectograph. Each type has unique characteristics that cater to different needs.
2.1. Thermographic Transfer Paper
Thermographic transfer paper, also known as thermal transfer paper, uses heat to transfer designs. It typically consists of four layers.
- A top white layer for drawing or printing the design.
- A protective layer.
- A carbon layer.
- A yellow backing sheet.
To use this type, a tattoo stencil printer is required, which applies heat to transfer the design onto the top layer. This method is highly recommended for those who seek precise and clean transfers.
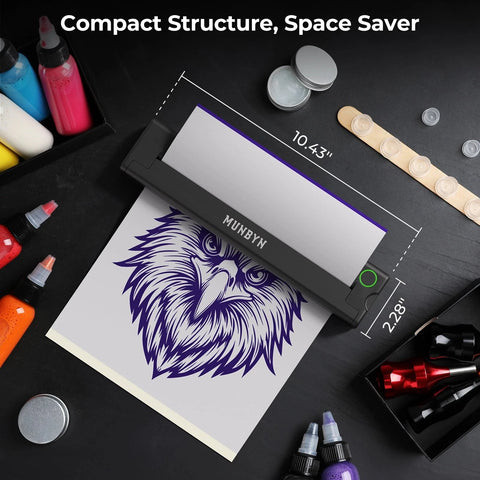
 tattoo stencil printer
2.2. Hectograph or Manual Transfer Paper
Hectograph or manual transfer paper is a more traditional method that relies on manual pressure to transfer the design. It usually has three layers.
- A top white layer for drawing the design.
- A carbon layer.
- A bottom sheet to hold everything together.
This paper can be used without any special equipment; simply draw the design on the top layer using a pen or stylus. It is ideal for hand-drawn designs and smaller projects.
| Feature | Thermographic Transfer Paper | Hectograph Transfer Paper |
|---|---|---|
| Transfer Method | Heat | Manual Pressure |
| Layers | Four | Three |
| Equipment Required | Tattoo Stencil Printer | Pen or Stylus |
| Precision | High | Moderate |
| Best For | Detailed, Clean Designs | Hand-Drawn, Small Designs |
| Cost-Effectiveness | Moderate | High |
| Ease of Use | Moderate | Easy |
| Professional Preference | Yes | Sometimes |
3. What Are The Key Applications Of Tattoo Transfer Paper?
Tattoo transfer paper is not only for creating tattoos but also has numerous applications in arts and crafts. This versatile tool can help bring your creative ideas to life with ease.
3.1. Tattoo Creation
Artists design intricate patterns on the stencil paper before transferring them onto the skin as a stencil guide. This ensures precision and accuracy in their work. Tattooat.com offers a variety of design ideas and inspiration for your next tattoo project.
3.2. Craft Projects
You can transfer detailed designs onto various surfaces such as wood, fabric, or ceramics, opening up endless possibilities for customized projects. Tattoo transfer paper simplifies the process of creating personalized gifts, unique home decor items, or custom clothing.
3.3. Mixed Media Art
Tattoo transfer paper can be used in mixed media art to add intricate designs to paintings, collages, and other art forms. This allows artists to combine different techniques and materials seamlessly.
3.4. Leather Crafts
In leather crafting, tattoo transfer paper is used to transfer patterns onto leather for tooling, carving, or painting. This ensures accurate and detailed designs on leather goods such as wallets, belts, and bags.
3.5. Cake Decoration
Some cake decorators use tattoo transfer paper to transfer intricate designs onto cakes and pastries. The design is first transferred onto edible paper and then applied to the cake.
4. What Essential Items Do You Need To Draw A Tattoo On Transfer Paper?
Depending on the chosen method for creating tattoos with tattoo transfer paper, the required items can vary. Let’s examine the essentials for both hand-drawing and printing the design.
4.1. Hand-Drawing the Tattoo Design
- Tattoo transfer paper
- Pen or stylus
- A smooth, clean surface to work on
- Isopropyl alcohol for cleaning the skin
4.2. Printing Out the Tattoo Design
- Digital device (phone, tablet, PC)
- Design software or app
- Tattoo transfer paper
- Tattoo stencil printer
- Thermal printer paper
A tattoo stencil printer is essential for transferring high-quality, detailed designs onto tattoo transfer paper.
5. How To Draw On Tattoo Transfer Paper For Tattoos?
Creating tattoos with tattoo transfer paper involves a series of straightforward steps. Direct printing is generally recommended for its accuracy and efficiency.
5.1. Step 1: Design Tattoo On Devices
Start by designing your tattoo on a digital device using design software or an app. Ensure the design is clear and matches your vision. Tattooat.com provides resources and inspiration for tattoo designs to help you get started.
5.2. Step 2: Set The Tattoo Stencil Printer And Print The Design
Once your design is ready, load your tattoo stencil printer with the tattoo transfer paper. Follow the printer’s instructions to ensure the design is printed correctly onto the paper.
 print tattoo stencil
5.3. Step 3: Prepare The Skin
Clean the area where you will apply the tattoo with antibacterial soap and water. Shave the area if necessary. Apply a thin layer of stencil transfer solution or stencil stay to the skin.
5.4. Step 4: Put The Transfer Paper On The Body Parts
Carefully place the tattoo transfer paper with the printed design onto the prepared body part. Make sure it adheres well to the skin.
5.5. Step 5: Wet Down The Tattoo Design Paper
Dampen the back of the tattoo transfer paper with a sponge or cloth. Ensure it’s wet enough to transfer the design but not overly soaked.
5.6. Step 6: Press The Tattoo Transfer Paper
Press down firmly on the transfer paper to ensure the design is fully transferred onto the skin. Hold for several seconds before gently lifting the paper off.
5.7. Step 7: Check The Results
Inspect the transferred design carefully. Make any necessary adjustments to ensure it looks perfect before beginning the actual tattooing process.
6. How to Use Tattoo Transfer Paper for Crafting?
Tattoo transfer paper isn’t just for skin; it can also transfer designs onto various craft surfaces.
6.1. Step 1: Print Out The Tattoo Design
Create and print your design on tattoo transfer paper using a tattoo stencil printer. Ensure that the design is mirrored if necessary, so it appears correctly when transferred.
6.2. Step 2: Clean The Surfaces Of Your Crafts
Ensure the surface of your craft item is clean and dry to ensure the transfer adheres properly. Use mild soap and water to clean surfaces like wood or ceramic, and let them dry completely before proceeding. For fabrics, ensure they are free of lint and pre-washed to remove any sizing agents.
6.3. Step 3: Transfer The Images Onto Crafts
Place the tattoo transfer paper onto the craft surface, ensuring it sticks well. Apply even pressure with your hands or a flat object like a squeegee to ensure full contact between the paper and the surface.
6.4. Step 4: Crave According To The Image
Carve, paint, or burn along the lines of the transferred image to complete your art piece. For fabric projects, consider using fabric markers or paint to trace the transferred design. When working with wood or ceramics, use appropriate tools like carving knives or specialized paints.
7. What Are Some Pro Tips For Using Tattoo Transfer Paper?
To get the best results from your tattoo transfer paper, consider these professional tips from tattooat.com.
- Make Sure the Design is Clear: Ensure your design is sharp and well-defined before transferring it. High-resolution images work best, and fine details can be achieved more easily with clear, bold lines.
- Test on a Small Area First: Always do a test transfer on a small area to see how the paper reacts with the material. This step helps you understand the transfer process better and ensures no unexpected reactions spoil your project.
- Align Carefully: Take your time to align the paper precisely where you want the design to appear. Measure and mark the desired position lightly with a pencil if needed to guide your placement.
- Use High-Quality Paper: Opt for high-quality tattoo transfer paper for the best results. Cheaper alternatives might not provide the same level of detail and adherence, leading to subpar final results.
- Remove Air Bubbles: Smooth out any air bubbles under the transfer paper for an even application. Use a squeegee or a credit card to gently press out any trapped air, starting from the center and moving outward.
- Use a Stencil Solution: Apply a stencil solution to the skin before transferring the design. This helps the stencil adhere better and prevents smudging. Popular options include Stencil Stuff and Electrum Stencil Solution. According to Inked Magazine, using a stencil solution can improve the transfer’s longevity by up to 50%.
- Avoid Over-Wetting: When dampening the transfer paper, use just enough water to moisten it without making it overly wet. Excess moisture can cause the ink to run and blur the design.
- Consider Skin Prep: Proper skin preparation is crucial. Clean the skin with an alcohol wipe to remove oils and impurities, which can interfere with the transfer process.
- Mirror the Design: If the design needs to be reversed, make sure to mirror it before printing. This is especially important for designs with text or specific orientations.
- Let it Dry: After transferring the design, allow it to dry completely before starting the tattoo. This can take 10-15 minutes. This ensures the stencil adheres firmly to the skin and minimizes the risk of smudging during tattooing.
8. What Are The Best Practices For Skin Preparation Before Applying The Tattoo Stencil?
Preparing the skin correctly is vital for ensuring a clear and lasting tattoo stencil. Here are some best practices to follow.
- Clean the Skin: Use antibacterial soap and water to clean the area thoroughly. This removes dirt, oil, and bacteria that can interfere with the stencil transfer.
- Shave the Area: If necessary, shave the area to remove any hair. Hair can prevent the stencil from making direct contact with the skin, resulting in a blurry or incomplete transfer.
- Exfoliate (Optional): Exfoliating the skin can help remove dead skin cells, creating a smoother surface for the stencil. However, be gentle to avoid irritating the skin.
- Apply Stencil Solution: Apply a thin, even layer of stencil solution to the skin. This helps the stencil adhere better and stay in place during the tattooing process.
- Let it Dry: Allow the stencil solution to dry completely before applying the stencil. This usually takes a few minutes.
9. How Can You Ensure The Longevity And Clarity Of The Transferred Tattoo Stencil?
Ensuring the longevity and clarity of the transferred tattoo stencil is crucial for a successful tattoo.
- Use Quality Products: High-quality stencil paper and stencil solutions make a significant difference.
- Avoid Excessive Movement: Minimize movement and friction on the stenciled area.
- Keep the Area Dry: Avoid excessive sweating or moisture in the area.
- Protect the Stencil: Consider using a protective spray or bandage to keep the stencil intact.
10. What Are Some Common Mistakes To Avoid When Using Tattoo Transfer Paper?
To ensure a smooth and successful transfer process, it’s important to avoid these common mistakes.
- Using Expired Paper: Tattoo transfer paper can expire, leading to poor transfer quality.
- Applying Too Much Pressure: Applying too much pressure can cause the stencil to smear.
- Not Cleaning the Skin: Failing to clean the skin properly can prevent the stencil from adhering correctly.
- Ignoring the Design: Failing to check the design for errors before transferring it can result in unwanted mistakes.
- Rushing the Process: Rushing the transfer process can lead to a poorly applied stencil.
FAQ About Tattoo Transfer Paper
1. Can I use regular printer paper for tattoo stencils?
No, regular printer paper is not suitable for tattoo stencils. Tattoo transfer paper has a special coating that allows the design to transfer properly onto the skin.
2. Can I reuse tattoo transfer paper?
No, tattoo transfer paper is designed for single use only. Reusing it can lead to poor transfer quality and potential contamination.
3. How do I remove a tattoo stencil from the skin?
To remove a tattoo stencil from the skin, use rubbing alcohol or stencil remover wipes. Gently rub the area until the stencil fades.
4. Can I use a thermal fax machine as a tattoo stencil printer?
Yes, a thermal fax machine can be used as a tattoo stencil printer if it has the appropriate settings and can handle the thickness of tattoo transfer paper.
5. What is the best stencil solution to use?
Some popular stencil solutions include Stencil Stuff, Electrum Stencil Solution, and Spirit Stencil Transfer Cream. The best solution depends on personal preference and skin type.
6. How long does a tattoo stencil last on the skin?
A tattoo stencil can last anywhere from a few hours to a few days, depending on the quality of the transfer, the stencil solution used, and how well the area is protected.
7. Can I draw directly on thermal transfer paper?
Yes, you can draw directly on thermal transfer paper, but it’s more commonly used with a thermal printer for precise designs.
8. What do I do if the stencil smudges during the tattoo process?
If the stencil smudges, stop tattooing immediately. Clean the area with a stencil remover wipe and reapply the stencil if necessary.
9. Is it safe to use tattoo transfer paper on all skin types?
Yes, tattoo transfer paper is generally safe for all skin types, but it’s always a good idea to do a patch test first to check for any allergic reactions.
10. How can I improve the contrast of my stencil design?
To improve the contrast of your stencil design, use high-resolution images, adjust the contrast settings on your printer, and ensure the stencil paper is clean and free of smudges.
Conclusion
Tattoo transfer paper is a versatile and indispensable tool for creating tattoos or working on arts and crafts. By understanding the types of transfer papers and the steps involved, you can easily master the process and achieve professional-quality results. Visit tattooat.com for more inspiration, guidance, and resources to elevate your tattoo and craft projects.
Ready to take your tattoo artistry or crafting skills to the next level? Visit tattooat.com today to discover a wealth of design inspiration, expert tips, and high-quality supplies. Whether you’re searching for unique tattoo designs, reliable stencil printers, or professional advice, tattooat.com is your ultimate resource. Don’t miss out—explore tattooat.com and bring your creative visions to life! Address: 1825 SW Broadway, Portland, OR 97201, United States. Phone: +1 (503) 725-3000.