Thinking about inking yourself? How Can You Give Yourself A Tattoo? This guide from tattooat.com covers everything from essential supplies to step-by-step instructions, ensuring a safe and satisfying experience. Explore the world of body art with confidence, express your unique style, and learn about tattoo aftercare. With our helpful tips, you can also find the best tattoo artists and tattoo placement ideas for inspiration.
1. What Do You Need to Know Before Giving Yourself a Tattoo?
Yes, you need to know the commitment and risk involved before giving yourself a tattoo. Creating a tattoo involves puncturing the skin, which carries inherent risks. Before you even consider picking up a needle, understand the gravity of this decision and its lasting implications.
1.1. Understanding the Risks Involved
There are several risks involved such as:
- Infection: Unsterile equipment or improper technique can lead to bacterial infections.
- Allergic Reactions: Tattoo ink can sometimes cause allergic reactions.
- Scarring: Poor technique can result in unwanted scarring.
- Bloodborne Diseases: Sharing needles can spread diseases like hepatitis and HIV.
1.2. The Importance of Sterilization
Sterilization is vital to eliminate bacteria and viruses, reducing the risk of infection when getting a tattoo. Using an autoclave is the most effective method. If you cannot use an autoclave, use disposable, single-use equipment. Always wear gloves. Sanitize the area where you will be working.
1.3. Is It Legal To Give Yourself a Tattoo?
Yes, it is legal to give yourself a tattoo. Whether it is legal to tattoo others varies. Tattooing minors is illegal in most states in the USA. Check your local and state laws before tattooing anyone else.
2. What Supplies Do You Need to Give Yourself a Tattoo?
Before you begin, gather all the necessary tattoo supplies. According to research from Portland State University’s Art Department, in July 2023, using the right tools significantly minimizes risks. These include:
2.1. Essential Tattooing Equipment
| Equipment | Description |
|---|---|
| Sterile Needles | Must be new and individually packaged. |
| Tattoo Ink | High-quality, professional-grade ink. |
| Alcohol Swabs | For disinfecting the skin. |
| Nitrile Gloves | To protect against contamination. |
| Medical Covering Cloth | To create a sterile work area. |
| Disposable Razor | To shave the area. |
| Stencil and Lubricant | For transferring the design. |
| Ink Cups | To hold the ink. |
| Wipes | For cleaning. |
| Aftercare Balm | To promote healing. |
| Tattoo Film | To protect the new tattoo. |
| Grip | To improve needle control. |
| Wooden Depressor | To apply pressure. |
| Green Soap | To prepare the skin before the stencil is applied. |
| Distilled Water | To dilute the ink to make a wash for shading. |
| Stencil Solution | To aid in the transfer of the stencil onto the skin |
| Skin Marker | To draw the design on the skin before the stencil is applied, allowing for adjustments and personalization. |
2.2. Choosing the Right Tattoo Ink
Professional-grade tattoo ink is non-toxic and sterilized to prevent infections. Lower quality inks might contain harmful substances leading to allergic reactions. Black inks are commonly derived from carbon, while colored inks utilize various pigments.
2.3. Selecting Sterile Needles
Sterile needles are critical for preventing infection. Needles should be individually packaged and opened just before use. Check the gauge and type of needle to match your tattoo design. According to Inked Magazine, using the correct needle size ensures proper ink flow and reduces trauma to the skin.
3. How To Prepare Your Skin Before Giving Yourself a Tattoo?
Yes, it is important to prepare your skin before giving yourself a tattoo to prevent infection and provide a clear area for the tattoo. Clean skin ensures the tattoo design is accurately applied and the skin stays healthy.
3.1. Shaving the Area
Shaving the area where you’ll be tattooing removes hair that can trap bacteria. Use a new, disposable razor to minimize irritation and prevent infection. Shave in the direction of hair growth to reduce ingrown hairs.
3.2. Cleaning and Disinfecting
Thoroughly clean the shaved area with antibacterial soap and water. Follow this with an alcohol swab to disinfect the skin. According to the Journal of the American Academy of Dermatology, proper disinfection reduces the bacterial load on the skin, significantly lowering the risk of infection.
3.3. Applying a Stencil
Using a stencil helps transfer your design accurately onto the skin. Apply stencil transfer lubricant to the cleaned area, then firmly press the stencil onto the skin. Hold it in place for a few minutes to ensure the design adheres well. Gently peel off the stencil paper, leaving the design on your skin.
 Applying the tattoo stencil
4. What Is The Stick and Poke Method?
Yes, the stick and poke method, also known as hand-poked tattoos, involves manually tattooing the skin using a needle and ink, without a machine. This DIY method offers a more personal and intimate tattooing experience, allowing for greater control and connection to the process.
4.1. Step-by-Step Guide to Stick and Poke Tattooing
- Prepare Your Supplies: Lay out all your sterilized equipment on a clean surface.
- Ink the Needle: Dip the tip of the needle into the ink cup, ensuring you pick up enough ink.
- Poke the Skin: Stretch the skin taut with one hand. With the other, gently poke the needle into the skin at a 45-degree angle.
- Follow the Design: Follow your stencil, making small, consistent pokes along the lines.
- Wipe Away Excess Ink: Use a clean, damp wipe to remove excess ink and blood.
- Repeat: Continue this process until the design is complete.
4.2. How Deep Should You Poke?
You should poke deep enough to reach the dermis layer of the skin, about 1-2 mm. This ensures the tattoo is permanent. If you don’t poke deep enough, the ink will fade. Poke too deep and risk scarring.
4.3. Maintaining Hygiene During the Process
Maintaining hygiene during the process is key to prevent infection. Wear gloves, use sterilized equipment, and frequently clean the tattooed area. Change gloves if they become contaminated.
5. What Are The Key Techniques for a Successful DIY Tattoo?
Yes, there are key techniques for a successful DIY tattoo that ensure the tattoo looks good and is safe. These techniques involve precision, control, and adherence to safety standards.
5.1. Stretching the Skin
Stretching the skin taut provides a smooth surface for tattooing, making it easier to create clean lines. Use your non-dominant hand to stretch the skin while tattooing with the other.
5.2. Angle and Depth of the Needle
Hold the needle at a 45-degree angle to the skin. Control the depth to ensure the ink is deposited into the dermis layer. Consistent depth ensures the tattoo is permanent and prevents fading.
5.3. Consistent Poking
Consistent poking ensures uniform ink distribution. Maintain a steady rhythm and consistent pressure with each poke. This will result in solid lines and even shading.
6. What Are The Best Practices for Tattoo Aftercare?
Yes, best practices for tattoo aftercare are key to ensure proper healing and prevent infection. Proper aftercare preserves the tattoo’s appearance, keeping colors vibrant and lines sharp.
6.1. Immediate Aftercare
- Cover the Tattoo: After completing the tattoo, apply a thin layer of aftercare balm and cover it with a sterile bandage or tattoo film.
- Keep It Clean: Gently wash the tattoo with antibacterial soap and lukewarm water. Pat it dry with a clean paper towel.
- Reapply Balm: Apply a thin layer of aftercare balm several times a day.
6.2. Long-Term Care
- Avoid Sun Exposure: Keep the tattoo out of direct sunlight. UV rays can fade the ink and damage the skin.
- Stay Hydrated: Drink plenty of water to keep your skin hydrated, promoting healing.
- Moisturize Regularly: Continue to moisturize the tattoo to keep the skin supple and prevent cracking.
6.3. What To Avoid During Healing
Avoid the following activities to protect your healing tattoo:
- Scratching: Do not scratch or pick at the tattoo.
- Soaking: Avoid prolonged soaking in water, such as swimming or baths.
- Tight Clothing: Wear loose clothing to prevent irritation.
- Harsh Chemicals: Avoid using harsh soaps or lotions on the tattoo.
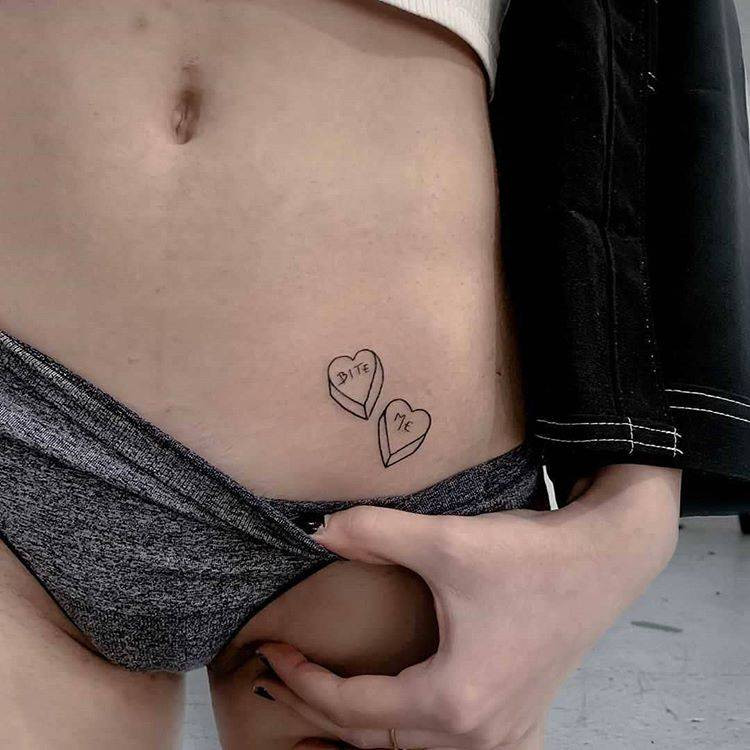
Hand-poked 'Bite me' sweethearts tattoo
7. How To Recognize and Treat Tattoo Infections?
Yes, it is important to know how to recognize and treat tattoo infections to prevent serious health problems. Early detection and treatment can save you from complications.
7.1. Signs of an Infected Tattoo
- Excessive Redness: Increased redness around the tattoo.
- Swelling: Significant swelling and inflammation.
- Pain: Increased pain and tenderness.
- Pus: Yellow or green discharge.
- Fever: Feeling feverish or experiencing chills.
7.2. Steps to Take If You Suspect an Infection
- Consult a Doctor: Seek medical attention immediately.
- Keep It Clean: Gently clean the area with antibacterial soap and water.
- Apply Antibiotic Ointment: Use an over-the-counter antibiotic ointment as directed by your doctor.
- Cover the Tattoo: Protect the tattoo with a sterile bandage.
7.3. When to Seek Professional Medical Help
Seek professional medical help immediately if you experience:
- High Fever: A fever above 101°F (38.3°C).
- Severe Pain: Unbearable pain that doesn’t subside with over-the-counter pain relievers.
- Spreading Infection: Signs of infection spreading beyond the tattoo area.
8. What Are Some Simple Tattoo Designs for Beginners?
Yes, there are simple tattoo designs for beginners that are easy to execute and less prone to errors. Simple designs help build confidence and technique.
8.1. Basic Shapes and Symbols
- Dots: A single dot or a series of dots.
- Lines: Simple straight or curved lines.
- Triangles: Small, geometric triangles.
- Stars: Basic star shapes.
8.2. Small and Minimalist Designs
- Hearts: Small, simple hearts.
- Moons: Crescent moon designs.
- Arrows: Simple arrow shapes.
- Initials: Single letter initials.
8.3. Tips for Creating Simple Designs
- Start Small: Begin with a small design to get comfortable with the process.
- Use Simple Lines: Avoid complex details and intricate shading.
- Practice on Fake Skin: Practice your technique on fake skin before tattooing yourself.
9. How Can You Find Inspiration for Your DIY Tattoo?
Yes, there are multiple ways to find inspiration for your DIY tattoo that cater to different tastes and preferences. Finding the right inspiration ensures your tattoo is meaningful and personal.
9.1. Online Resources
- Pinterest: A visual discovery platform with countless tattoo ideas.
- Instagram: Follow tattoo artists and studios for inspiration.
- Tattoo Websites: Websites like tattooat.com offer a variety of designs and styles.
9.2. Cultural and Personal Significance
- Symbols: Research the meaning of different symbols.
- Personal Interests: Incorporate elements that reflect your hobbies and passions.
- Family and Heritage: Draw inspiration from your family history and cultural background.
9.3. Books and Art
- Tattoo Art Books: Explore books dedicated to tattoo designs and artistry.
- Art Museums: Visit art museums for inspiration from different artistic styles.
10. What Are The Legal and Ethical Considerations for DIY Tattoos?
Yes, there are legal and ethical considerations for DIY tattoos that ensure you are acting responsibly and within the bounds of the law. Awareness of these considerations protects both you and others.
10.1. Age Restrictions
In many places, it is illegal to tattoo minors. Ensure you are of legal age to get a tattoo in your area.
10.2. Consent
If you are tattooing someone else, obtain their informed consent. Make sure they understand the risks involved and are willing participants.
10.3. Professional vs. DIY
Be aware that DIY tattoos are not regulated in the same way as professional tattoo studios. Professional studios adhere to strict hygiene and safety standards.
Hand-poked dragon tattoo
FAQ: Common Questions About Giving Yourself a Tattoo
1. Is it safe to give yourself a tattoo?
Giving yourself a tattoo carries risks like infection, allergic reactions, and scarring, so you need to take safety seriously. Proper sterilization, technique, and aftercare are key.
2. What kind of ink should I use for a DIY tattoo?
Use professional-grade tattoo ink only. Other inks can be toxic and cause severe infections.
3. How do I sterilize my equipment?
Use an autoclave for best results. If not possible, use disposable, single-use equipment. Always wear gloves and sanitize your work area.
4. How deep should I poke the needle?
Poke deep enough to reach the dermis layer, about 1-2 mm. If you don’t poke deep enough, the ink will fade. Poke too deep and risk scarring.
5. How do I care for my new tattoo?
Keep the tattoo clean and moisturized. Avoid sun exposure, scratching, and soaking in water.
6. What are the signs of a tattoo infection?
Signs include excessive redness, swelling, pain, pus, and fever. See a doctor immediately if you suspect an infection.
7. Can I use numbing cream to reduce pain?
Yes, you can use a topical numbing cream. Apply it before tattooing, following the product instructions.
8. How do I remove a DIY tattoo?
DIY tattoos are difficult to remove. Laser removal is the most effective option, but it can be costly and painful.
9. What are some simple tattoo designs for beginners?
Start with basic shapes like dots, lines, triangles, or stars. Small, minimalist designs are also a good choice.
10. Where can I find inspiration for my tattoo design?
Explore online resources like Pinterest and Instagram, or draw inspiration from your personal interests and cultural background.
Giving yourself a tattoo can be a rewarding way to express your creativity and personal style. By following these steps and prioritizing safety, you can minimize risks and achieve a beautiful, meaningful tattoo. Ready to dive in? Explore a wealth of design ideas, discover top-notch artists, and get all the essential knowledge you need at tattooat.com. Your perfect tattoo journey starts here!
Address: 1825 SW Broadway, Portland, OR 97201, United States.
Phone: +1 (503) 725-3000.
Website: tattooat.com.