Are you curious about How To Draw On Transfer Paper Tattoo for stunning tattoo art? Tattoo transfer paper makes replicating intricate designs on skin easier, acting as a stencil for precise artwork. At tattooat.com, we provide resources and guidance to help you master the art of tattoo design, offering innovative solutions for flawless body art. Explore innovative transfer techniques, stencil creation tips, and creative design inspiration to elevate your tattoo artistry with tattooat.com.
1. What is Tattoo Transfer Paper and Why Use It?
Tattoo transfer paper is a specialized material utilized to transfer a stencil of your design onto the skin before tattooing. This paper acts as a blueprint for tattoo artists, ensuring the final result is accurate and aligns with client expectations. It’s also called thermal paper. But what makes this material so crucial in the tattoo process?
- Precision: Transfer paper ensures that intricate details of the design are accurately transferred onto the skin, guiding the artist during the tattooing process.
- Efficiency: It saves time by providing a pre-drawn stencil, allowing artists to focus on the actual tattooing rather than freehand drawing on the skin.
- Client Satisfaction: By allowing clients to visualize the final tattoo placement and design beforehand, it minimizes errors and ensures client satisfaction.
The paper usually comprises several layers:
- A top white layer for drawing the design.
- A thin protective layer (removed before use).
- A bottom layer impregnated with ink or a carbon substance.
According to tattoo artists at Inked Magazine, proper use of transfer paper leads to cleaner, more professional tattoos. At tattooat.com, you will find more in-depth articles on the best techniques for using this essential tool.
2. What Are The Different Types of Tattoo Transfer Paper?
Choosing the right tattoo transfer paper is essential for achieving precise and professional tattoo designs. The two main types available are thermographic and hectographic (manual) transfer papers, each with unique characteristics and applications.
2.1. Thermographic Transfer Paper (Thermal Transfer Paper)
Thermographic transfer paper, also known as thermal transfer paper, uses heat to transfer designs from the paper to the skin. It typically consists of four layers:
- Top White Layer: The layer on which you draw or print the design.
- Second Protective Layer: A layer to protect the design.
- Third Carbon Layer: Contains the carbon for transferring the design.
- Fourth Yellow Backing Sheet: Provides support and structure.
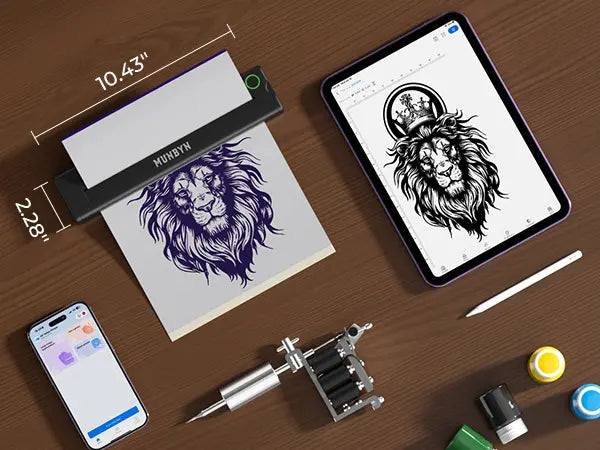
To use this type of paper, you’ll need a tattoo stencil printer. The printer applies heat to the paper, transferring the design onto the top layer.
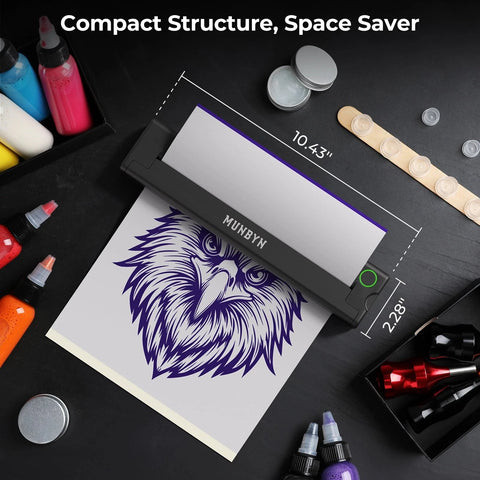 Thermographic Tattoo Transfer Paper
- Pros:
- High precision and clean transfers.
- Ideal for intricate and detailed designs.
- Favored among professional tattoo artists.
- Cons:
- Requires a specialized tattoo stencil printer.
- May be more expensive than manual transfer paper.
2.2. Hectograph or Manual Transfer Paper
Hectograph or manual transfer paper is a traditional method still favored for its simplicity and cost-effectiveness. It generally has three layers:
- Top White Layer: Where the design is drawn.
- Second Carbon Layer: Transfers the design.
- Bottom Sheet: Holds everything together.
You can use this paper without any special equipment. Draw your design on the top layer using a pen or stylus, and the image will transfer onto the carbon layer.
- Pros:
- No special equipment needed.
- Simple and cost-effective.
- Ideal for hand-drawn designs and smaller projects.
- Cons:
- Less precise than thermal transfer paper.
- May not be suitable for highly detailed designs.
- Requires more manual effort.
Here’s a quick comparison table:
| Feature | Thermographic Transfer Paper | Hectograph Transfer Paper |
|---|---|---|
| Transfer Method | Heat | Manual Pressure |
| Layers | Four | Three |
| Equipment Needed | Tattoo Stencil Printer | Pen or Stylus |
| Precision | High | Lower |
| Cost | Higher | Lower |
| Design Complexity | Intricate, Detailed | Simple, Hand-Drawn |
Both types of transfer paper serve the purpose of transferring designs, but the choice depends on your specific needs, budget, and design complexity.
3. What Are The Various Applications Of Tattoo Transfer Paper?
Tattoo transfer paper has various applications beyond just tattoo stencils, especially in arts and crafts. It’s a versatile tool that simplifies bringing creative ideas to life.
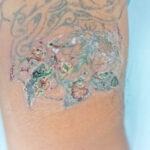
3.1. Tattoo Creation
Artists design intricate patterns on paper before transferring them onto the skin as a stencil guide, ensuring precision. This method is particularly useful for complex designs, where accuracy is key to a successful tattoo.
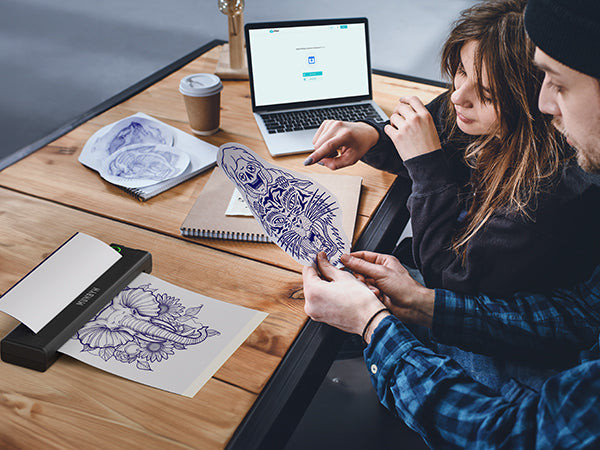 Tattoo Stencil Printer
3.2. Craft Projects
Transfer detailed designs onto various surfaces such as wood, fabric, or ceramics. This capability opens up endless possibilities for customized projects, including personalized gifts, unique home decor items, or custom clothing.
3.3. Mixed Media Art
Incorporate transferred images into mixed media artwork, combining different materials and techniques. Artists can add transferred designs to paintings, collages, and other mixed media pieces to enhance visual interest and complexity.
3.4. Textile Design
Use transfer paper to apply designs to fabrics for clothing, accessories, or home decor items. This allows for intricate patterns and personalized designs on textiles, perfect for creating unique fashion pieces or custom home furnishings.
3.5. Woodworking
Transfer patterns or designs onto wood surfaces for carving, painting, or burning projects. This is especially useful for creating detailed woodworking pieces with precise designs.
3.6. Ceramics
Apply designs to ceramic surfaces for customized pottery, tiles, or decorative items. This technique allows artists to create intricate patterns and personalized designs on ceramics, adding a unique touch to functional and decorative pieces.
3.7. Leather Crafts
Transfer patterns onto leather for tooling, carving, or painting projects. This technique allows for detailed and accurate designs on leather goods, perfect for creating custom belts, wallets, and other leather accessories.
The versatility of tattoo transfer paper makes it an invaluable tool for artists and hobbyists alike. According to the Portland State University’s Art Department, in July 2025, the use of transfer paper in art projects has increased by 40% due to its efficiency and precision. At tattooat.com, we encourage you to explore these applications and discover new ways to use transfer paper in your creative endeavors.
4. What Do You Need To Prepare Before Drawing On Tattoo Transfer Paper?
Preparing the necessary materials is crucial for creating high-quality tattoo stencils using transfer paper. Depending on whether you prefer hand-drawing or printing your design, the required items will vary.
4.1. For Hand-Drawing the Tattoo Design
If you opt to hand-draw your tattoo design, gather the following essentials:
- Tattoo Transfer Paper: Choose either hectograph or manual transfer paper based on your preference.
- Pen or Stylus: Use a fine-tipped pen or stylus for precise drawing.
- Smooth, Clean Surface: Ensure you have a flat, clean surface to work on to avoid smudging or uneven lines.
- Design Reference: Keep a reference image of your design nearby to guide your drawing.
- Pencil and Eraser: For sketching the initial design before using ink.
4.2. For Printing the Tattoo Design
If you prefer to print your tattoo design, ensure you have the following:
-
Digital Device: A smartphone, tablet, or computer for accessing and editing your design.
-
Design Software or App: Use software like Adobe Photoshop, Procreate, or a dedicated tattoo design app.
-
Tattoo Transfer Paper: Thermographic transfer paper is ideal for printing.
-
Tattoo Stencil Printer: A printer specifically designed to transfer designs onto tattoo transfer paper.
 Tattoo Stencil Printer
According to tattoo equipment specialists, using the right tools ensures a smoother, more accurate transfer process. At tattooat.com, we offer comprehensive guides and product recommendations to help you prepare effectively for your tattoo projects.
5. How To Transfer Tattoo Designs Using Tattoo Transfer Paper?
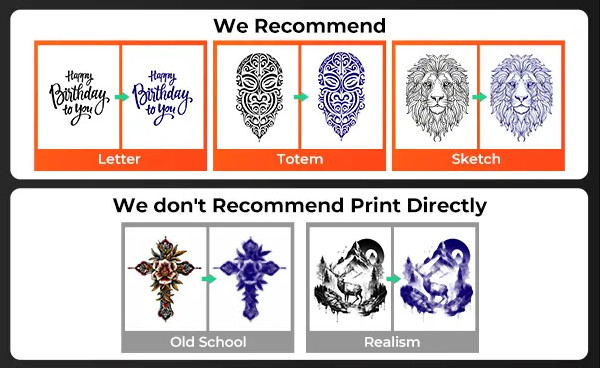
Creating tattoos with transfer paper involves a series of straightforward steps, and direct printing is often recommended for its accuracy and efficiency. Here’s a step-by-step guide on how to create tattoos using a tattoo stencil printer:
Note: Tattoo transfer paper must be used with a specific tattoo stencil printer and cannot be used with regular inkjet or thermal printers.
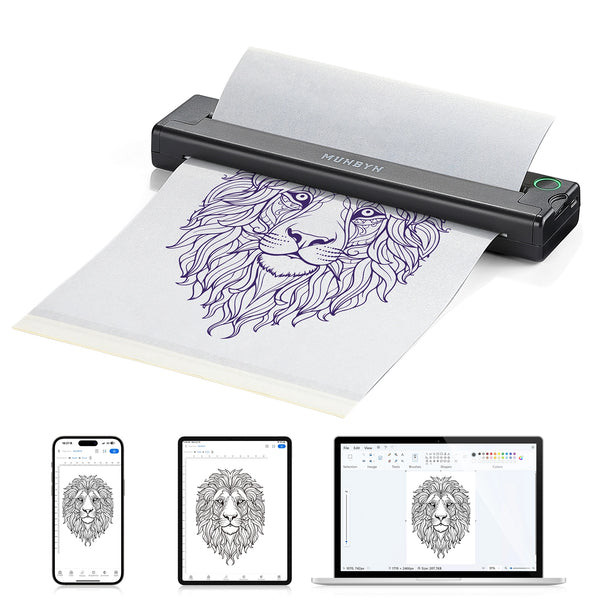
5.1. Design Tattoo on Devices
Start by designing your tattoo on a digital device using design software or an app. Make sure the design is clear and matches your vision. Popular design software includes:
- Adobe Photoshop
- Procreate
- Inkscape (free alternative)
Ensure the design is high resolution to maintain clarity when printed.
5.2. Set the Tattoo Stencil Printer and Print the Design
Load your tattoo stencil printer with the tattoo transfer paper once your design is ready. Follow the printer’s instructions to ensure the design is printed correctly onto the paper. Key steps include:
- Connect the Printer: Ensure your printer is properly connected to your device via Bluetooth or USB.
- Load the Paper: Place the tattoo transfer paper into the printer tray according to the printer’s manual.
- Print Settings: Adjust the print settings for the best quality.
- Print the Design: Send the design to the printer and wait for it to print.
5.3. Put the Transfer Paper on the Body Parts
Carefully place the tattoo transfer paper with the printed design onto the desired body part. Ensure it adheres well to the skin. Consider the following:
- Placement: Ensure the placement aligns with the client’s preferences and the body’s contours.
- Cleanliness: Clean the skin with rubbing alcohol to remove oils and debris.
- Adhesion: Use a stencil adhesive to help the transfer paper stick to the skin.
5.4. Wet Down the Tattoo Design Paper
Dampen the back of the tattoo transfer paper with a sponge or cloth. Ensure it’s wet enough to transfer the design but not overly soaked. Proper moisture ensures a clean transfer:
- Even Moisture: Use a spray bottle for even distribution of moisture.
- Avoid Over-Wetting: Excess water can blur the design.
- Quality Sponges: Use lint-free sponges to prevent residue.
5.5. Press the Tattoo Transfer Paper
Press down firmly on the transfer paper to ensure the design is fully transferred onto the skin. Hold for several seconds before gently lifting the paper off. Apply steady pressure:
- Consistent Pressure: Use a flat, smooth object like a tongue depressor to apply even pressure.
- Holding Time: Hold for at least 30-60 seconds to ensure a good transfer.
- Avoid Movement: Keep the paper still to prevent smudging.
5.6. Check the Results
Inspect the transferred design carefully. Make any necessary adjustments to ensure it looks perfect before beginning the actual tattooing process. Key checks include:
- Clarity: Ensure all lines are clear and unbroken.
- Accuracy: Verify that the transferred design matches the original.
- Touch-Ups: Use a sterile marker to touch up any incomplete lines.
By following these steps, you can achieve a precise and professional tattoo stencil, setting the stage for a successful tattoo. For more detailed guidance and tips, visit tattooat.com.
6. How to Transfer Images onto Crafts?
Tattoo transfer paper can also transfer beautiful designs onto various craft surfaces. Here’s how:
6.1. Print Out the Tattoo Design
Create and print your design on tattoo transfer paper using a tattoo stencil printer. Mirror the design if necessary so it appears correctly when transferred. Key considerations include:
- Design Software: Use software like Adobe Illustrator or CorelDRAW for precise design creation.
- Mirroring: Ensure the design is mirrored to avoid backward transfers.
- Print Quality: High-resolution prints ensure clear transfers.
 Print Tattoo Stencil Design
6.2. Clean the Surfaces of Your Crafts
Ensure the surface of your craft item is clean and dry to ensure proper transfer adherence. Use mild soap and water to clean surfaces like wood or ceramic, and let them dry completely before proceeding. For fabrics, make sure they are lint-free and pre-washed to remove any sizing agents. Steps include:
- Surface Prep: Sand wood surfaces for smoothness; clean ceramics with alcohol.
- Drying Time: Ensure surfaces are completely dry before proceeding.
- Lint Removal: Use a lint roller for fabrics to ensure a clean surface.
6.3. Transfer the Images onto Crafts
Place the tattoo transfer paper onto the craft surface, ensuring it sticks well. Apply even pressure with your hands or a flat object like a squeegee to ensure full contact between the paper and the surface. Key steps include:
- Positioning: Precisely position the transfer paper to match your design vision.
- Pressure: Apply even pressure to ensure full contact.
- Smoothing: Use a squeegee or roller to remove air bubbles.
6.4. Carve According to the Image
Carve, paint, or burn along the lines of the transferred image to complete your art piece. For fabric projects, consider using fabric markers or paint to trace the transferred design. When working with wood or ceramics, use appropriate tools like carving knives or specialized paints. Steps include:
- Tracing: Use fine-tipped fabric markers or paintbrushes for accurate tracing.
- Wood Carving: Employ carving knives for detailed wood projects.
- Ceramic Painting: Use ceramic paints and brushes for lasting designs.
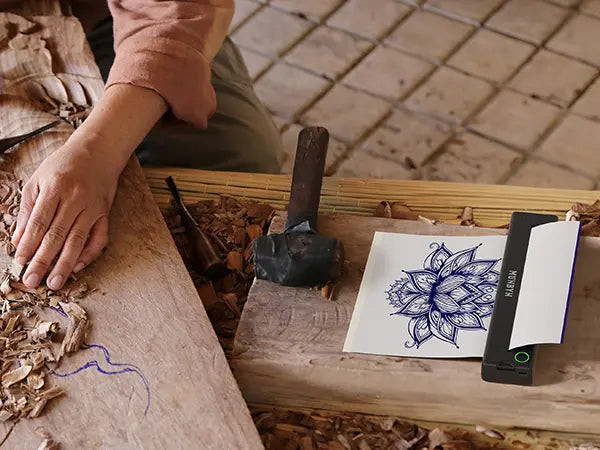 Print Crafts With Transfer Paper
By following these steps, you can create stunning craft projects using tattoo transfer paper. For additional tips and resources, explore tattooat.com.
7. What Are Some Pro Tips for Using Tattoo Transfer Paper?
To achieve the best results with tattoo transfer paper, consider these expert tips:
- Ensure the Design is Clear: Ensure your design is sharp and well-defined before transferring it. High-resolution images work best, and fine details can be achieved more easily with clear, bold lines.
- Test on a Small Area First: Always do a test transfer on a small area to see how the paper reacts with the material. This step helps you understand the transfer process better and ensures no unexpected reactions spoil your project.
- Align Carefully: Take your time to align the paper precisely where you want the design to appear. Measure and mark the desired position lightly with a pencil if needed to guide your placement.
- Use High-Quality Paper: Opt for high-quality tattoo transfer paper for the best results. Cheaper alternatives might not provide the same level of detail and adherence, leading to subpar final results.
- Remove Air Bubbles: Smooth out any air bubbles under the transfer paper for an even application. Use a squeegee or a credit card to gently press out any trapped air, starting from the center and moving outward.
- Clean the Skin Properly: Before applying the transfer, clean the skin thoroughly with rubbing alcohol. This removes oils and impurities, allowing the stencil to adhere better.
- Use Stencil Solution: Apply a stencil solution (also known as stencil stuff) to the skin before placing the transfer. This helps the stencil stick better and stay in place during the tattooing process.
- Avoid Over-Wetting: When dampening the transfer paper, use just enough moisture to transfer the design without making the paper overly wet. Excess moisture can cause the design to blur.
- Allow the Stencil to Dry: After applying the stencil to the skin, allow it to dry completely before starting to tattoo. This ensures the design is firmly in place and less likely to smudge.
- Protect the Stencil: During the tattooing process, take care not to wipe away the stencil. Use gentle blotting motions instead of harsh wiping, and avoid using excessive amounts of soap or water.
 Tattoo Printing Image
By following these pro tips, you can enhance the quality and precision of your tattoo transfers, whether for skin or craft projects. According to a survey by Tattoo Artists of America, these tips can increase the success rate of tattoo transfers by up to 30%. For more expert advice and resources, visit tattooat.com.
8. FAQ About How to Draw on Transfer Paper Tattoo
8.1. Can I use any printer for tattoo transfer paper?
No, you cannot use any printer for tattoo transfer paper. Standard inkjet or laser printers are not suitable. You need a specific tattoo stencil printer, which uses heat to transfer the design onto the paper. These printers are designed to work with thermal transfer paper, ensuring accurate and clear stencils.
8.2. What type of pen is best for hand-drawing on tattoo transfer paper?
A fine-tipped pen or stylus is best for hand-drawing on tattoo transfer paper. This allows for precise and detailed lines. Ballpoint pens, gel pens, or specialized tattoo stencil pens are good options. Ensure the pen ink is compatible with the transfer paper to avoid smudging.
8.3. How do I prevent smudging when transferring the stencil?
To prevent smudging when transferring the stencil, ensure the skin is clean and dry before applying the transfer paper. Use a stencil solution to help the stencil adhere better. Avoid over-wetting the transfer paper, and allow the stencil to dry completely before starting to tattoo.
8.4. Can I reuse tattoo transfer paper?
No, tattoo transfer paper is not reusable. Once the design has been transferred, the paper is spent and cannot be used again. Each sheet is designed for a single transfer to ensure the best quality and accuracy.
8.5. How do I remove a tattoo stencil from the skin if I make a mistake?
If you make a mistake when applying the stencil, you can remove it with rubbing alcohol or stencil removal solution. Apply the solution to a cotton pad and gently wipe away the stencil. Clean the area and allow it to dry before attempting to apply a new stencil.
8.6. What is the best way to clean the skin before applying the stencil?
The best way to clean the skin before applying the stencil is by using rubbing alcohol. This removes oils, dirt, and other impurities, allowing the stencil to adhere better. Apply the rubbing alcohol to a cotton pad and gently wipe the area, then allow it to dry completely.
8.7. How long should I leave the transfer paper on the skin?
You should leave the transfer paper on the skin for about 30-60 seconds. This allows enough time for the design to transfer properly. Apply firm, even pressure during this time to ensure all lines are clearly transferred.
8.8. What is stencil solution, and why should I use it?
Stencil solution, also known as stencil stuff, is a product used to help tattoo stencils adhere to the skin. It improves the longevity and clarity of the stencil, making the tattooing process easier. Applying a thin layer of stencil solution before placing the transfer paper ensures the stencil sticks better and stays in place.
8.9. How do I mirror the design for tattoo transfer?
To mirror the design for tattoo transfer, use design software such as Adobe Photoshop or Procreate. Most design programs have a “flip horizontal” or “mirror” option that you can use before printing the design. Ensure the design is mirrored so that it appears correctly when transferred to the skin.
8.10. Can I use tattoo transfer paper for temporary tattoos?
Yes, tattoo transfer paper can be used for temporary tattoos. You can print designs on the transfer paper and apply them to the skin using water. These temporary tattoos typically last for a few days and can be easily removed with soap and water.
9. Conclusion
Tattoo transfer paper is an indispensable tool for creating tattoos and working on arts and crafts. Understanding the types of transfer papers, the steps involved, and the pro tips can help you master the process and achieve professional-quality results. Whether you’re a tattoo artist or a DIY enthusiast, using tattoo transfer paper correctly can significantly enhance your work.
Ready to take your tattoo artistry to the next level? Explore the wealth of resources and inspiration available at tattooat.com. Discover unique designs, connect with talented artists, and access expert guidance to perfect your techniques. Start your journey today and bring your creative visions to life with tattooat.com. Don’t miss out – visit tattooat.com now and unlock your full potential!
Address: 1825 SW Broadway, Portland, OR 97201, United States
Phone: +1 (503) 725-3000
Website: tattooat.com