Creating unique characters is a cornerstone of digital art, and tattoos are a fantastic way to inject personality and visual interest. If you’re designing characters, especially for comics or animations, redrawing intricate tattoos repeatedly can be incredibly time-consuming. Fortunately, with tools like Clip Studio Paint, you can design tattoos once and apply them effortlessly to your characters, maintaining consistency and saving valuable time.
This guide will walk you through the process of Drawing Easy Tattoos and applying them to your characters using Clip Studio Paint. We’ll cover:
Designing and Saving Your Tattoo Art as a Reusable Material
Applying and Adjusting Tattoos on Your Characters
Let’s dive in and start drawing easy tattoos!
Designing and Saving Your Tattoo Art
Before applying tattoos, you need to design them! Let’s start by creating a new canvas specifically for your tattoo design. Consider where the tattoo will be placed on your character. For this example, we’ll create an arm tattoo, so a long, rectangular canvas is ideal. It’s always better to create your tattoo design larger than needed; you can easily scale it down later without losing quality.
 Canvas Setup for Tattoo Design
Creating a new canvas in Clip Studio Paint to start drawing easy tattoos, thinking about the tattoo placement on the character.
Once your canvas is set up, fill the background with your character’s skin tone. This simple step helps you visualize how the tattoo will look on skin, rather than designing against a stark white background.
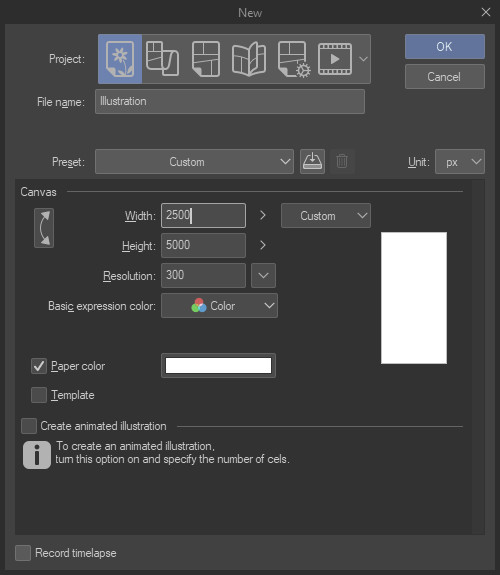
Now for the fun part – drawing your easy tattoo! For this example, we’ll create a magical-themed tattoo with symbols and a magic circle. Clip Studio Paint Assets is a goldmine for brushes and image materials to make drawing easy tattoos even simpler.
For the design, we’ll place a magic circle at the top, suitable for the shoulder area. Then, using a parallel line ruler and various brushes from Clip Studio Assets, we’ll create lines of magical writing flowing down the arm. Here’s the final tattoo design:
 Magical Symbol Tattoo Design
Example of an easy tattoo design created in Clip Studio Paint using magical symbols and brushes, ready to be saved as a material.
To make this tattoo easily reusable, we’ll save it as a Material in Clip Studio Paint’s Library. This eliminates the need to reopen the tattoo file and copy-paste the design every time you want to use it.
To save as a Material, ensure all tattoo elements are on a single layer. Hide any background layers (like the skin tone layer we created earlier) that you don’t want to include in the saved tattoo material. Then, go to Layer > Merge visible to new layer. This creates a flattened copy of your tattoo design on a new layer, keeping your original layers intact.
 Merge Visible Layers Option
Selecting “Merge visible to new layer” in Clip Studio Paint to combine tattoo layers into one for saving as a material, simplifying the process of drawing easy tattoos repeatedly.
In your Layer palette, you’ll now see the merged tattoo layer alongside your original layers.
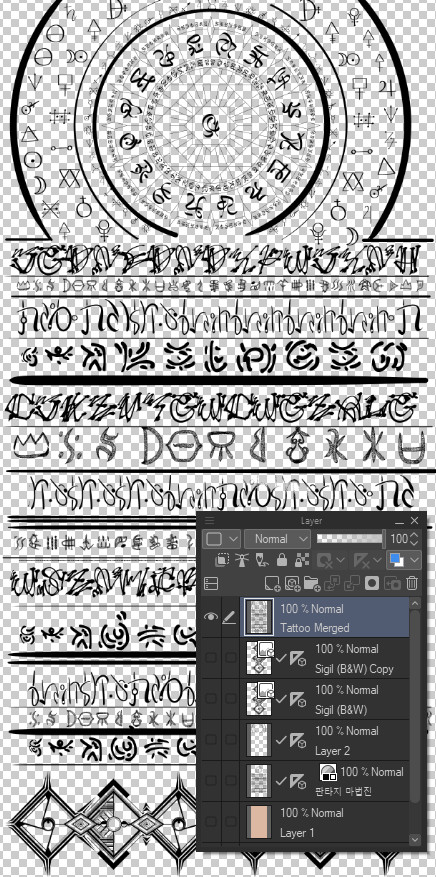 Layer Palette with Merged Tattoo Layer
Layer palette in Clip Studio Paint showing the original design layers and the newly created merged layer, ready for material registration for easy tattoo application.
Next, with the merged tattoo layer selected, navigate to Edit > Register Material > Image.
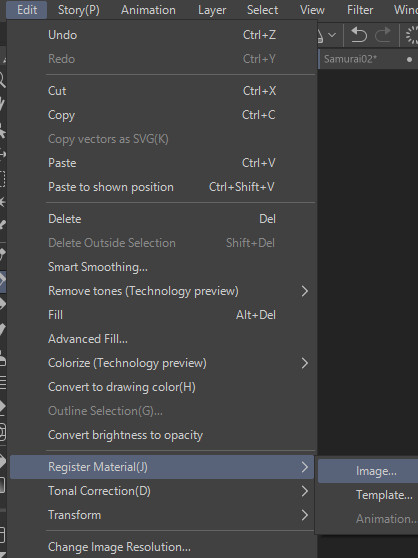 Register Material Option
Accessing the “Register Material” option in Clip Studio Paint to save the easy tattoo design for future use on different characters.
The Material Property window will appear. On the left, confirm the Material Image preview looks correct. Then, in the Material Name field, give your tattoo a descriptive name (e.g., “Magic Arm Tattoo”). Tick the box next to “Scale up/down” and ensure the dropdown is set to “Adjust after pasting”. This crucial setting allows you to resize and rotate the tattoo directly on your character’s canvas, making adjustments seamless.
Consider checking “Specify order in Layer palette” and choosing a higher level. This ensures the tattoo material pastes above your coloring layers, saving you from rearranging layers later.
Choose a save location in the “Choose save location” area. For organization, “Image material – Illustration – Decoration” is a suitable folder.
Finally, in the “Search tag” area, click the + icon to add relevant tags. Tags like “tattoo”, “magic”, “arm tattoo”, “easy tattoo“, and “symbols” will make it easier to find your design later. Press Enter after each tag and click the icon again to add more.
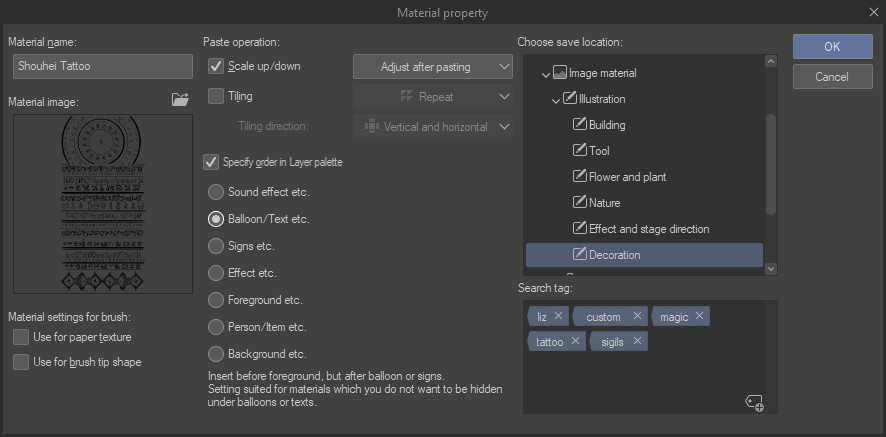 Material Property Window for Saving Tattoo
Material Property window in Clip Studio Paint, showing settings for saving the easy tattoo design, including name, scale options, save location, and search tags for easy retrieval.
Click OK to save your tattoo material. Now, let’s apply it to a character!
Applying the Tattoo to a Character
With your tattoo design saved as a material, it’s incredibly easy to apply it to any character. Open the character image you want to tattoo. Then, simply drag and drop your saved tattoo design from the Material Library directly onto your character’s canvas.
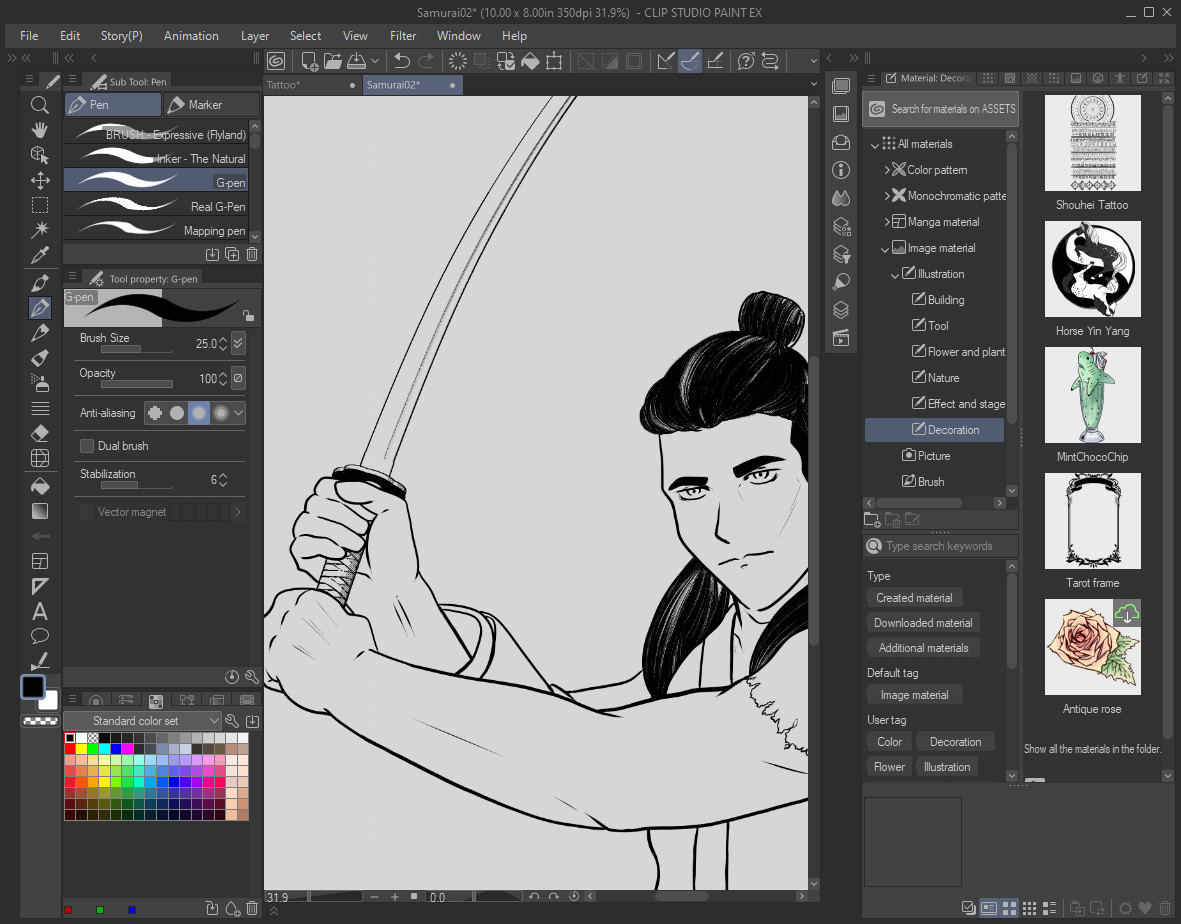 Dragging Tattoo Material onto Character Canvas
Dragging the saved easy tattoo material from the Clip Studio Paint Material Library onto the character’s artwork for application.
The tattoo will appear on its own layer, surrounded by a bounding box. Because we enabled “Scale up/down” and “Adjust after pasting,” you can immediately scale and rotate the tattoo to roughly position it correctly on your character.
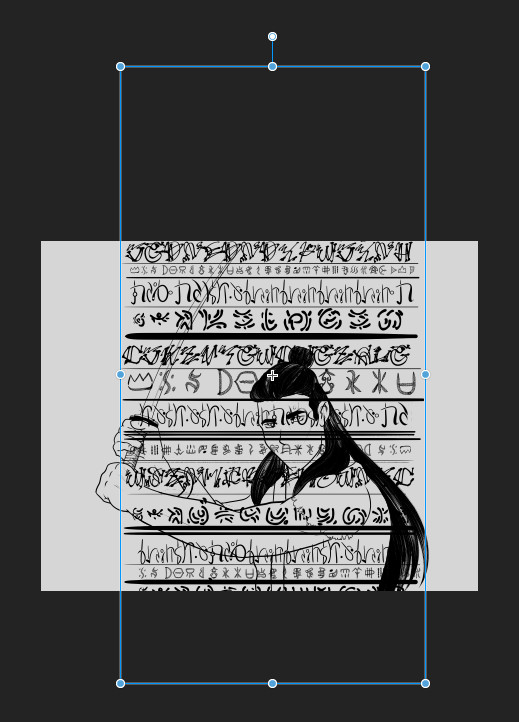 Initial Tattoo Placement on Character
The easy tattoo material initially placed on the character, showing the bounding box for scaling and rotation adjustments within Clip Studio Paint.
Currently, the tattoo looks flat and pasted on. To make it look like a realistic tattoo that conforms to the character’s form, we need to refine it.
First, right-click on the tattoo layer in the Layer palette and select Rasterize (or go to Layer > Rasterize). This converts the tattoo material layer into a raster layer, allowing for further editing.
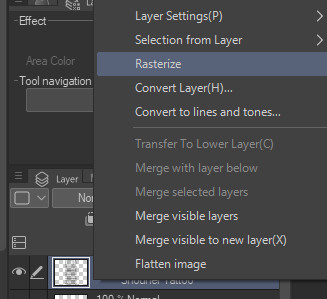 Rasterize Tattoo Layer Option
Choosing “Rasterize” in Clip Studio Paint to convert the tattoo material layer into a raster layer for mesh transformation and further adjustments.
Next, go to Edit > Transform > Mesh Transformation.
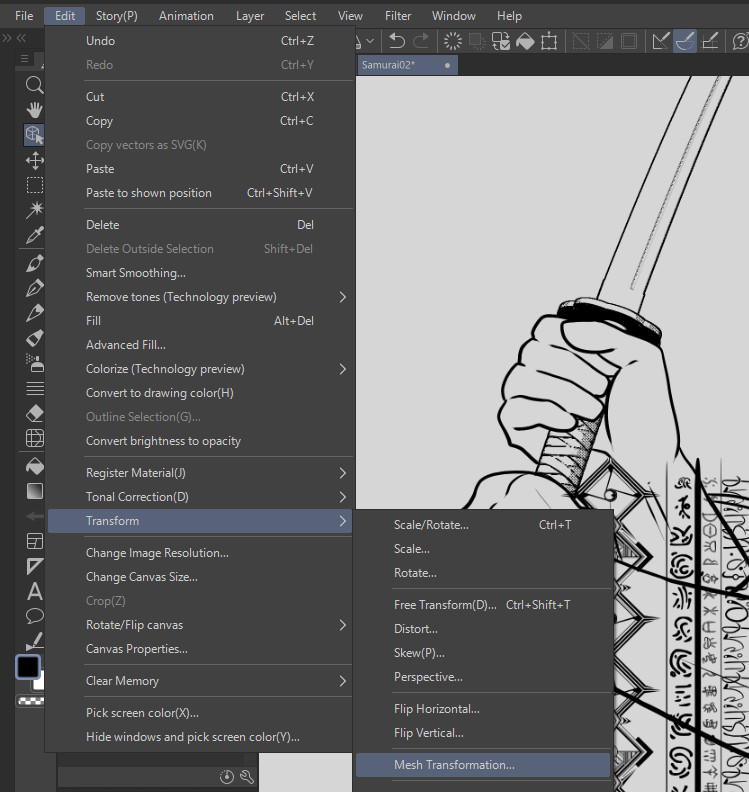 Mesh Transformation Option
Selecting “Mesh Transformation” in Clip Studio Paint to manipulate the tattoo design and make it conform to the character’s body contours.
A grid mesh will overlay your tattoo. Before manipulating the mesh, check the Tool Property window and increase the Number of vertices in both directions. More vertices provide finer control for warping the tattoo to fit complex forms like arms or legs. Adjust these settings before you start moving the mesh points.
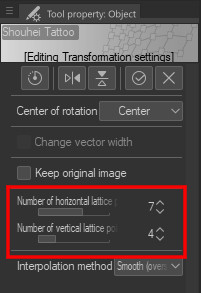 Mesh Transformation Tool Properties
Tool Property window for Mesh Transformation in Clip Studio Paint, highlighting the “Number of vertices” setting which is crucial for detailed adjustments when drawing easy tattoos on curved surfaces.
Now, manipulate the mesh by dragging the vertices to contour the tattoo to the character’s arm. Curve the design to follow the arm’s shape, giving the illusion of wrapping around a 3D form.
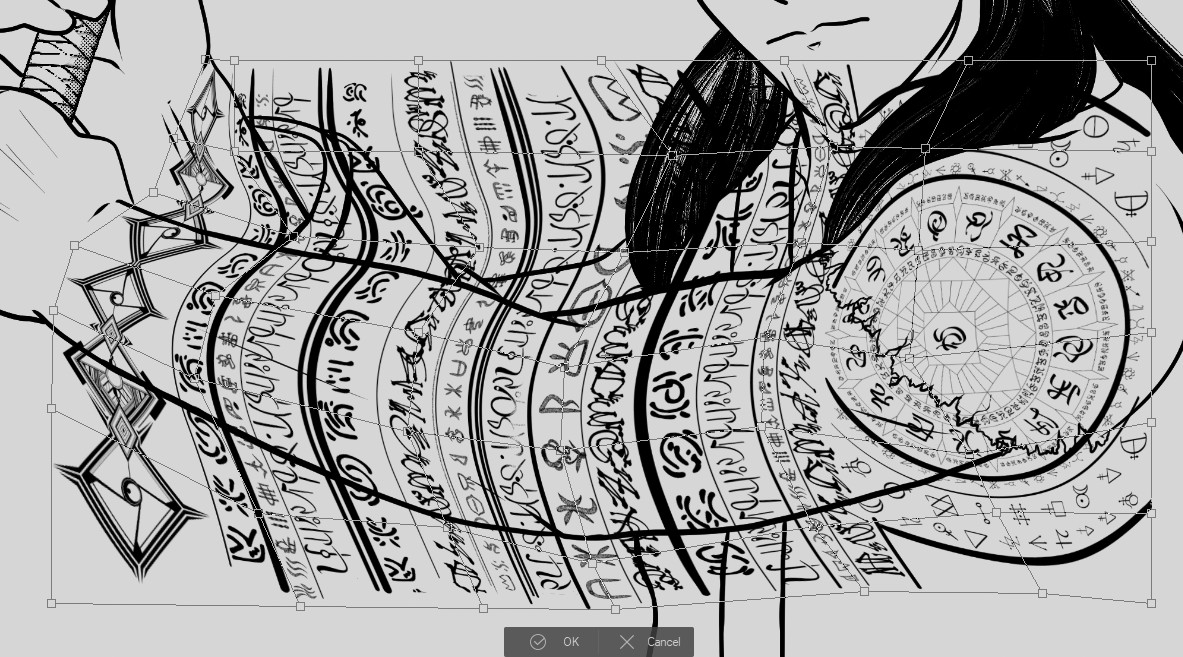 Adjusting Tattoo with Mesh Transformation
Using Mesh Transformation in Clip Studio Paint to adjust the easy tattoo design, warping it to follow the contours of the character’s arm for a more realistic look.
Mesh transformation can take practice, but it’s a powerful tool for realistically applying tattoos and other surface designs.
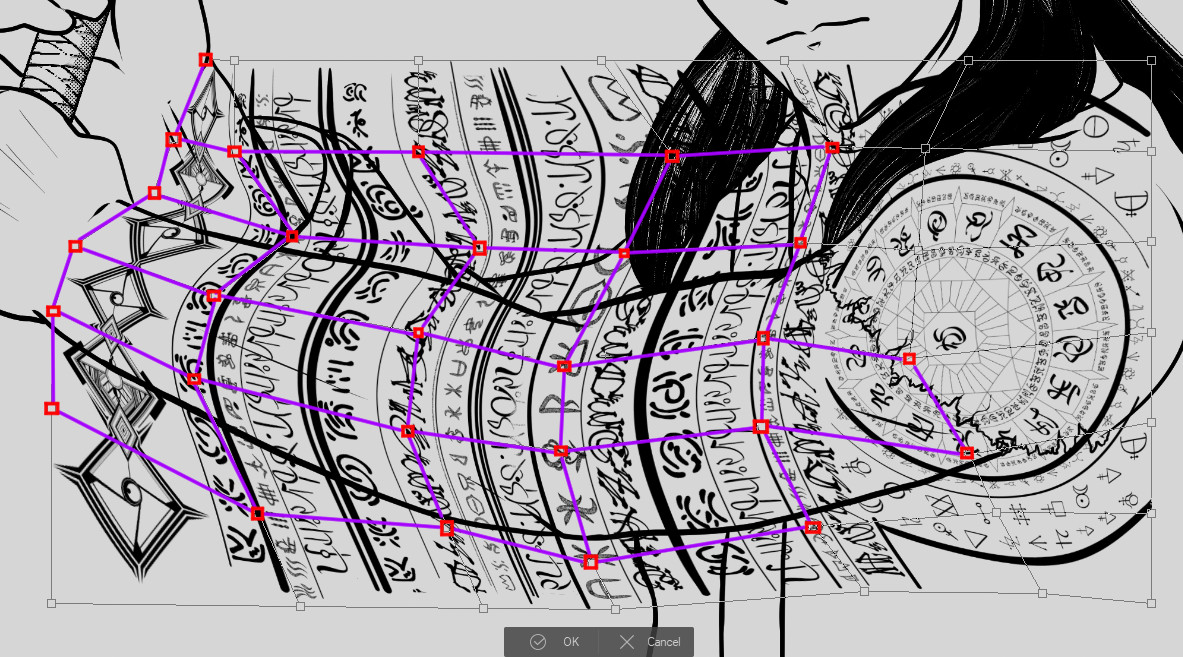 Highlighted Mesh Transformation Adjustments
Highlighted areas showcasing the adjustments made using Mesh Transformation to curve the easy tattoo design around the arm, demonstrating the tool’s effectiveness.
Finally, clean up any tattoo edges that extend beyond the character’s arm using a Layer Mask. Layer masks are non-destructive, allowing you to hide parts of the tattoo layer without permanently erasing them.
Click the “Add Layer Mask” icon in the Layer palette. A white box will appear next to the tattoo layer preview, indicating the mask. Ensure the mask is selected (white outline) before proceeding.
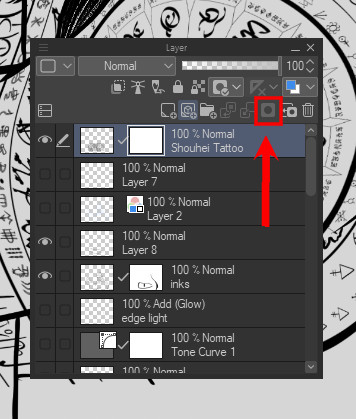 Add Layer Mask Icon
Locating the “Add Layer Mask” icon in Clip Studio Paint to create a mask for cleaning up the edges of the easy tattoo and blending it seamlessly with the character art.
To better visualize the tattoo edges for masking, temporarily enable Layer Color to change the tattoo to a distinct color like blue. This helps differentiate the tattoo from the character art while erasing.
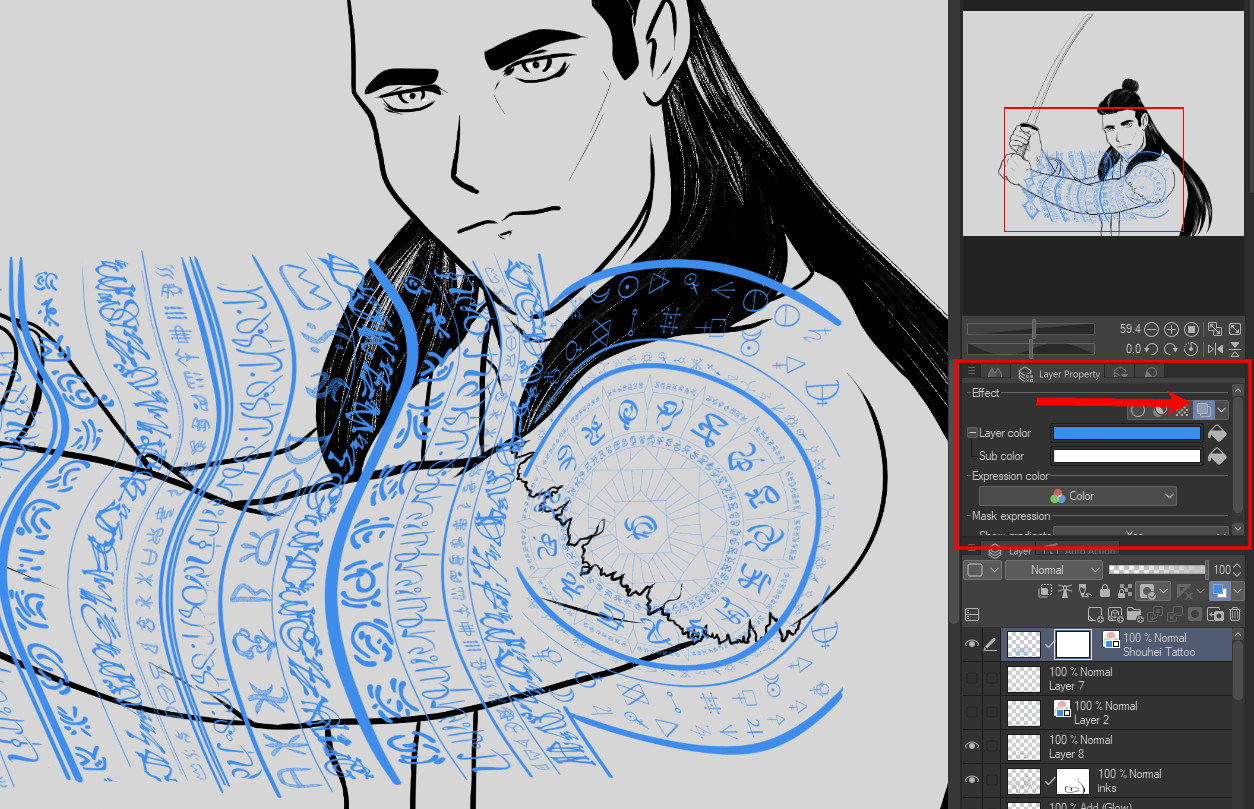 Layer Color Option for Masking
Using the “Layer Color” option in Clip Studio Paint to temporarily change the tattoo color, enhancing visibility for precise masking and edge cleanup when drawing easy tattoos.
Using an Eraser tool on the Layer Mask, carefully erase the excess tattoo areas extending beyond the arm’s outline. Remember, you are hiding parts of the tattoo, not erasing them permanently. Switching to a drawing tool (like a pen) on the layer mask with black will reveal hidden parts again.
Once finished cleaning up the edges, disable Layer Color to return the tattoo to its original color.
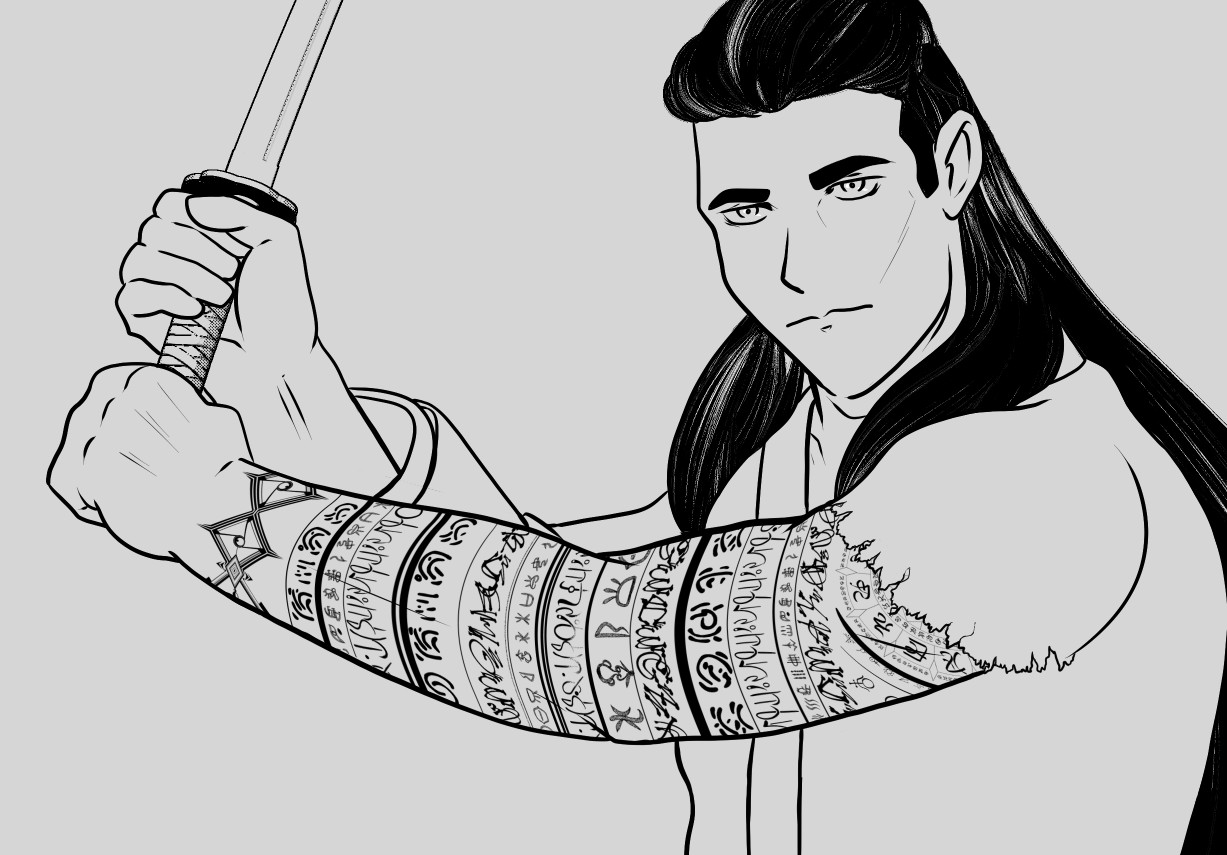 Final Tattoo Application with Clean Edges
The final result of applying the easy tattoo using Clip Studio Paint, showcasing clean edges and a realistic integration with the character’s arm after masking and mesh transformation.
And there you have it! Your character now sports a seamlessly applied tattoo.
Conclusion
This technique extends far beyond just tattoos. Use it to add patterns to clothing, intricate designs to accessories, or any repeating element on your characters. By drawing easy tattoos and saving them as materials in Clip Studio Paint, you streamline your workflow, maintain design consistency, and save countless hours in your digital art process.
Explore the vast capabilities of Clip Studio Paint to further enhance your character designs! Visit https://www.clipstudio.net/en or https://graphixly.com for more resources and inspiration.