Fall is approaching, and what better way to celebrate the season than with pumpkins? If you’re looking for a quick, easy, and unique way to decorate for fall without taking up too much space, these temporary tattoo pumpkins are the perfect DIY project! With the vast array of beautiful Temporary Tattoos available, you can easily transform mini pumpkins into stunning fall decor in just minutes. Get ready to add a touch of creative flair to your home this autumn with this simple guide.
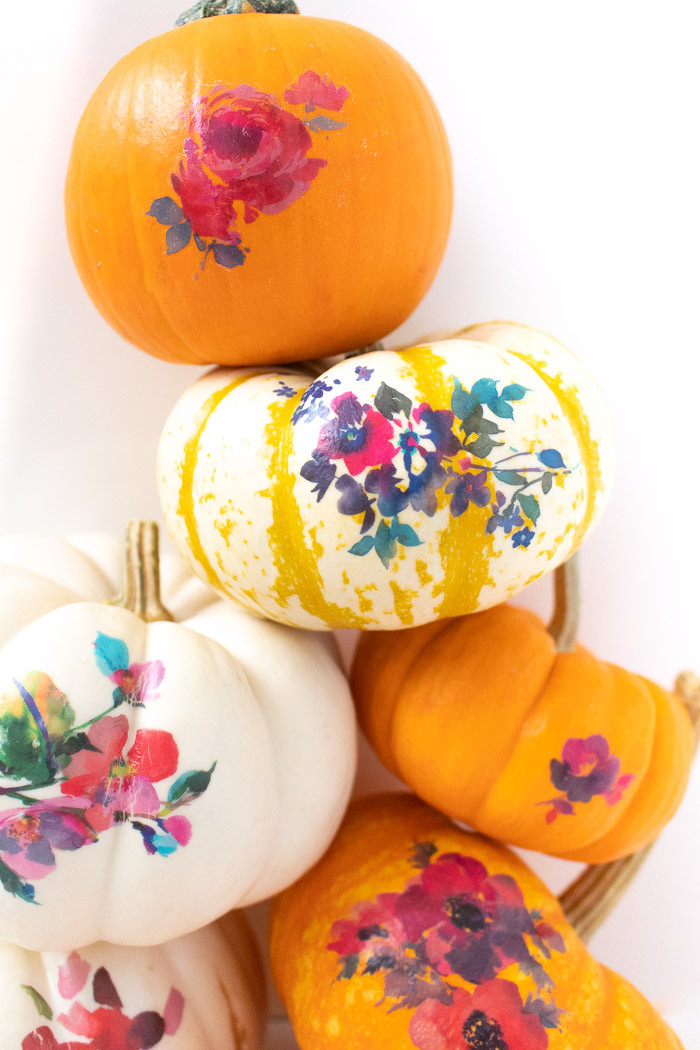
 Mini pumpkins decorated with watercolor floral temporary tattoos, displayed as fall decor.
I was inspired by the idea of using temporary tattoos for crafts after previously making temporary tattoo mugs. Seeing how well those held up, I knew temporary tattoos would be ideal for decorating pumpkins. If you’re like me and feel like you’ve exhausted traditional pumpkin decorating methods, this project is a breath of fresh air. It’s a fun and modern way to incorporate watercolor-inspired designs and other patterns into your fall decorations. This DIY project is truly my kind of fall decor – simple, stylish, and satisfyingly quick! Here’s how you can create your own temporary tattoo pumpkins.
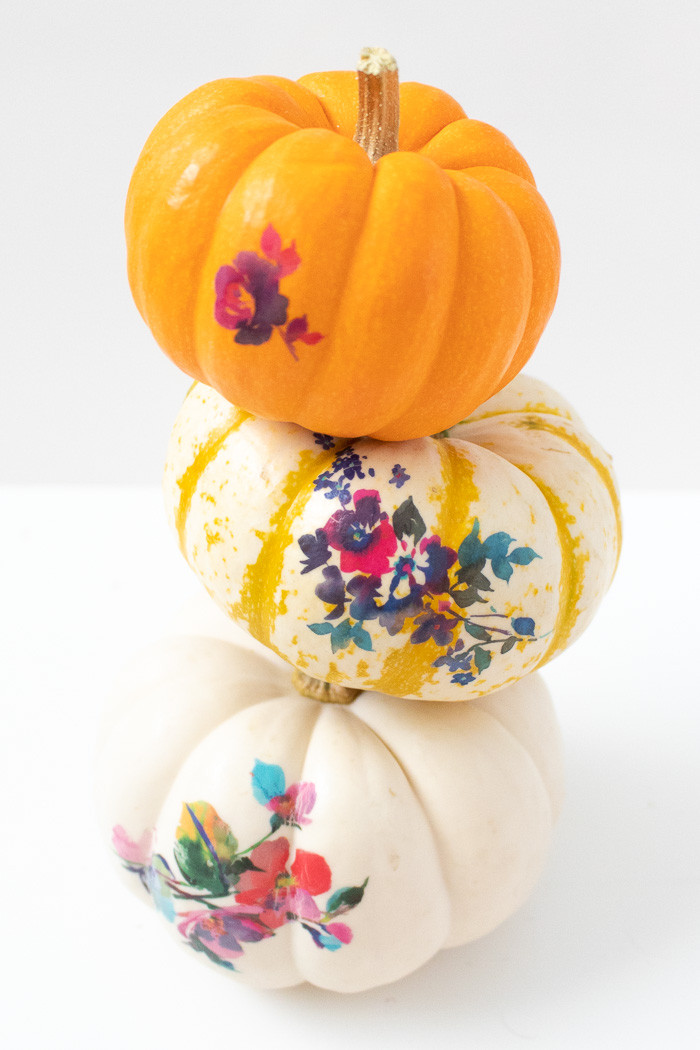
 Close-up of mini pumpkins with applied temporary tattoos, showing floral and abstract watercolor designs.
 Group of decorated mini pumpkins with various temporary tattoo designs, showcasing different fall decor styles.
For this project, I sourced my temporary tattoos from Tattly, which offers an amazing selection. I chose a set of watercolor floral tattoos and an abstract watercolor design. The best part is, you can use any leftover tattoos for yourself! Remember those temporary tattoo mugs I mentioned earlier? Those metallic temporary tattoos were also from Tattly, and I highly recommend exploring their range for diverse designs.
 Step-by-step process of applying a temporary tattoo to a mini pumpkin using a damp cloth.
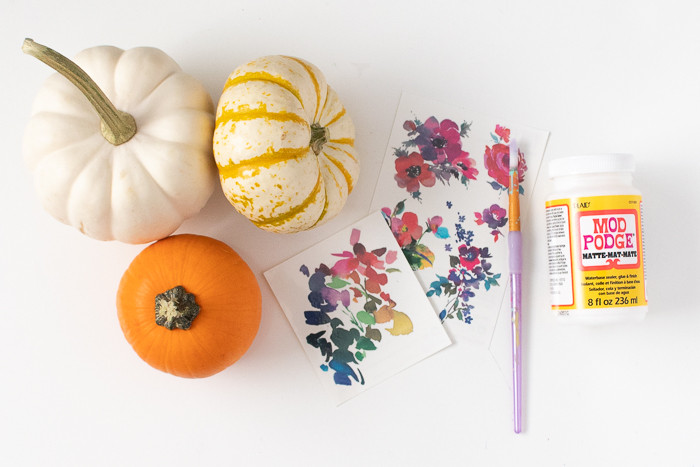 Finished temporary tattoo pumpkins arranged on a bookshelf as part of fall home decor.
Project Time: 5 minutes
Materials You’ll Need:
- Mini pumpkins (various colors and shapes for visual interest)
- Temporary tattoos (choose designs that complement fall themes or your personal style)
- Mod Podge (sealer to enhance durability and finish)
- Paint brush (for applying Mod Podge)
- Damp cloth or sponge (for applying tattoos)
Step-by-Step Guide:
Step 1: Prepare Your Pumpkins
Begin by cleaning your mini pumpkins. Wipe them thoroughly with a dry cloth to remove any dirt or residue. Ensure they are completely dry before proceeding to the next step. This clean surface will help the temporary tattoos adhere properly. Cut out the individual temporary tattoo designs you wish to use from the sheet. It’s best to cut them out separately for easier application.
Tip: Before applying the tattoo, place it on the pumpkin to check the positioning and ensure it sits well, especially if your pumpkin has an uneven surface.
 Close-up of cutting out a temporary tattoo design in preparation for applying it to a pumpkin.
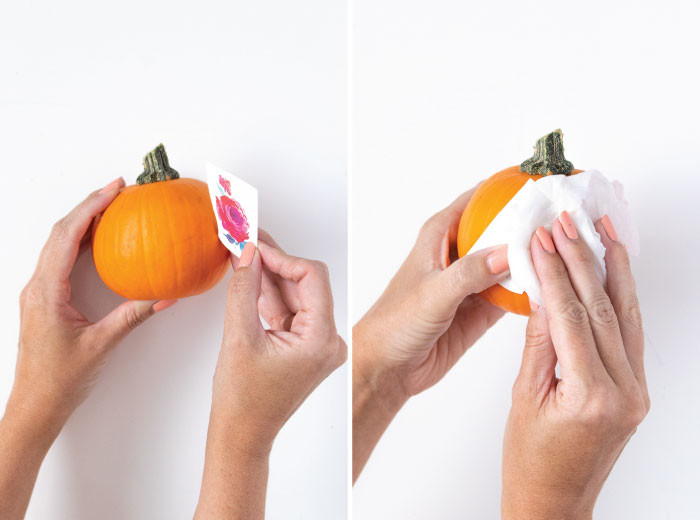
Step 2: Apply the Temporary Tattoos
Remove the clear plastic film from the front of the temporary tattoo. Place the tattoo face-down onto the pumpkin in your desired location. Hold it firmly in place and use a damp cloth or sponge to gently dab the back of the tattoo paper for about 20-30 seconds. Make sure the entire paper backing is dampened. Carefully peel away the paper backing to reveal the tattoo transferred onto the pumpkin. Check if the entire design has adhered correctly and press down any edges that might be lifting.
Note: For pumpkins with more curves or indentations, work slowly and carefully press the tattoo and damp cloth into these areas to avoid distorting or cracking the tattoo design.
 Detailed view of applying a temporary tattoo to a mini pumpkin using a damp sponge, pressing firmly.
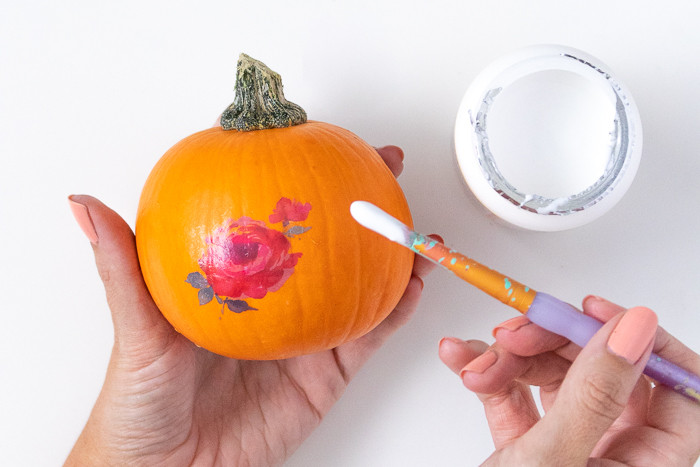
Step 3: Seal with Mod Podge
Once the temporary tattoo is fully applied and the pumpkin is completely dry, it’s time to seal it for added durability and a nice finish. Apply a thin, even layer of Mod Podge over the tattoo using a paint brush. This sealant will help protect the temporary tattoo and give it a slightly glossy or matte finish depending on the type of Mod Podge you choose. Allow the Mod Podge to dry completely.
 Applying a layer of Mod Podge over a temporary tattoo on a mini pumpkin with a paintbrush.
Now your adorable mini temporary tattoo pumpkins are ready to be displayed! Arrange them in groups or scatter them around your home to instantly bring in the fall spirit. I’ve placed mine on our bookshelf, and they definitely add a festive touch. Get ready to explore more fall decorating ideas and even start thinking about Halloween crafts too!