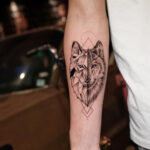
Temporary tattoos are a fantastic way to experiment with body art, add a fun touch to parties, or simply express yourself without the long-term commitment of permanent ink. If you’ve ever wondered how to create your own temporary tattoos, you’re in luck! It’s a surprisingly simple and enjoyable DIY project that you can do right at home. This guide will walk you through the steps of making your own temporary tattoos using printable tattoo paper, allowing you to bring your custom designs to life in minutes.
First, you’ll need to gather your supplies. The key ingredient for this project is printable temporary tattoo paper. This special paper is designed to transfer your designs onto your skin safely and easily. You can find it at most craft stores or online retailers. Alongside the tattoo paper, you’ll need a printer – an inkjet printer like the Canon PIXMA iP8720 works exceptionally well for vibrant and detailed prints, even on specialty materials. Of course, you’ll also need your tattoo designs ready to print.
Once you have your materials assembled, the first step is to prepare your tattoo design. You can use pre-made designs or unleash your creativity and design your own! If you’re designing your own, remember that the design needs to be mirrored or flipped horizontally before printing. This is crucial because the tattoo will be applied face-down on your skin, and you want it to appear correctly once transferred. Ensure your design is sized to fit within an 8.5×11 inch page, which is the standard size for printable tattoo paper.
With your design ready and mirrored, it’s time to print. Load the printable tattoo paper into your printer, following the manufacturer’s instructions for paper orientation. Print your design onto the tattoo paper. The Canon PIXMA iP8720 is ideal because it handles various paper types smoothly, ensuring a high-quality print for your temporary tattoos.
Image of printable tattoo paper and printed designs
A sheet of printable temporary tattoo paper showcasing various printed tattoo designs, ready for the next step in the DIY process.
After printing, carefully follow the instructions provided with your specific brand of temporary tattoo paper. Generally, this next step involves applying a thin, adhesive film sheet over the printed design. This film is usually included with the tattoo paper and is essential for transferring the tattoo to your skin and making it last. Peel off the backing of the adhesive sheet and carefully apply it to the printed side of the tattoo paper, ensuring there are no air bubbles. Smooth it down firmly to ensure good adhesion.
Image showing the application of the adhesive film to the printed tattoo paper
Close-up view of the protective plastic film being carefully applied to the printed tattoo design on the special paper, preparing it for cutting and application.
Once the film is applied, use scissors or a craft knife to cut out the individual tattoos from the sheet. Cut as close to the edges of your design as possible for a cleaner look on the skin.
Now for the exciting part – applying your temporary tattoo! Remove the clear plastic film from the front of the tattoo you’ve cut out. Position the tattoo face-down on the area of skin where you want to apply it. Press firmly and then take a damp cloth or sponge and wet the back of the tattoo paper thoroughly. Hold the wet cloth against the paper for about 20-30 seconds, ensuring the entire back of the paper is wet.
Image demonstrating the application of a temporary tattoo using a wet cloth
Hands applying a wet cloth to the back of the temporary tattoo paper adhered to skin, facilitating the transfer of the design.
After 충분히 wetting the paper, gently peel away the paper backing. Your temporary tattoo should now be beautifully transferred onto your skin! Allow it to dry completely for a few minutes. Avoid excessive rubbing or stretching the area immediately after application to ensure the tattoo sets properly.
These DIY temporary tattoos are perfect for adding a touch of personality to your look for a day or two. They typically last for a couple of days, depending on placement and how well you care for them. To remove the temporary tattoo, you can gently scrub it with soap and water or use baby oil or rubbing alcohol.
Making your own temporary tattoos is a fun, easy, and creative activity. Whether you’re testing out tattoo placements before getting permanent ink, creating unique looks for events, or just enjoying some crafty fun, knowing How To Make A Temporary Tattoo opens up a world of artistic possibilities right at your fingertips.